Timeline overview
Use the Timeline Editor window to create cut-scenes, cinematics, and game-play sequences by visually arranging tracks and clips linked to GameObjects in your scene.
For each cut-scene, cinematic, or game-play sequence, the Timeline Editor window saves the following:
Timeline Asset: stores the tracks, clips, and recorded animations without links to the specific GameObjects being animated. The Timeline Asset is saved to the project.
Timeline instance: stores links to the specific GameObjects being animated by the Timeline Asset. These links, referred to as bindings, are saved to the scene.
Timeline Asset
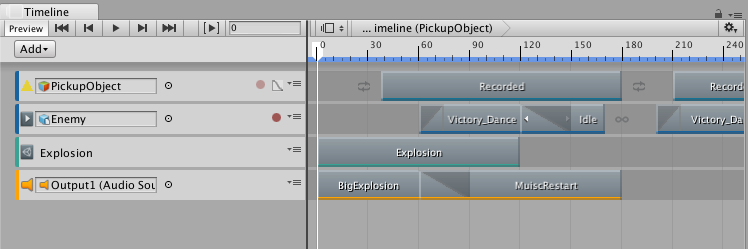
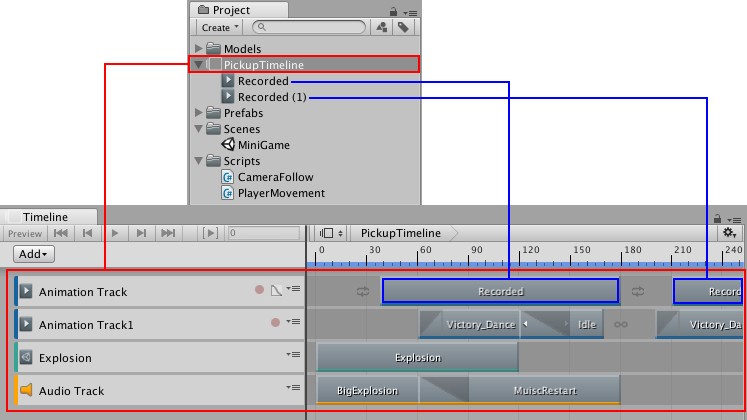
The Timeline Editor window saves track and clip definitions as a Timeline Asset. If you record key animations while creating your cinematic, cut-scene, or game-play sequence, the Timeline Editor window saves the recorded animation as children of the Timeline Asset.
Timeline instance
Although a Timeline Asset defines the tracks and clips for a cut-scene, cinematic, or game-play sequence, you cannot add a Timeline Asset directly to a scene. To animate GameObjects in your scene with a Timeline Asset, you must create a Timeline instance.
The Timeline Editor window provides an automated method of creating a Timeline instance while creating a Timeline Asset.
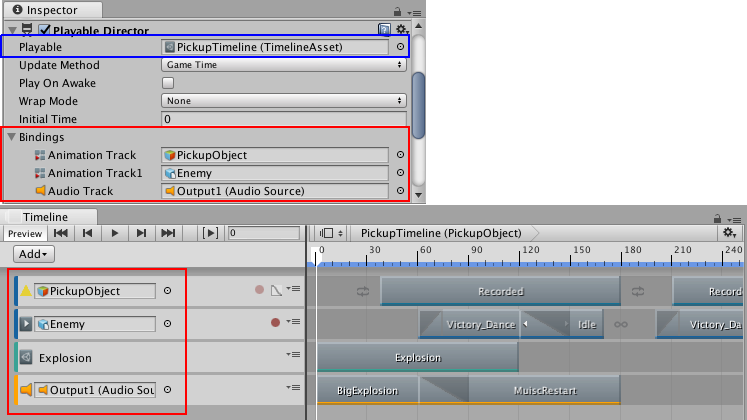
If you select a GameObject in the scene that has a Playable Director component associated with a Timeline Asset, the bindings appear in the Timeline Editor window and in the Playable Director component (Inspector window).
Reusing Timeline Assets
Since Timeline Assets and Timeline instances are separate, it is possible to reuse the same Timeline Asset with many Timeline instances.
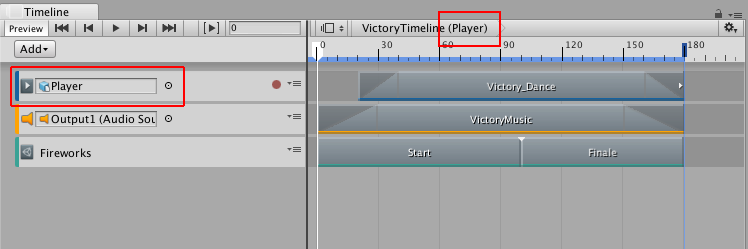
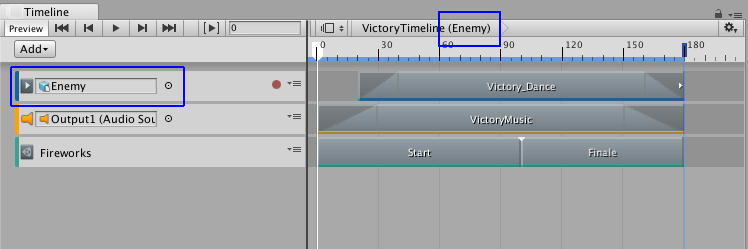
For example, you can create a Timeline Asset named VictoryTimeline with the animation, music, and particle effects that play when the main game character (Player) is victorious. To reuse the VictoryTimeline Timeline Asset to animate another game character (Enemy) in the same scene, you can create another Timeline instance for the secondary game character.
Since the Timeline Asset is being reused, any modification to the Timeline Asset in the Timeline Editor window results in changes to all Timeline instances.
For example, in the previous example, if you delete the Fireworks Control track in the Timeline Editor window while modifying the Player Timeline instance, the track is removed from the VictoryTimeline Timeline Asset. This also removes the Fireworks control track from all instances of the VictoryTimeline Timeline Asset, including the Enemy Timeline instance.
What’s the difference between the Animation window and the Timeline window?
The Timeline window
The Timeline window allows you to create cinematic content, game-play sequences, audio sequences and complex particle effects. You can animate many different GameObjects within the same sequence, such as a cut scene or scripted sequence where a character interacts with scenery. In the timeline window you can have multiple types of track, and each track can contain multiple clips that can be moved, trimmed, and blended between. It is useful for creating more complex animated sequences that require many different GameObjects to be choreographed together.
The Timeline window is newer than the Animation window. It was added to Unity in version 2017.1, and supercedes some of the functionality of the Animation window. To start learning about Timeline in Unity, visit the Timeline section of the user manual.
The Animation window
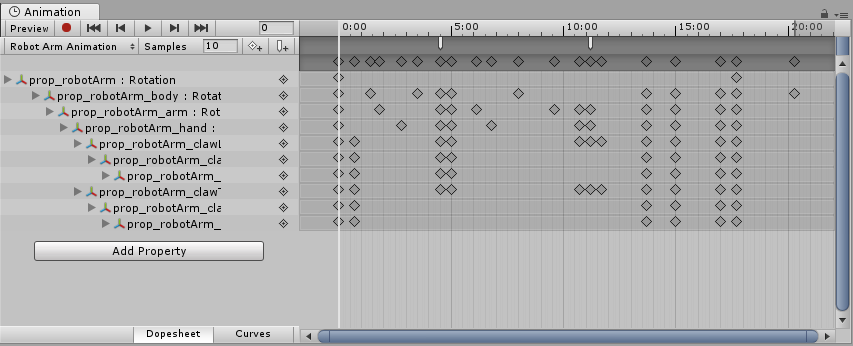
The Animation window allows you to create individual animation clips as well as viewing imported animation clips. Animation clips store animation for a single GameObject or a single hierarchy of GameObjects. The Animation window is useful for animating discrete items in your game such as a swinging pendulum, a sliding door, or a spinning coin. The animation window can only show one animation clip at a time.
The Animation window was added to Unity in version 4.0. The Animation window is an older feature than the Timeline window. It provides a simple way to create animation clips and animate individual GameObjects, and the clips you create in the Animation window can be combined and blended between using anim Animator controller. However, to create more complex sequences involving many disparate GameObjects you should use the Timeline window (see below).
The animation window has a “timeline” as part of its user interface (the horiontal bar with time delineations marked out), however this is separate to the Timeline window.
To start learning about animation in Unity, visit the Animation section of the user manual.
- 2017–08–10 Page published with limited editorial review
对文档有任何疑问,请移步至开发者社区提问,我们将尽快为您解答