Conventional Game Input
Unity supports keyboard, joystick and gamepad input.
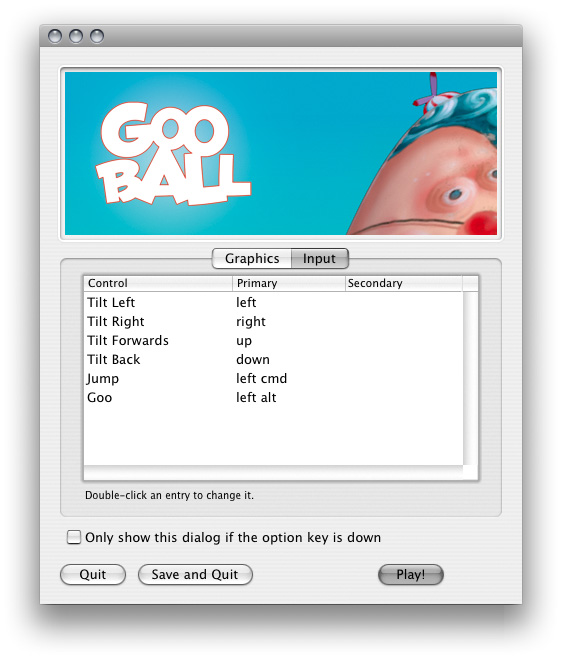
Virtual axes and buttons can be created on the Input window, and end users can configure Keyboard input in a nice screen configuration dialog.

You can setup joysticks, gamepads, keyboard, and mouse, then access them all through one simple scripting interface. Typically you use the axes and buttons to fake up a console controller. Alternatively you can access keys on the keyboard.
Virtual Axes
From scriptsA piece of code that allows you to create your own Components, trigger game events, modify Component properties over time and respond to user input in any way you like. More info
See in Glossary, all virtual axes are accessed by their name.
Every project has the following default input axes when it’s created:
- Horizontal and Vertical are mapped to w, a, s, d and the arrow keys.
- Fire1, Fire2, Fire3 are mapped to Control, Option (Alt), and Command, respectively.
- Mouse X and Mouse Y are mapped to the delta of mouse movement.
- Window Shake X and Window Shake Y is mapped to the movement of the window.
Adding new Input Axes
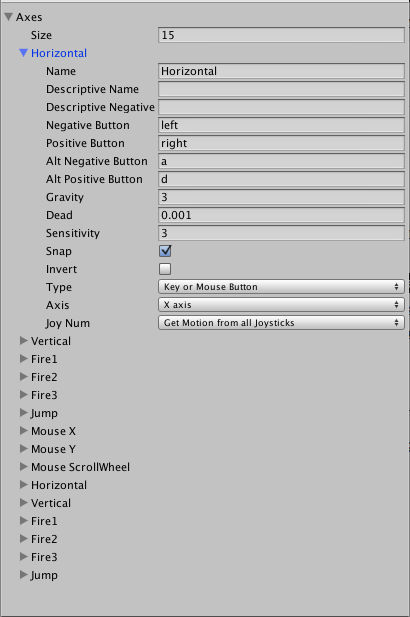
If you want to add new virtual axes go to the Edit > Project Settings menu, then select the Input category. Here you can also change the settings of each axis.

You map each axis to two buttons on a joystick, mouse, or keyboard keys.
| Property: | Function: |
|---|---|
| Name | The name of the string used to check this axis from a script. |
| Descriptive Name | Positive value name displayed in the input tab of the Configuration dialog for standalone builds. |
| Descriptive Negative Name | Negative value name displayed in the Input tab of the Configuration dialog for standalone builds. |
| Negative Button | The button used to push the axis in the negative direction. |
| Positive Button | The button used to push the axis in the positive direction. |
| Alt Negative Button | Alternative button used to push the axis in the negative direction. |
| Alt Positive Button | Alternative button used to push the axis in the positive direction. |
| Gravity | Speed in units per second that the axis falls toward neutral when no buttons are pressed. |
| Dead | Size of the analog dead zone. All analog device values within this range result map to neutral. |
| Sensitivity | Speed in units per second that the axis will move toward the target value. This is for digital devices only. |
| Snap | If enabled, the axis value will reset to zero when pressing a button of the opposite direction. |
| Invert | If enabled, the Negative Buttons provide a positive value, and vice-versa. |
| Type | The type of inputs that will control this axis. |
| Axis | The axis of a connected device that will control this axis. |
| Joy Num | The connected Joystick that will control this axis. |
Use these settings to fine tune the look and feel of input. They are all documented with tooltips in the Editor as well.
Using Input Axes from Scripts
You can query the current state from a script like this:
value = Input.GetAxis ("Horizontal");
An axis has a value between –1 and 1. The neutral position is 0. This is the case for joystick input and keyboard input.
However, Mouse Delta and Window Shake Delta are how much the mouse or window moved during the last frame. This means it can be larger than 1 or smaller than –1 when the user moves the mouse quickly.
It is possible to create multiple axes with the same name. When getting the input axis, the axis with the largest absolute value will be returned. This makes it possible to assign more than one input device to one axis name. For example, create one axis for keyboard input and one axis for joystick input with the same name. If the user is using the joystick, input will come from the joystick, otherwise input will come from the keyboard. This way you don’t have to consider where the input comes from when writing scripts.
Button Names
To map a key to an axis, you have to enter the key’s name in the Positive Button or Negative Button property in the InspectorA Unity window that displays information about the currently selected GameObject, Asset or Project Settings, alowing you to inspect and edit the values. More info
See in Glossary.
Keys
The names of keys follow this convention:
- Normal keys: “a”, “b”, “c” …
- Number keys: “1”, “2”, “3”, …
- Arrow keys: “up”, “down”, “left”, “right”
- Keypad keys: “[1]”, “[2]”, “[3]”, “[+]”, “[equals]”
- Modifier keys: “right shift”, “left shift”, “right ctrl”, “left ctrl”, “right alt”, “left alt”, “right cmd”, “left cmd”
- Mouse Buttons: “mouse 0”, “mouse 1”, “mouse 2”, …
- Joystick Buttons (from any joystick): “joystick button 0”, “joystick button 1”, “joystick button 2”, …
- Joystick Buttons (from a specific joystick): “joystick 1 button 0”, “joystick 1 button 1”, “joystick 2 button 0”, …
- Special keys: “backspace”, “tab”, “return”, “escape”, “space”, “delete”, “enter”, “insert”, “home”, “end”, “page up”, “page down”
- Function keys: “f1”, “f2”, “f3”, …
The names used to identify the keys are the same in the scripting interface and the Inspector.
value = Input.GetKey ("a");
Note also that the keys are accessible using the KeyCode enum parameter.