Animation Integration
Animation allows for each transition between control states to be fully animated using Unity’s animation system. This is the most powerful of the transition modes due to the number of properties that can be animated simultaneously.

To use the Animation transitionAllows a state machine to switch or blend from one animation state to another. Transitions define how long a blend between states should take, and the conditions that activate them. More info
See in Glossary mode, an Animator ComponentA component on a model that animates that model using the Animation system. The component has a reference to an Animator Controller asset that controls the animation. More info
See in Glossary needs to be attached to the controller element. This can be done automatically by clicking “Auto Generate Animation”. This also generates an Animator ControllerControls animation through Animation Layers with Animation State Machines and Animation Blend Trees, controlled by Animation Parameters. The same Animator Controller can be referenced by multiple models with Animator components. More info
See in Glossary with states already set up, which will need to be saved.
The new Animator controller is ready to use straight away. Unlike most Animator Controllers, this controller also stores the animations for the controller’s transitions and these can be customised, if desired.
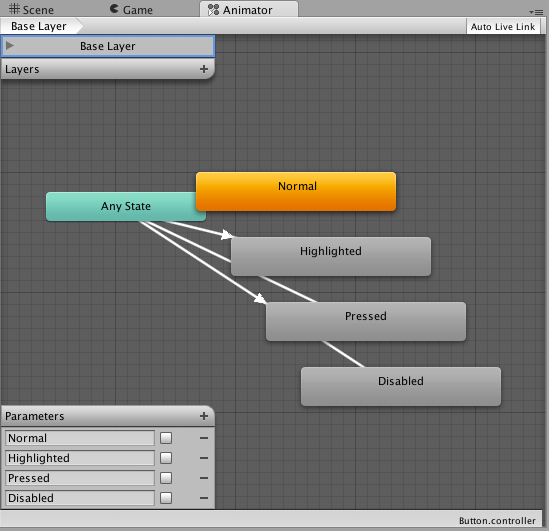
For example, if a Button element with an Animator controller attached is selected, the animations for each of the button’s states can be edited by opening the Animation window (Window>Animation).
There is an Animation ClipAnimation data that can be used for animated characters or simple animations. It is a simple “unit” piece of motion, such as (one specific instance of) “Idle”, “Walk” or “Run”. More info
See in Glossary pop-up menu to select the desired clip. Choose from “Normal”, “Highlighted”, “Pressed” and “Disabled”.

The Normal State is set by the values on button element itself and can be left empty. On all other states, the most common configuration is a single keyframeA frame that marks the start or end point of a transition in an animation. Frames in between the keyframes are called inbetweens.
See in Glossary at the start of the timeline. The transition animation between states will be handled by the Animator.
As an example, the width of the button in the Highlighted State could be changed by selecting the Highlighted state from the Animation Clip pop up menu and with the playhead at the start of the time line:
- Select the record Button
- Change the width of the Button in the inspector
- Exit the record mode.
Change to play mode to see how the button grows when highlighted.
Any number of properties can have their parameters set in this one keyframe.
Several buttons can share the same behaviour by sharing Animator Controllers.
The UI(User Interface) Allows a user to interact with your application. Unity currently supports three UI systems. More info
See in Glossary Animation transition mode is not compatible with Unity’s legacy animation system. You should only use the Animator Component.
Copyright © 2023 Unity Technologies
优美缔软件(上海)有限公司 版权所有
"Unity"、Unity 徽标及其他 Unity 商标是 Unity Technologies 或其附属机构在美国及其他地区的商标或注册商标。其他名称或品牌是其各自所有者的商标。
公安部备案号:
31010902002961