Curves
You can attach animation curves to imported animation clipsAnimation data that can be used for animated characters or simple animations. It is a simple “unit” piece of motion, such as (one specific instance of) “Idle”, “Walk” or “Run”. More info
See in Glossary in the Animation tab.
You can use these curves to add additional animated data to an imported clip. You can use that data to animate the timings of other items based on the state of an animator. For example, in a game set in icy conditions, an extra animation curve could be used to control the emission rate of a particle systemA component that simulates fluid entities such as liquids, clouds and flames by generating and animating large numbers of small 2D images in the scene. More info
See in Glossary to show the player’s condensing breath in the cold air.
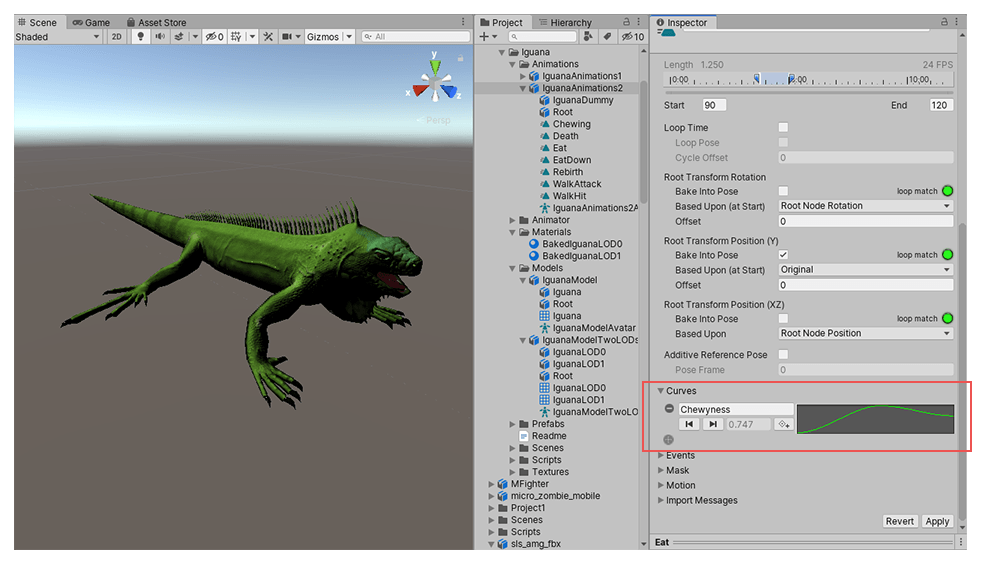
To add a curve to an imported animation, expand the Curves section at the bottom of the Animation tab, and click the plus icon to add a new curve to the current animation clip:

If your imported animation file is split into multiple animation clips, each clip can have its own custom curves.

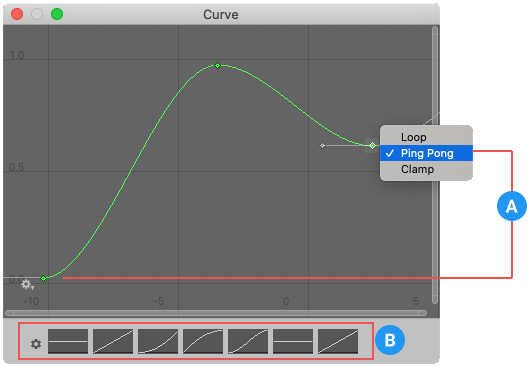
The curve’s X-axis represents normalized time and always ranges between 0.0 and 1.0 (corresponding to the beginning and the end of the animation clip respectively, regardless of its duration).

(A) Wrapping mode
(B) Curve Presets
Double-clicking an animation curve brings up the standard Unity curve editor which you can use to add keys to the curve. Keys are points along the curve’s timeline where it has a value explicitly set by the animator rather than just using an interpolated value. Keys are very useful for marking important points along the timeline of the animation. For example, with a walking animation, you might use keys to mark the points where the left foot is on the ground, then both feet on the ground, right foot on the ground, and so on. Once the keys are set up, you can move conveniently between key frames by pressing the Previous Key Frame and Next Key Frame buttons. This moves the vertical red line and shows the normalized time at the keyframeA frame that marks the start or end point of a transition in an animation. Frames in between the keyframes are called inbetweens.
See in Glossary. The value you enter in the text box drives the value of the curve at that time.
Animation curves and animator controller parameters
If you have a curve with the same name as one of the parameters in the Animator ControllerControls animation through Animation Layers with Animation State Machines and Animation Blend Trees, controlled by Animation Parameters. The same Animator Controller can be referenced by multiple models with Animator components. More info
See in Glossary, then that parameter takes its value from the value of the curve at each point in the timeline. For example, if you make a call to GetFloat from a script, the returned value is equal to the value of the curve at the time the call is made. Note that at any given point in time, there might be multiple animation clips attempting to set the same parameter from the same controller. In that case, Unity blends the curve values from the multiple animation clips. If an animation has no curve for a particular parameter, then Unity blends with the default value for that parameter.