Render As Service – 工程隔离版
Notes: - 本文档为URAS(工程隔离版)的开发流程介绍,和关键操作文字版说明。URAS Demo Package 已上线,可查看 URAS Demo Package - URAS(工程隔离版)现已支持 Asset Bundle 和 Addressable, 请使用最新版团结引擎,可查看 AssetBundle & Addressable in URAS
Render As Service 工程隔离版介绍
Render As Service,英文简称为URAS,下同。
工程隔离是在 URAS 的基础上新增的模式
- 一个渲染服务 Service 支持多个 Client APP 运行,且每个 Client APP 相互独立、互不干扰、可自更新
- 提升开发便捷性和协作型,同一 Service 下的各 Client 可由不同团队独立完成
- 开发项目时:
- 项目开发流程转为一个母工程,设置项目的通用设置、管线等,给其他项目提供公共依赖项,每个子工程都是一个独立 Tuanjie 工程
- 所有子工程使用相同的项目设置和渲染管线
- 在开发阶段,每个项目独立为一个 Tuanjie 工程,独立开发
- 每个项目的逻辑发布成一个 C# 程序集,Tuanjie 引擎使用 Mono 虚拟机,每个项目的 C# 程序集加载到独立 domain 中运行,实现逻辑独立
- 项目 Client APP 运行时:
- 仅需一个 Service,多个工程共用同一个 Service,每个工程均正常运行且互不干扰
- 一个新 Client 集成到已运行 Service 中,新 Client 可正常运行和渲染,已运行的 Client 和 Service 均不受干扰
- 已运行的 Service 和 Client 中,关闭一个 Client,不影响其他 Client 和 Service 的正常运行
- 每个 Client 可通过 OTA 单独更新,更新后可正常运行,且不影响其他 Client 和 Service
因工程隔离面向多进程,此文档着重介绍多进程开发模式 Client 端和 Service 端操作说明
Notes:工程隔离版 URAS 要求 Client 和 Service 使用相同的渲染管线
Service端开发说明
Notes: - Service端 的操作是为了导出 Service APK,因此需 - Step1:使用 Tuanjie Editor 导出空场景的 Android Studio工 程 - Step2:在 Android Studio 中打开 Android Studio 工程,打包 APK - Service 端仅需 Build 一次,此后无需修改,可反复使用
Tuanjie Editor中操作说明
新建项目
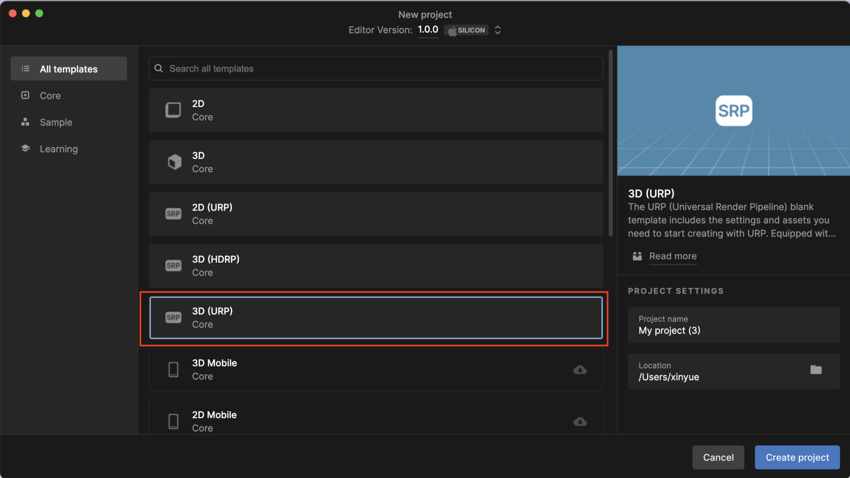
- 打开Tuanjie Hub,新建项目,创建3D(URP)工程(推荐3D URP,其他管线同样支持,但需要保证Service和Client渲染管线一致)
切换至 HMI Android 平台并勾选工程隔离
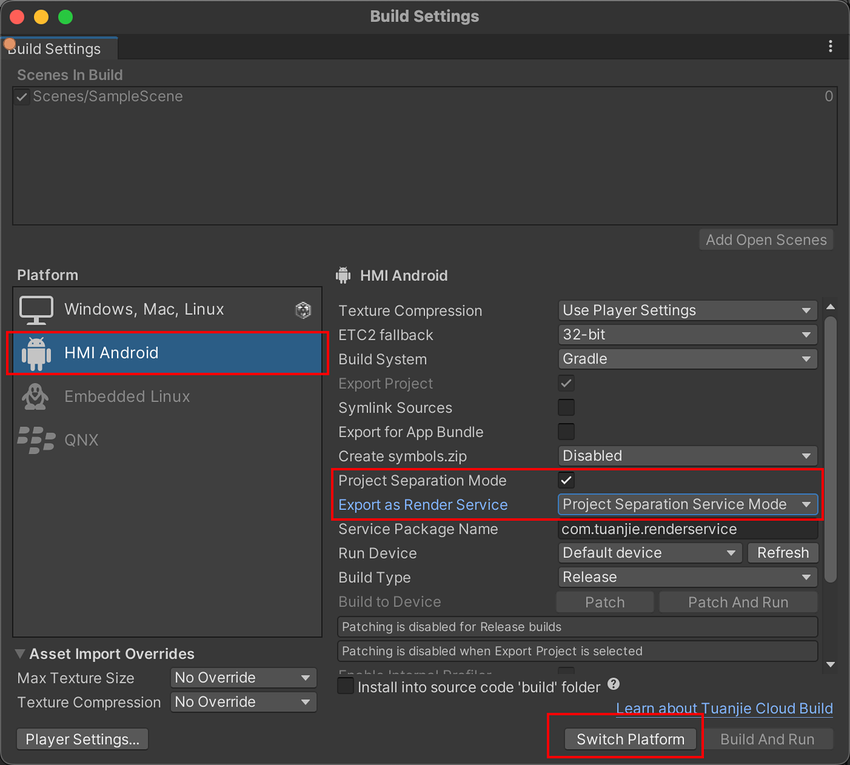
在顶部菜单栏点击 File >> Build Settings
在弹出的 Build Settings 窗口中
点击 HMI Android
勾选 Project Separation Mode (勾选之后即为工程隔离版本,不勾选则为非工程隔离版URAS)
将 [Export as Render Service] 设置为 Project Separation Service Mode (注意:选择 Project Separation Service Mode 模式时上面的 Scenes In Build 相关的功能会被禁用,因为此模式下不需要设置相关参数)
在 [Service Package Name] 中配置导出的 Service 包名;若只有单个 Service,用默认包名 com.tuanjie.renderservice 即可
-
点击 Switch Platform
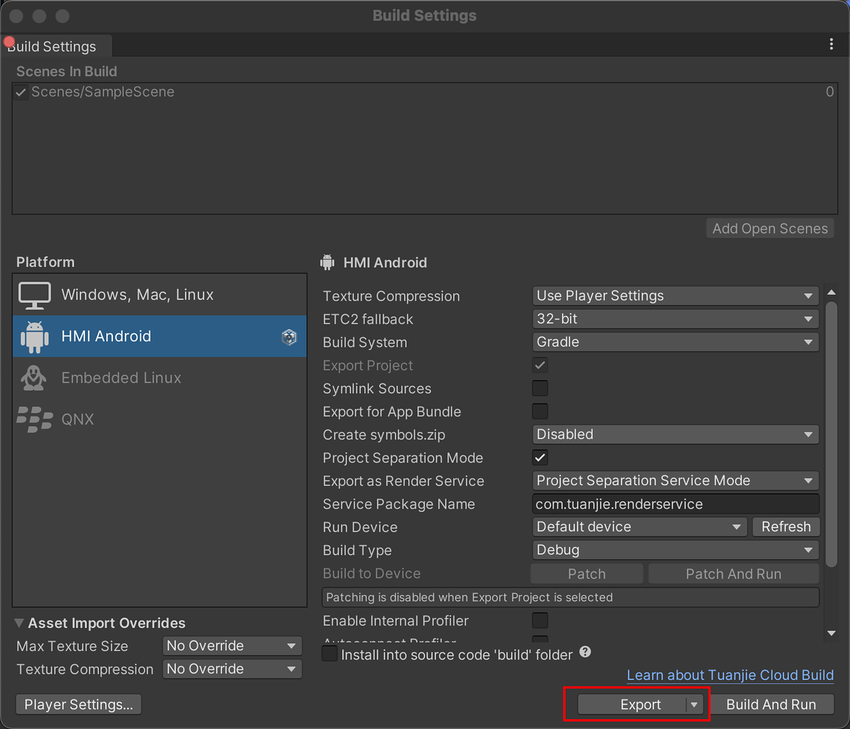
导出Service端Android Studio工程
- 在 Building Settings 窗口中,点击 Export,选择任一位置导出工程文件
在Android Studio中操作说明
打开工程文件
- 在 Android Studio 中打开上文导出的工程文件
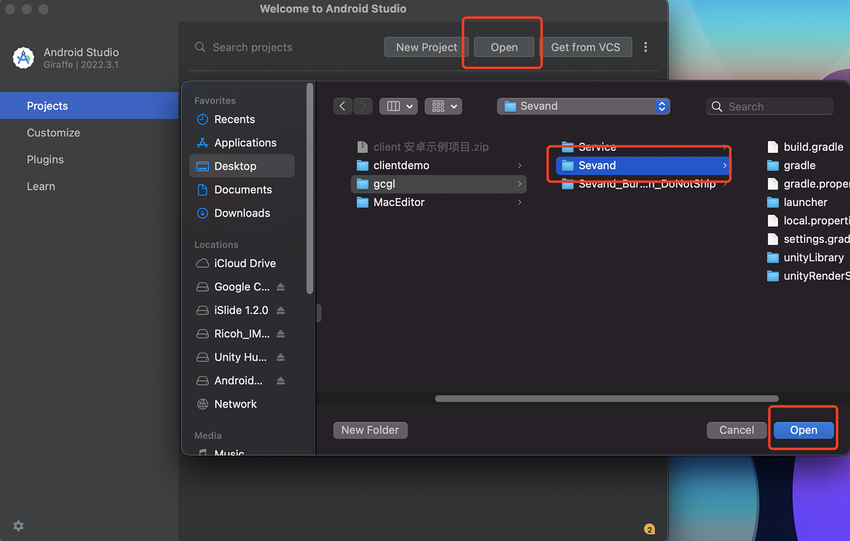
导出 APK 文件
-
点击 Build >> Build Bundle(s)/APK(s) >> Build APK(s)
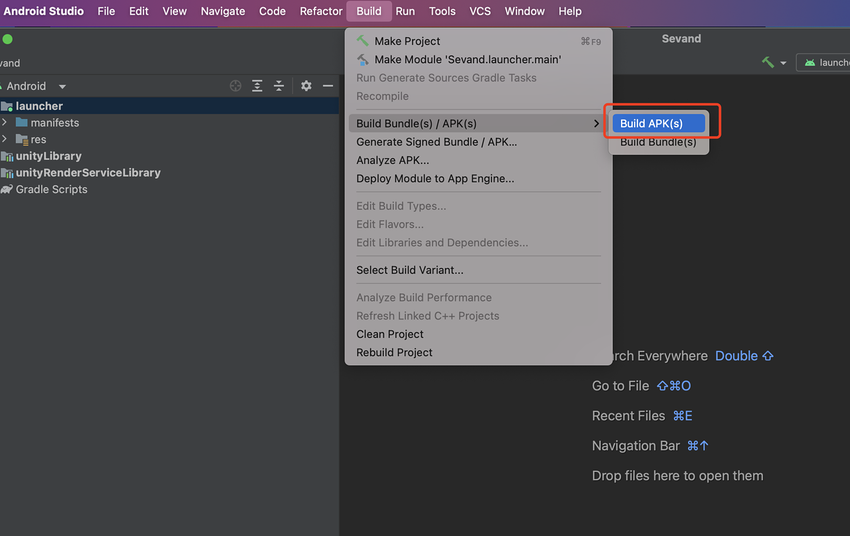
build APKs. -
点击launcher >> Edit Configurations,打开对应面板并将 Launch 改为 Nothing,点击 Apply 应用设置
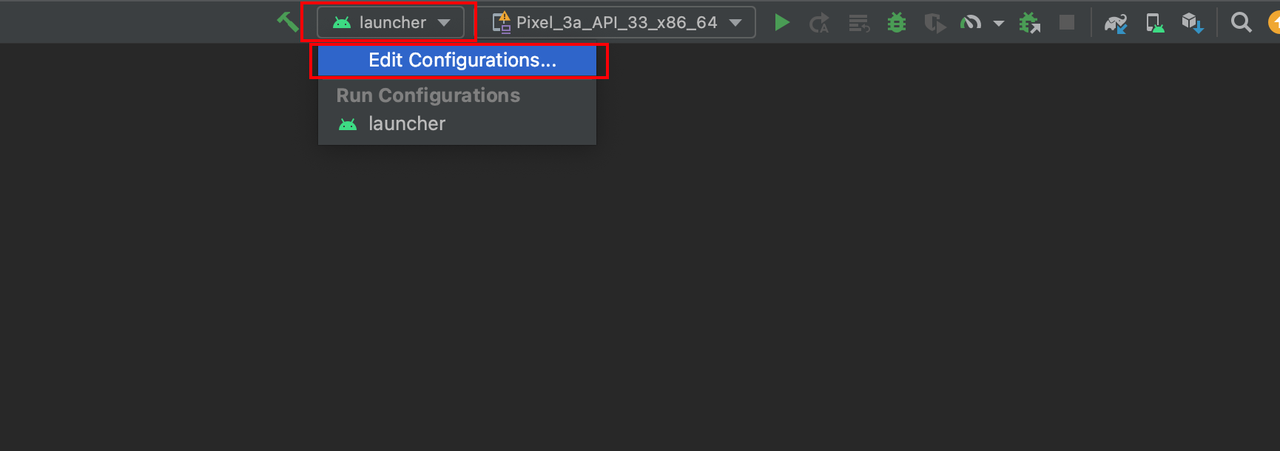
edit configuration 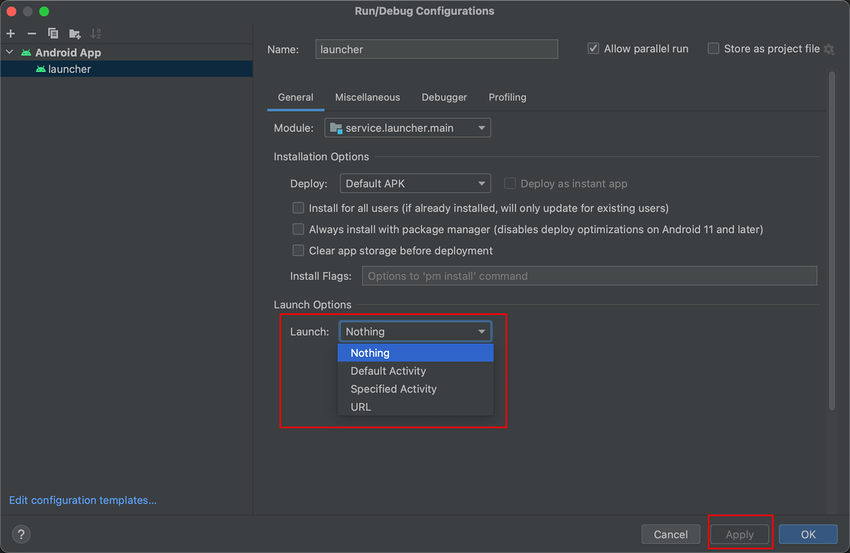
edit configuration -
右下角显示 build 的进度,完成之后可通过点击 locate 定位到该 apk
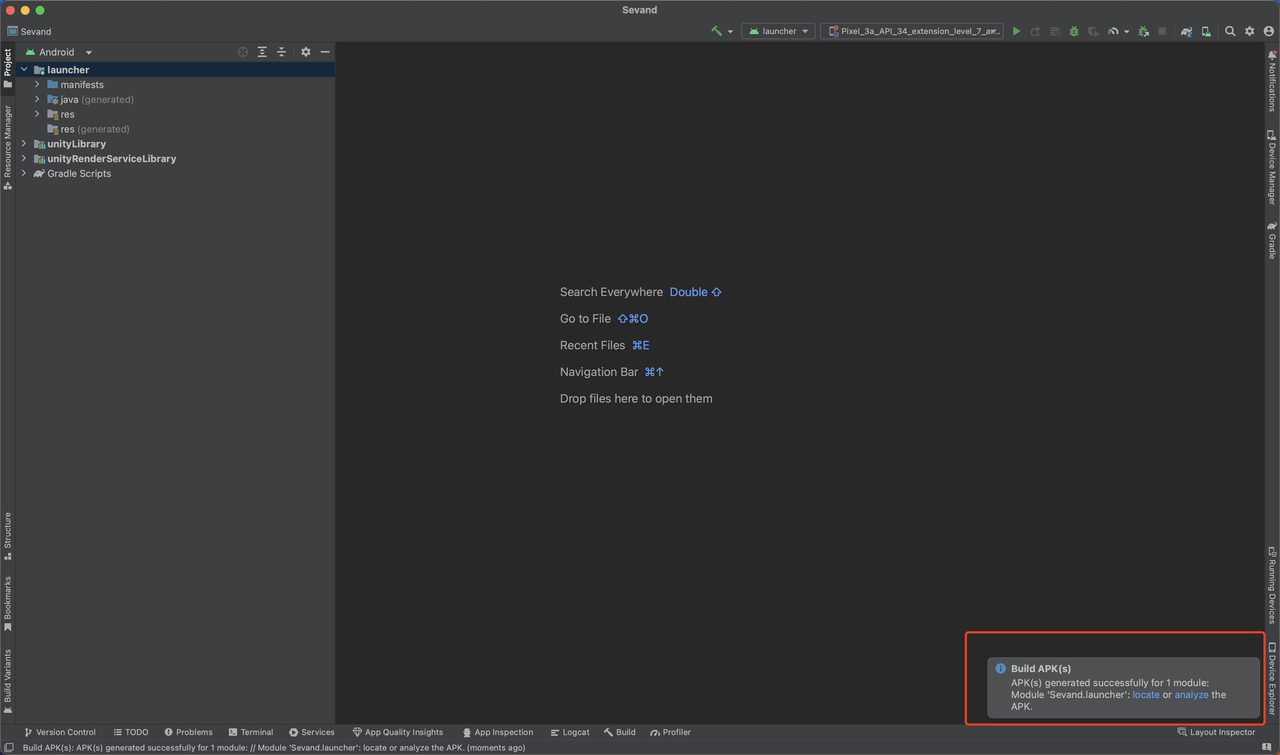
构建进度检查
Client端开发说明
Notes:
-
为了开发运行在 Service上 的多个Client APK,因此需:
Step1:使用 Tuanjie Editor 开发 3D 场景,并导出包含 RenderServiceLibrary 包的 Android Studio 工程
-
Step2:
- 在 Android Studio 中打开该 Android Studio 工程,开发并打包 APK
- 或在 Android Studio 中打开原生工程,导入 RenderServiceLibrary 包,开发并打包 APK
在 Tuanjie Editor 中操作说明
新建项目
在 Tuanjie Hub 中新建一个3D(URP)工程(推荐3D URP,其他管线同样支持,但需要保证 Service 和 Client 渲染管线一致)
切换 HMI Android平台
点击顶部菜单栏 File >> Build Settings
在弹出的 Build Settings 窗口中
切换 HMI Android 平台
勾选 Project Separation Mode (勾选之后即为工程隔离版本,不勾选则为非工程隔离版URAS)
将 [Export as Render Service] 设置为 Project Separation Client Mode
-
点击 Switch Platform
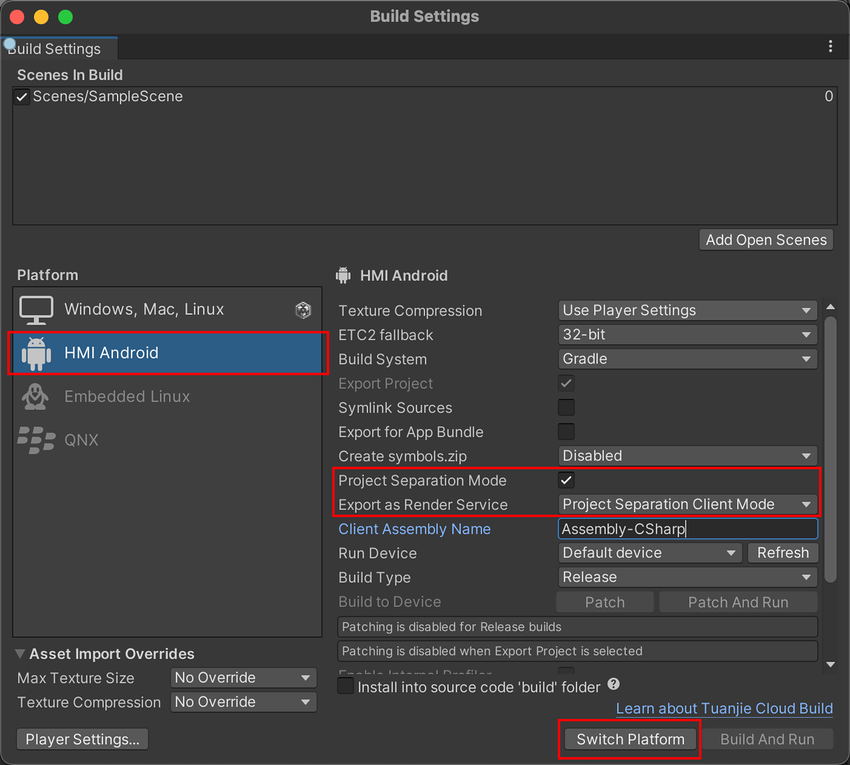
平台切换
配置Target Display
切换至 HMI Android 平台后,Editor里已集成完整的 URAS 功能
选择需要使用 URAS 的 Camera
在该 Camera 的 Inspector 面板中,找到 Camera 下的 Target Display 参数
- 展开下拉列表,选择一个 Display 使用
- 注:此处的 Display 与 Android 端的 tuanjieDisplay 对应
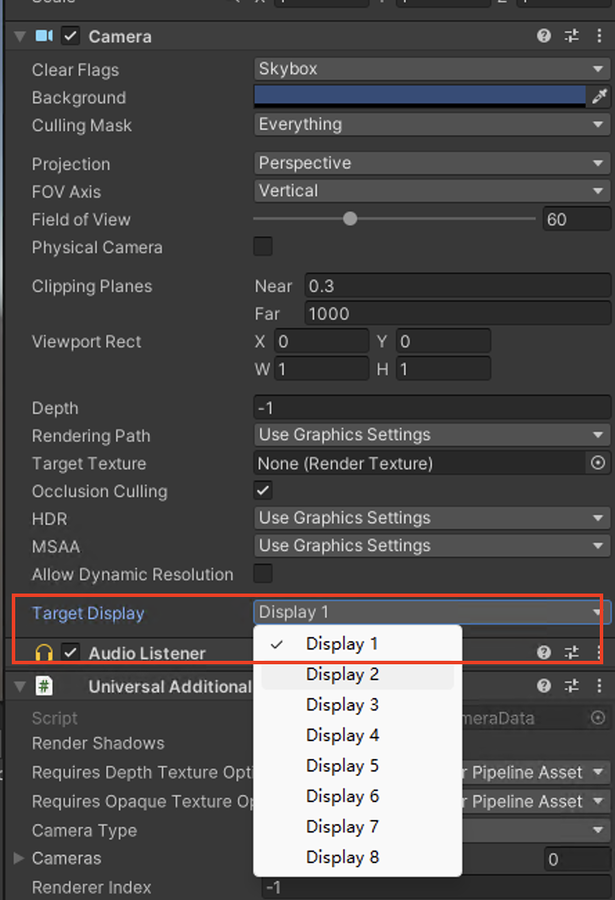
-
注意:若有Canvas,Screen Space - Overlay模式的Canvas的 Target Display 需要与对应相机的 Target Display 参数保持一致。

-
Touch事件处理的sample code:
void HandleTouch()
{
  for (int i = 0; i < 10; i++)
  {
    #if ENABLE_INPUT_SYSTEM
    if(i < Touch.activeTouches.Count)
    {
      var touch = Touch.activeTouches[i];
      Vector3 touchPos = touch.screenPosition;
      Debug.Log($"Get touch position {touchPos} at display {touch.displayIndex}");
    }
    #else
    if (i < Input.touchCount)
    {
      Touch touch = Input.GetTouch(i);
      Vector3 touchPos = touch.position;
      Debug.Log($"Get touch position {touchPos} at display {touch.displayIndex}");
    }
    #endif
  }
}
导出 Android Studio 工程
点击顶部菜单栏 File >> Bulid Settings
再次确认 [Export as Render Service] 设置为 Project Separation Client Mode
在 [Client Assembly Name] 中配置导出的 dll 的名字,注意:更改期间会禁用Build功能,更改结束后会重新编译工程中的脚本文件,编译结束后可进行其他操作
-
点击 Export,选择任一位置导出
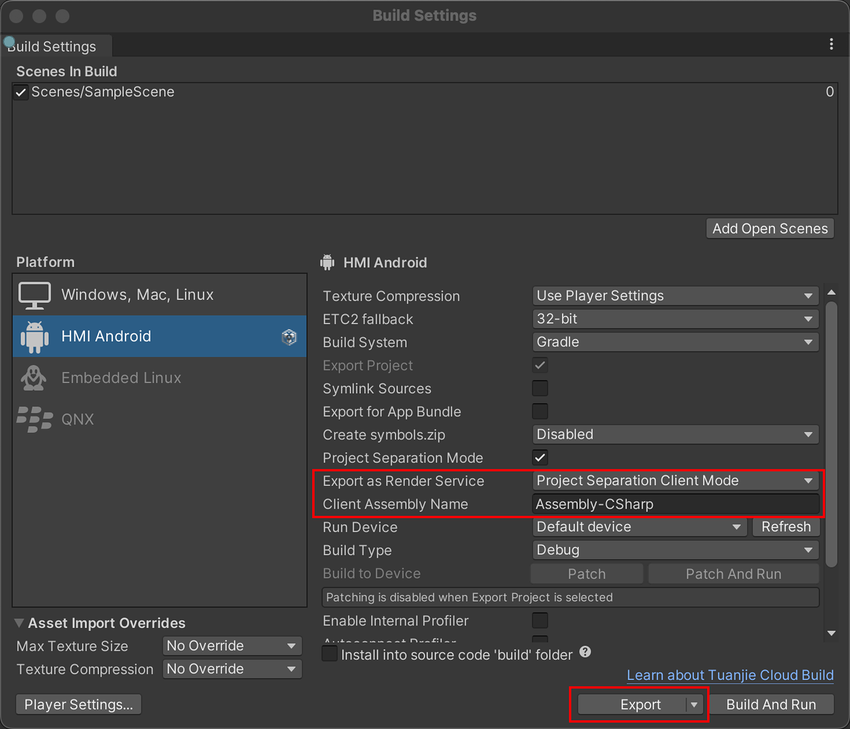
在 Android Studio 中操作说明
Notes: - 根据需求,选择其一操作: - 若需要将Tuanjie 3D 内容嵌入原生 Android APP 中,则参考下文第一节基于原生Android App的说明 - 若直接使用 Tuanjie Editor 导出的工程进行开发,则参考下文第二节基于先前导出的 Android 工程
基于原生 Android App
导入 RenderServiceLibrary 包并配置
找到打包出的工程文件中的 RenderServiceLibrary 包
将 RenderServiceLibrary 包导入原生 Android Studio 工程
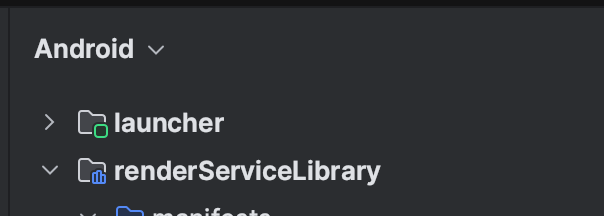
在原生 app 的 build gradle 中添加
implementation project (’:RenderServiceLibrary‘),路径根据需求可修改implementation project(":renderServiceLibrary")TuanjieView配置
TuanjieView 创建时,tuanjieServicePkgName 参数需要指定 service 包名进行绑定;tuanjieDisplay 参数需要与Editor中设置的Camera Target Display 参数保持一致,可参考:
xml <com.unity3d.renderservice.client.TuanjieView android:id="@+id/tuanjieView1" android:layout_width="match_parent" android:layout_height="275dp" app:tuanjieViewType="SurfaceView" app:tuanjieDisplay="1" app:tuanjieRenderFrameInterval="1" app:tuanjieServicePkgName="com.tuanjie.renderservice" />-
Service 启动/停止调试
启动渲染服务可以调用 ensureStarted 方法
-
停止渲染服务调用 ensureStopped 方法
mStartServiceBtn =findViewById(R.id.startServiceBtn);
mStartServiceBtn.setOnClickListener(new View.OnClickListener() {
    @Override
    public void onclick(View view) {
        Log.d(LOG_TAG,msg:"onClick To Start TuanjieRenderService");
        mTuanjieRenderService.ensureStarted();
    }
});

mStopServiceBtn = findViewById(R.id.stopServiceBtn);
mStopServiceBtn.setOnClickListener(new View.OnClickListener() {
    @Override
    public void onclick(View view) {
        Log.d(LOG_TAG, msg: "onclick To Stop TuanjieRenderService");
        mTuanjieRenderService.ensureStopped();
    }
});
基于先前导出的 Android 工程
- 在 Android Studio 中打开上文中导出的 Android Studio 工程文件
- TuanjieView 配置同上文
- 渲染服务调试同上文
- 启动渲染服务调用 ensureStarted 方法
- 停止渲染服务调用 ensureStopped 方法
- 在初始化、启动和停止 Service 时也需要传入包名
导出APK文件
同 Service 端操作
新增功能 API 使用说明
工程隔离场景切换API
Notes:为了在工程隔离模式下实现场景切换需求,因此新增了以下3个 API 供用户使用:
SceneManagement.SceneManager.RenderServiceAddSceneAsync(string sceneName)使用此异步 API 向 service 请求 additive 增加新的场景,需要使用 sceneName 作为参数传入
SceneManagement.SceneManager.RenderServiceRemoveSceneAsync(string sceneName)使用此异步 API 向 service 请求移除场景,需要使用 sceneName 作为参数传入
SceneManagement.SceneManager.RenderServiceReplaceSceneAsync(string unloadSceneName, string loadScenename)使用此异步 API 向 service 请求替换场景,需要使用 unloadSceneName 作为需要移除的场景名,使用 loadScenename 作为需要 load 的场景名
SceneCullingMask API
以下 API 是为了解决 URAS 本身为了解决多个相机内容 culling 而需要占用 layer 使用的问题,会导致用户无法像一般情况下,通过 layer 来进行逻辑处理的问题,新增的 API 通过修改当前 scene 的 SceneCullingMask 参数来对整个场景中的物体进行 culling,用以区分不同相机的渲染内容。默认情况下 Service 会在 Client 链接时为各个 Client 分配各自的 SceneCullingMask ,不需要手动设置。
SceneManagement.SceneManager.GetRenderServiceSceneCullingMask(Scene scene)使用此 API 查询此场景的 SceneCullingMask 参数值,需要使用 scene 作为参数传入,返回值为 culing 类型
SceneManagement.SceneManager.SetRenderServiceSceneCullingMask(Scene scene, int renderServiceSceneCullingMaskLayer)使用此 API 设置此场景的 SceneCullingMask 参数值,需要使用需要使用 scene 和 renderServiceSceneCullingMaskLayer 作为参数传入, renderServiceSceneCullingMaskLayer 的范围为(059),此 API 会将此 scene 中的所有物体的 SceneCullingMask 都设置为此值,只有 SceneCullingMask 为此值的相机才会渲染此 scene 中的物体
运行说明
APK安装调试
- 将 Service APK 与 Client APK 导入同一安卓设备中并安装
- 通过应用管理界面为 Service 应用开启自启动权限,或者在应用启动管理中将Service改为自动管理
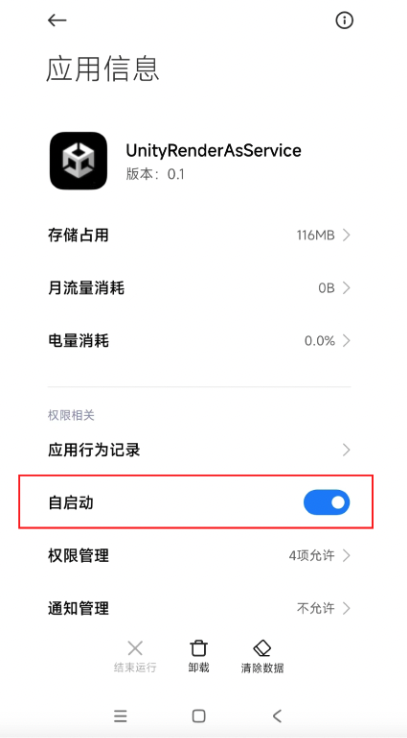
运行项目(示例,按需参考)
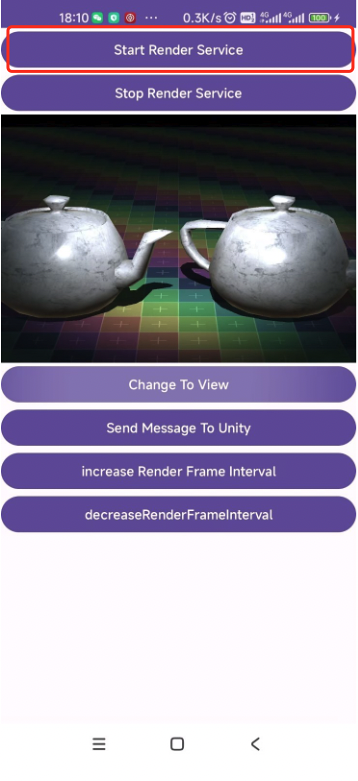
- 打开Client APP,点击Start Render Service(若Client APP中设置通过点击按钮实现拉起Service逻辑)即可自动拉起Service,展示出渲染后的画面
- 支持多个APP同时运行并启用渲染服务
