Splash Screen
The Unity Editor allows you to configure a Splash Screen for your project. The level to which you can customize the Unity Splash Screen depends on your Unity subscription; depending on whehether you have Unity Personal, Unity Plus or Unity Pro, you can disable the Unity Splash Screen entirely, disable the Unity logo, and add your own logos, among other options.
You can also make your own introductory screens or animations to introduce your Project in your first SceneA Scene contains the environments and menus of your game. Think of each unique Scene file as a unique level. In each Scene, you place your environments, obstacles, and decorations, essentially designing and building your game in pieces. More info
See in Glossary, using the Unity UI System. These can be in addition to or instead of using the Unity Splash Screen, depending on your subscription.
The Unity Splash Screen is uniform across all platforms. It displays promptly, displaying while the first Scene loads asynchronously in the background. This is different to your own introductory screens or animations which can take time to appear; this is due to Unity having to load the entire engine and first Scene before displaying them.
Note: Unity copies these options directly to the Package.appxmanifest file.
Subscription limitations
The Unity Pro and Plus subscriptions have no limitations to customization of the Unity Splash Screen.
The Unity Personal subscription has the following limitations:
- The Unity Splash Screen cannot be disabled.
- The Unity logo cannot be disabled.
- The opacity level can be set to a minimum value of 0.5.
Unity Splash Screen settings
To access the Unity Splash Screen settings, open Edit > Project SettingsA broad collection of settings which allow you to configure how Physics, Audio, Networking, Graphics, Input and many other areas of your Project behave. More info
See in Glossary from the main menu in Unity and select the Player category. Then expand the Splash Image section and scroll down to the Splash Screen property.

The screen contains the following sections:
Preview
Enable the Show Splash Screen option to display the Splash Screen at the start of the game. If you are using the Unity Personal subscription you cannot disable this option.

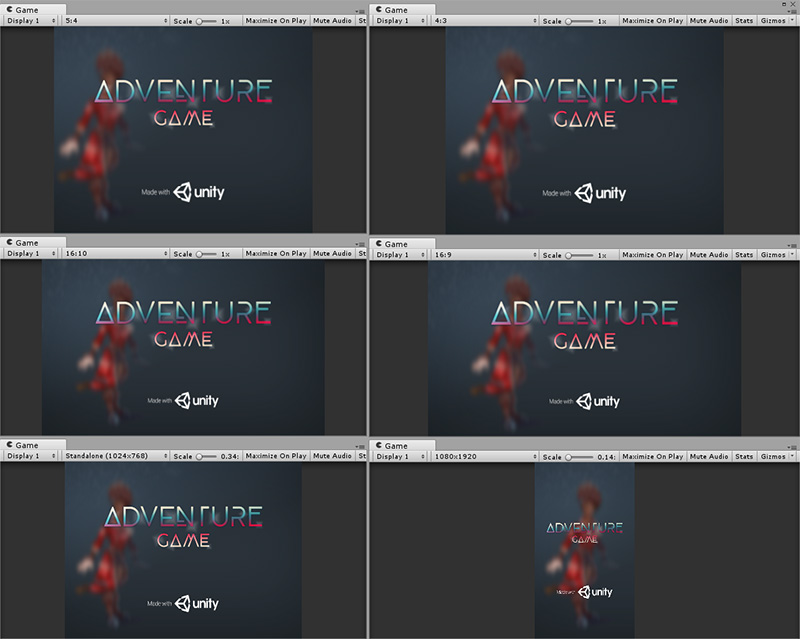
Use the Preview button to see a preview of the Splash Screen in the Game view. The preview reflects the resolution and aspect ratioThe relationship of an image’s proportional dimensions, such as its width and height.
See in Glossary of the Game view. Use multiple Game views to preview multiple different resolutions and aspect ratios simultaneously. This is particularly useful for simulating the Splash Screen’s appearance on multiple different devices.
Style
Use the Splash Style setting to control the style of the Unity branding.

Choose either Light on Dark (the default) or Dark on White from the Splash Style drop-down menu.

Animation
Use the AnimationA collection of images that create a moving image when played sequentially. In Unity, an animation is the result of adding two different animation keys, at two different times, for the same animatable property. More info
See in Glossary setting to define how the Splash Screen appears and disappears from the screen.

Choose one of the following values from the Animation drop-down menu:
| Value | Function |
|---|---|
| Static | Do not apply animation. |
| Dolly | The logo and background zoom to create a visual dolly effect. This is the default. |
| Custom | Configure the background and logo zoom amounts to allow for a modified dolly effect. |
Logos
Use the settings in the Logos section to customize your application’s logos.
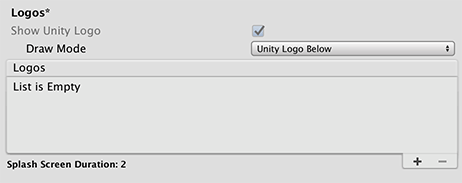
Your application is co-branded with the Unity logo by default. If you are using the Unity Personal subscription you cannot disable this option. If you are using Unity Pro or Plus subscriptions, you can disable the Show Unity Logo option to remove the Unity logo from your application.
If you are using Unity co-branding, you can control how it appears by choosing one of the following values from the Draw Mode drop-down box:
| Value | Function |
|---|---|
| Unity Logo Below | Draw the co-branding Unity logo beneath all logos that are shown. |
| All Sequential | Insert the co-branding Unity logo as a logo into the Logos list. |
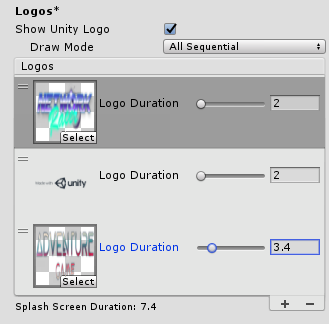
You can customize the list of logos to appear on the Splash Screen:
Each logo must be a Sprite Asset. Set the Sprite Mode to Single to use the entire spriteA 2D graphic objects. If you are used to working in 3D, Sprites are essentially just standard textures but there are special techniques for combining and managing sprite textures for efficiency and convenience during development. More info
See in Glossary as the logo. If you want to change the logo’s aspect ratio, set the Sprite Mode to Multiple and edit the dimensions with the Sprite Editor.
To add and remove logos, use the plus (+) and minus (-) buttons.
To reorder logos, drag and drop them in the list.
You can control the length of time each Sprite Asset appears on the screen by setting its Logo Duration setting. Use a value between 2 and 10 seconds.
If an entry in the Logos list has no logo Sprite Asset assigned, no logo is shown for the duration of that entry. You can use this to create delays between logos.
The entire duration of the Splash Screen is the total of all logos plus 0.5 seconds for fading out. This might be longer if the first Scene is not ready to play, in which case the Splash Screen shows only the background image or color and then fades out when the first Scene is ready to play.
Background
Use the settings in the Background section to customize the background of your application’s Splash Screen.
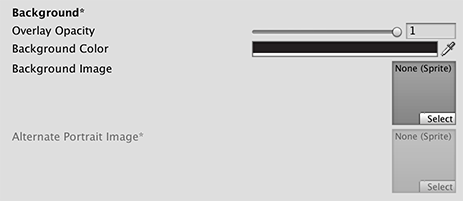
Overlay Opacity
Adjust the strength of the Overlay Opacity setting to make the logos stand out. This affects the background color and image color, based on how you set up your Splash Style.
You can set the opacity to a lower number to reduce this effect. You can also completely disable the effect by setting it to 0. For example, if the Splash Screen style is Light on Dark, with a white background, the background becomes gray when Overlay Opacity is set to 1, and white when Overlay Opacity is set to 0. In the Unity Personal subscription, this option has a minimum value of 0.5.
Background Color
Set the Background Color when no background image is set. Note that the actual background color may be affected by the Overlay Opacity setting, and might not match the assigned color.
Background Image
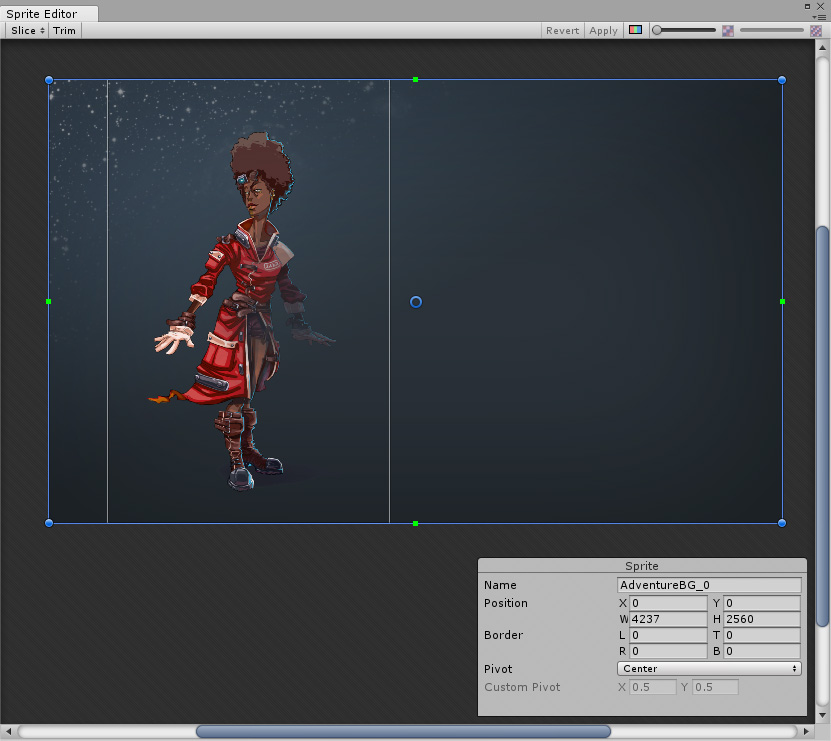
Specify a reference to a Sprite image in the Background Image setting instead of using a color background. Unity adjusts the background image so that it fills the screen. The image is uniformly scaled until it fits both the width and height of the screen. This means that parts of the image might extend beyond the screen edges in some aspect ratios. To adjust the background image’s response to aspect ratio, change the Sprite’s Position values in the Sprite Editor.
Alternate Portrait Image
Set an Alternate Portrait Image with portrait aspect ratios (for example, a mobile device in portrait mode). If there is no Alternate Portrait Image Sprite assigned, the Unity Editor uses the Sprite assigned as the Background Image for both portrait and landscape mode.
You can adjust the Position and dimensions of the Sprite in the Sprite Editor to control the aspect ratio and position of the background image on the Splash Screen. In this example, the same image is being used for both landscape and portrait; however, the portrait position has been adjusted.
