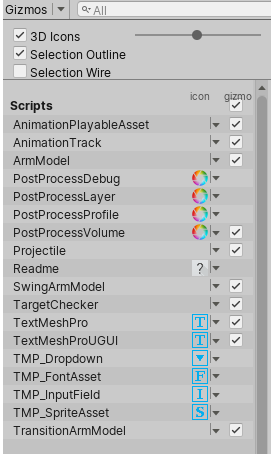
Gizmos menu
The Scene viewAn interactive view into the world you are creating. You use the Scene View to select and position scenery, characters, cameras, lights, and all other types of Game Object. More info
See in Glossary and the Game view both have a GizmosA graphic overlay associated with a GameObject in a Scene, and displayed in the Scene View. Built-in scene tools such as the move tool are Gizmos, and you can create custom Gizmos using textures or scripting. Some Gizmos are only drawn when the GameObject is selected, while other Gizmos are drawn by the Editor regardless of which GameObjects are selected. More info
See in Glossary menu. Click the Gizmos button in the toolbarA row of buttons and basic controls at the top of the Unity Editor that allows you to interact with the Editor in various ways (e.g. scaling, translation). More info
See in Glossary of the SceneA Scene contains the environments and menus of your game. Think of each unique Scene file as a unique level. In each Scene, you place your environments, obstacles, and decorations, essentially designing and building your game in pieces. More info
See in Glossary view or the Game view to access the Gizmos menu.

| Property | Function |
|---|---|
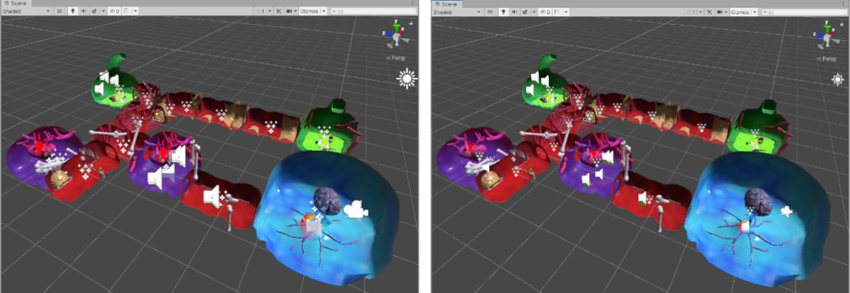
| 3D Icons | The 3D Icons checkbox controls whether component icons (such as those for Lights and Cameras) are drawn by the Editor in 3D in the Scene view. When the 3D Icons checkbox is ticked, component icons are scaled by the Editor according to their distance from the Camera, and obscured by GameObjects in the Scene. Use the slider to control their apparent overall size. When the 3D Icons checkbox is not ticked, component icons are drawn at a fixed size, and are always drawn on top of any GameObjects in the Scene view. See Gizmos and Icons, below, for images and further information. |
| Selection Outline | Check Selection Outline to display selected GameObjects with a colored outline, and their children with a different colored outline. By default, Unity highlights the selected GameObject in orange, and child GameObjects in blue. NOTE: This option is only available in the Scene view Gizmos menu; you cannot enable it in the Game view Gizmos menu. See Selection Outline and Selection Wire, below, for images and further information. |
| Selection Wire | Check Selection Wire to show the selected GameObjects with their wireframe Mesh visible. To change the colour of the Selection Wire, go to Unity > Preferences (macOS) or Edit > Preferences (Windows), select Colors, and alter the Selected Wireframe setting. This option is only available in the Scene view Gizmos menu; you cannot enable it in the Game view Gizmos menu. See Selection Outline and Selection Wire, below, for images and further information. |
| Recently Changed | Controls the visibility of the icons and gizmos for components and scripts that you modified recently. This section appears the first time you change one or more items, and updates after subsequent changes. For more information, see Built-in components, scripts, and recently changed items, below. |
| Scripts | Controls the visibility of the icons and gizmos for scripts in the Scene. This section appears only when your Scene uses scripts that meet specific criteria. See Built-in components, scripts, and recently changed items, below, for further information. |
| Built-in Components | Controls the visibility of the icons and gizmos for all component types that have an icon or gizmo. See Built-in components, scripts, and recently changed items, below, for further information. |
Gizmos and Icons
Gizmos
Gizmos are graphics associated with GameObjects in the Scene. Some Gizmos are only drawn when the GameObjectThe fundamental object in Unity scenes, which can represent characters, props, scenery, cameras, waypoints, and more. A GameObject’s functionality is defined by the Components attached to it. More info
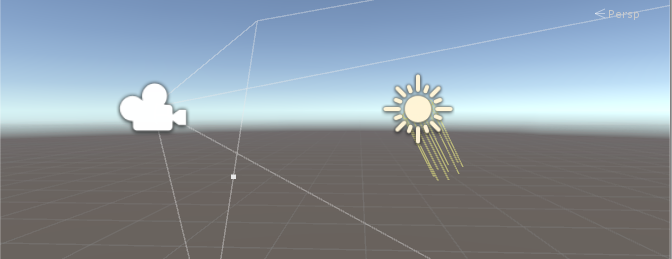
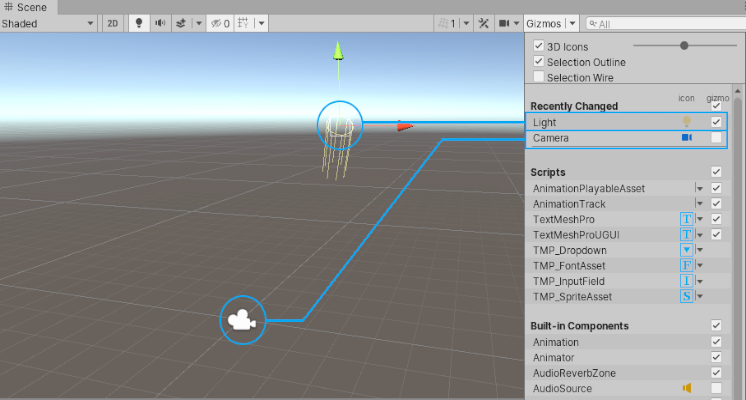
See in Glossary is selected, while other Gizmos are drawn by the Editor regardless of which GameObjects are selected. They are usually wireframes, drawn with code rather than bitmap graphics, and can be interactive. The CameraA component which creates an image of a particular viewpoint in your scene. The output is either drawn to the screen or captured as a texture. More info
See in Glossary Gizmo and Light direction Gizmo (shown below) are both examples of built-in Gizmos; you can also create your own Gizmos using script. See documentation on Understanding Frustum for more information about the Camera.
Some Gizmos are passive graphical overlays, shown for reference (such as the Light direction Gizmo, which shows the direction of the light). Other Gizmos are interactive, such as the AudioSource spherical range Gizmo, which you can click and drag to adjust the maximum range of the AudioSource.
The Move, Scale, Rotate and Transform tools are also interactive Gizmos. See documentation on Positioning GameObjects to learn more about these tools.
See the Script Reference page for the OnDrawGizmos function for further information about implementing custom Gizmos in your scriptsA piece of code that allows you to create your own Components, trigger game events, modify Component properties over time and respond to user input in any way you like. More info
See in Glossary.
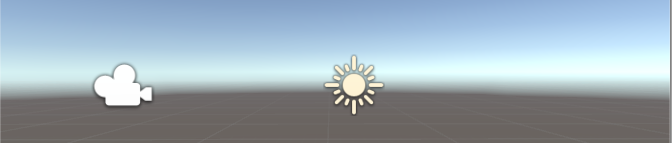
Icons
You can display icons in the Game view or Scene view. They are flat, billboard-style overlays which you can use to clearly indicate a GameObject’s position while you work on your game. The Camera icon and Light icon are examples of built-in icons; you can also assign your own to GameObjects or individual scripts (see documentation on Assigning Icons to learn how to do this).
Selection Outline and Selection Wire
Selection Outline
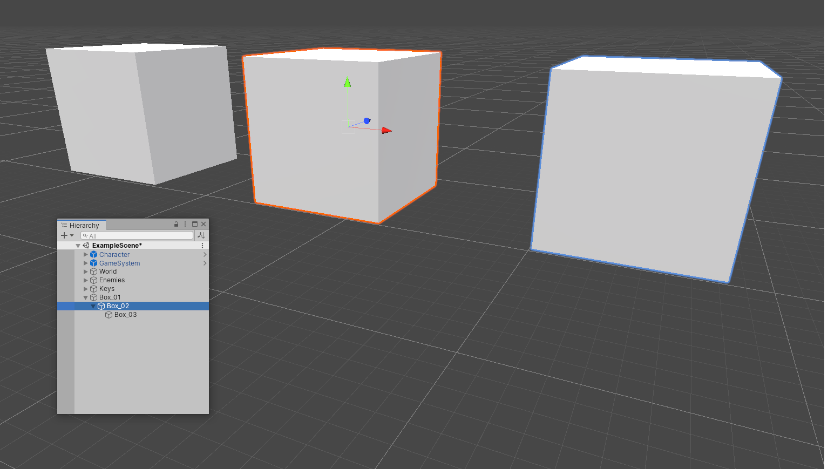
When Selection Outline is enabled, an outline appears around selected GameObjects and their child GameObjects. By default, Unity outlines selected GameObjects in orange, and child GameObjects in blue. You can change these colors in the Unity preferences (see Selection Colors, below).
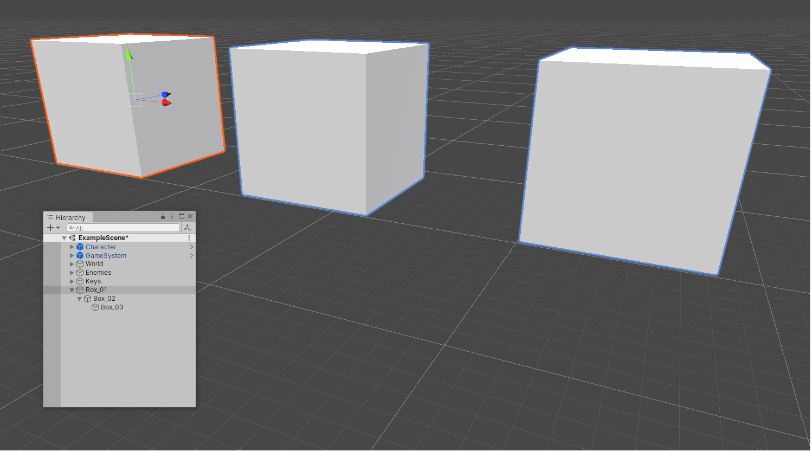
When you select a GameObject, Unity outlines all of its child GameObjects (and their child GameObjects, and so on), but does not outline parent GameObjects (or their parent GameObjects, and so on).
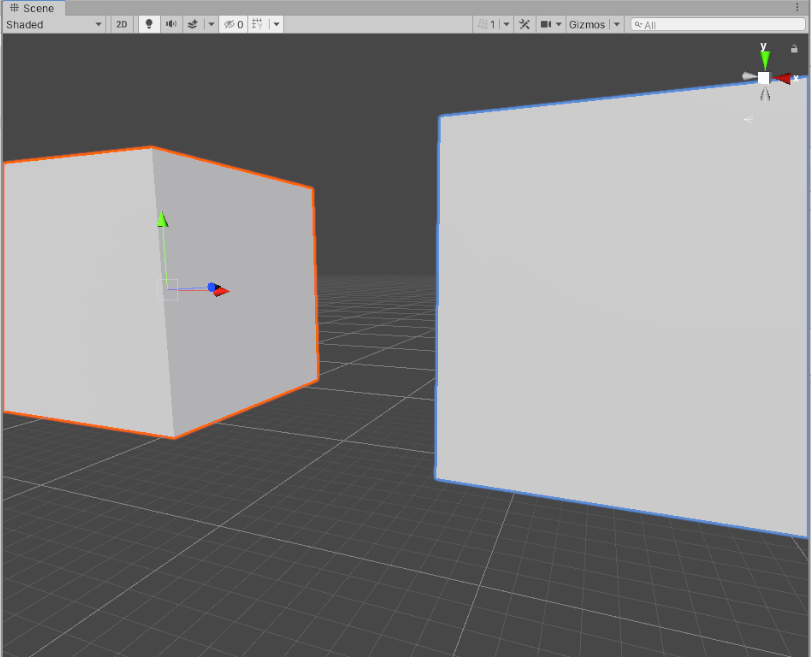
If selected GameObjects extend beyond the edges of the Scene view, the selection outline runs along the edge of the window:
Selection Wire
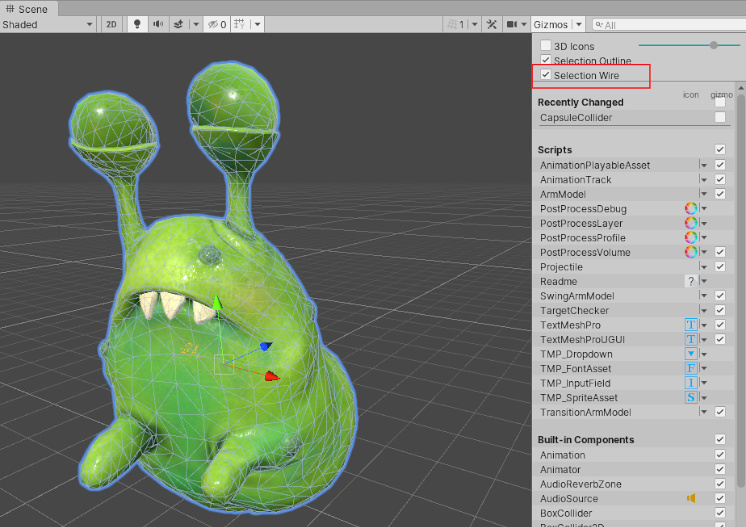
When Selection Wire is enabled, then when you select a GameObject in the Scene view or Hierarchy window, the wireframe MeshThe main graphics primitive of Unity. Meshes make up a large part of your 3D worlds. Unity supports triangulated or Quadrangulated polygon meshes. Nurbs, Nurms, Subdiv surfaces must be converted to polygons. More info
See in Glossary for that GameObject is made visible in the Scene view:
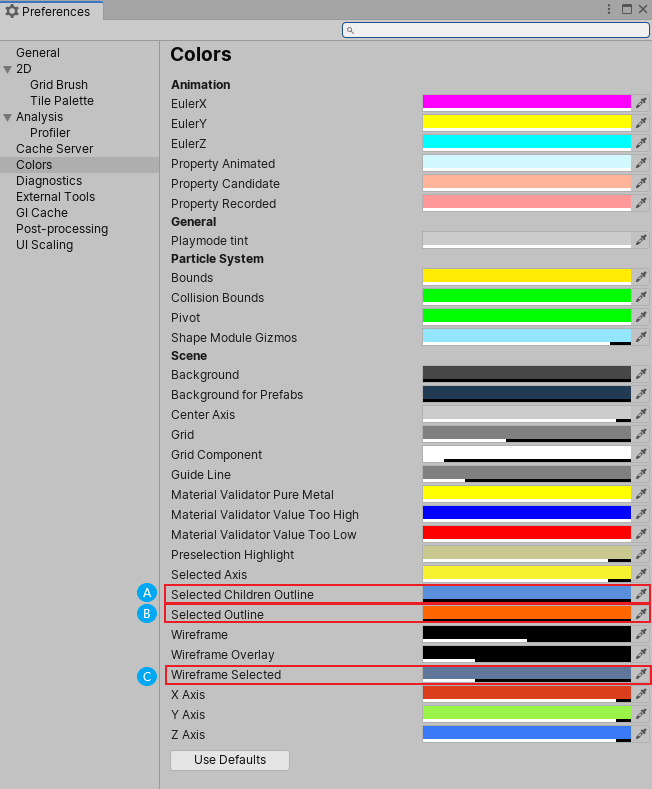
Selection colors
You can set custom colors for selection wireframes.
- Go to Unity > Preferences (macOS) or Edit > Preferences (Windows) to open the Preferences editor.
- On the colors tab, change one or more of the following colors:
- (A) Selected Children Outline: outline color for selected GameObjects’ children.
- (B) Selected Outline: outline color for selected GameObjects.
- (C) Wireframe Selected: outline color for selected GameObjects’ wireframes.
Built-in components, scripts, and recently changed items
Use the list in the Gizmos menu to control the visibility of icons and gizmos for various components. The list is divided into sections:
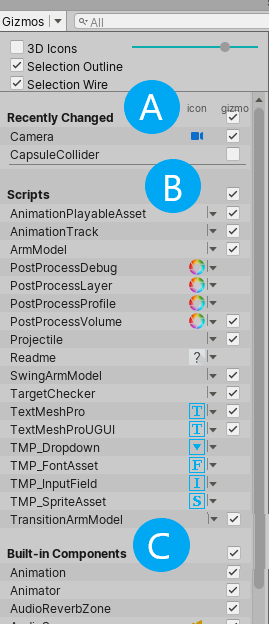
A. The Recently Changed section controls the visibility of the icons and gizmos for items that you’ve modified recently. It appears the first time you change one or more items. Unity updates the list after subsequent changes.
B. The Scripts section controls the visibility of the icons and gizmos for scripts that:
Have an icon assigned to them (see documentation on Assigning icons).
Implement the OnDrawGizmos function.
Implement the OnDrawGizmosSelected function.
This section appears when your Scene contains one or more scripts that meet the above criteria.
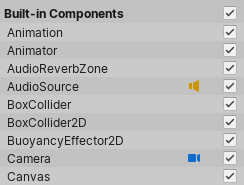
C. The Built-in Components section controls the visibility of the icons and gizmos for all component types that have an icon or gizmo.
Built-in component types that do not have an icon or gizmo shown in the Scene view (for example, Rigidbody) are not listed here.
Toggling icon visibility
The icon column shows or hides the icons for each component type. Full-color icons are displayed in the main Scene view window, faded icons are not.
To toggle an icon’s visibility in the Scene view, click any icon in the icon column.
Note: If an item in the list has a gizmo but no icon, the icon column for that item is empty.
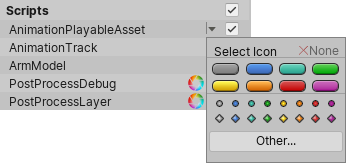
Changing script icons
Scripts with custom icons show a small drop-down menu arrow in the icon column. To change a custom icon, click the arrow to open the Select Icon menu.
Toggling gizmo visibility
To control whether the Editor draws gizmo graphics for a particular component type (for example, a Collider’s wireframe gizmo or a Camera’s view frustum gizmo) or script, use the checkboxes in the Gizmo column.
When a checkbox is checked, the Editor draws gizmos for that component type.
When a checkbox is cleared, the Editor does not draw gizmos for that component type.
Note: If an item in the list has an icon but no gizmo, the Gizmo column for that item is empty.
To toggle gizmo visibility for an entire section (all Built-in Components, all Scripts, and so on), use the checkboxes next to the section names.
When the checkbox is toggled on, gizmo visibility is toggled on for one or more item types in the section.

Copyright © 2023 Unity Technologies
优美缔软件(上海)有限公司 版权所有
"Unity"、Unity 徽标及其他 Unity 商标是 Unity Technologies 或其附属机构在美国及其他地区的商标或注册商标。其他名称或品牌是其各自所有者的商标。
公安部备案号:
31010902002961