App thinning
The Apple store and iOS optimize the installation of iOS, tvOS, and watchOS apps by tailoring app delivery to the capabilities of a user’s particular device. This optimization is called app thinning. App thinning lets you create apps that use the most device features, occupy minimum disk space, and accommodate future updates that can be applied by Apple. Learn more about this optimization process on Apple’s Developer Library page on App Thinning.
Unity lets you implement the following two major components for app thinning:
On-demand resources
On-demand resources (ODR) is a feature available for the iOS and tvOS platforms, from version 9.0 of iOS and tvOS onwards. It allows you to reduce the size of your application by separating the core Assets (those that are needed from application startup) from Assets which may be optional, or which appear in later levels of your game. These additional Assets are called AssetBundles that are available across all Unity build targets, but you must take additional steps to enable them for hosting from the App Store.
AssetBundles can contain Asset files such as models, Materials, Textures, and ScenesA Scene contains the environments and menus of your game. Think of each unique Scene file as a unique level. In each Scene, you place your environments, obstacles, and decorations, essentially designing and building your game in pieces. More info
See in Glossary, but they can’t include scriptsA piece of code that allows you to create your own Components, trigger game events, modify Component properties over time and respond to user input in any way you like. More info
See in Glossary. Therefore, all your scripting logic must reside in the main application. Apple recommends that an AssetBundle be no larger than 64MB in size, to reduce loading time (particularly over-the-air) and minimize the amount of storage space used on the device.
Setting up ODR
To set up your project for ODR, first check that your build type is set to iOS. In the menu bar, go to File > Build Settings.
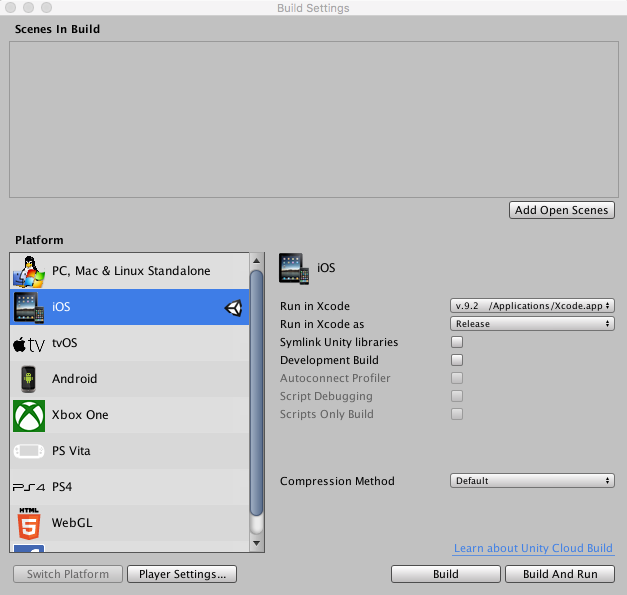
If it isn’t already selected, click on iOS, then click the Switch Platform button. Next, click the Player SettingsSettings that let you set various player-specific options for the final game built by Unity. More info
See in Glossary button. In the InspectorA Unity window that displays information about the currently selected GameObject, asset or project settings, allowing you to inspect and edit the values. More info
See in Glossary window, open Other Settings, navigate to the Configuration section, and enable the Use on demand resources checkbox.

Creating an AssetBundle
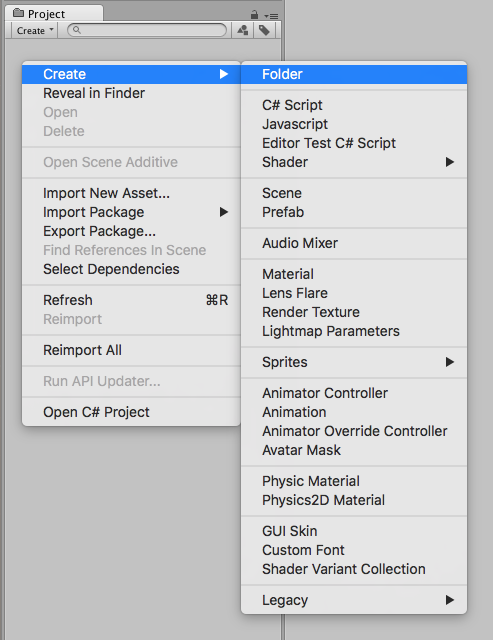
First, create a new folder to group the Assets you want to place into an AssetBundle. To do this, right-click inside the Project window and go to Create > Folder (or click Create > Folder in the top-left of the Project window).
Select the Asset files you wish to add to the AssetBundle, then drag-and-drop them into your new folder.
When creating an AssetBundle, you need to assign it a tag, which is used as an identifier when requesting the AssetBundle download. It’s good practice to create a label that matches the bundle’s filename; this ensure a unique label, and makes it easier to recognise when you are working with it later.
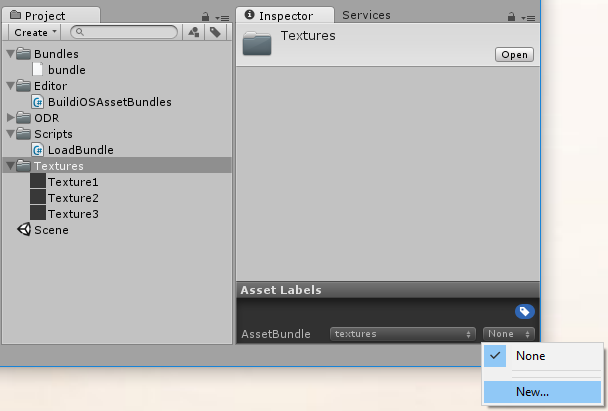
To create or assign a tag, select your new folder and navigate to the Asset Labels section at the bottom of the Inspector window. Click the left-hand drop-down menu, select New, and enter the name of your new label. Note that AssetBundle labels must be lower-case.
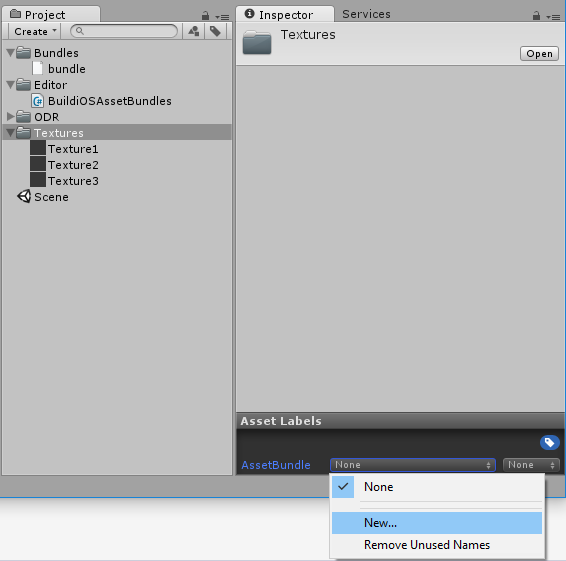
In this example, a folder called Textures is being given a new label.
To generate the new AssetBundle file, you must references the new label in an Editor script. To create an Editor script, create a new folder inside the Project window called Editor. Right-click on the Editor folder and select Create > C# Script. Name the new script BuildiOSAssetBundles.cs.
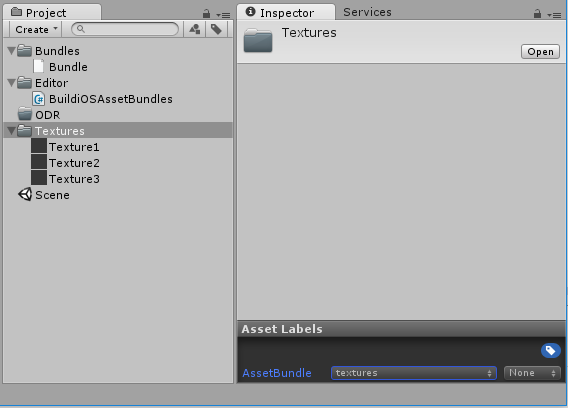
In this example, the Textures folder has the label textures and the new script BuildiOSAssetBundles.cs is created in the Editor folder.
Open BuildiOSAssetBundles.cs and copy in the code below. In this example, the label textures is used; change this throughout with the name of your label (in lower-case text).
Note that this example uses uncompressed bundles; however, this isn’t a requirement for app thinning.
using UnityEngine;
using UnityEditor;


public class BuildiOSAssetBundles : MonoBehaviour
{
    [InitializeOnLoadMethod]
    static void SetupResourcesBuild( )
    {
        UnityEditor.iOS.BuildPipeline.collectResources += CollectResources;
    }

    static UnityEditor.iOS.Resource[] CollectResources( )
    {
        return new UnityEditor.iOS.Resource[]
        {
            new UnityEditor.iOS.Resource( "textures", "Assets/ODR/textures" ).AddOnDemandResourceTags( "textures" ),
            new UnityEditor.iOS.Resource( "bundle", "Assets/Bundles/bundle.unity3d" ).AddOnDemandResourceTags( "bundle" ),
        };
    }

    [MenuItem( "Bundle/Build iOS AssetBundle" )]
    static void BuildAssetBundles( )
    {
        var options = BuildAssetBundleOptions.None;

        bool shouldCheckODR = EditorUserBuildSettings.activeBuildTarget == BuildTarget.iOS;

#if UNITY_TVOS
            shouldCheckODR |= EditorUserBuildSettings.activeBuildTarget == BuildTarget.tvOS;
#endif

        if( shouldCheckODR )
        {
#if ENABLE_IOS_ON_DEMAND_RESOURCES
            if( PlayerSettings.iOS.useOnDemandResources )
                options |= BuildAssetBundleOptions.UncompressedAssetBundle;
#endif

#if ENABLE_IOS_APP_SLICING
            options |= BuildAssetBundleOptions.UncompressedAssetBundle;
#endif
        }

        BuildPipeline.BuildAssetBundles( "Assets/ODR", options, EditorUserBuildSettings.activeBuildTarget );
    }

}
The significant line in the above code sample is the following, which takes the files tagged with the textures label and creates an AssetBundle file called textures within the Assets/ODR folder:
new UnityEditor.iOS.Resource( "textures", "Assets/ODR/textures" ).AddOnDemandResourceTags( "textures" )
For demonstration purposes, the above code sample also includes the following line, which adds an AssetBundle called bundle that’s already built - for example, from another project or a third-party vendor:
new UnityEditor.iOS.Resource( "bundle", "Assets/Bundles/bundle.unity3d" ).AddOnDemandResourceTags( "bundle" )
The whole code sample creates a new menu in the Unity Editor menu bar. Go to Bundle > Build iOS AssetBundle. This generates the AssetBundles in the ODR folder.

The following script downloads the textures ODR AssetBundle, assigning it to the public member TextureBundle. Place this somewhere in your project.
using UnityEngine;
using UnityEngine.iOS;
using System;
using System.Collections;

public class LoadBundle : MonoBehaviour
{
    public AssetBundle     TextureBundle;


    void Start( )
    {
        StartCoroutine( LoadAsset( "textures", "textures" ) );
    }

    public IEnumerator LoadAsset( string resourceName, string odrTag )
    {
        // Create the request
        OnDemandResourcesRequest request = OnDemandResources.PreloadAsync( new string[] { odrTag } );

        // Wait until request is completed
        yield return request;

        // Check for errors
        if( request.error != null )
            throw new Exception( "ODR request failed: " + request.error );

        TextureBundle = AssetBundle.LoadFromFile( "res://" + resourceName );

        request.Dispose( );
    }
}
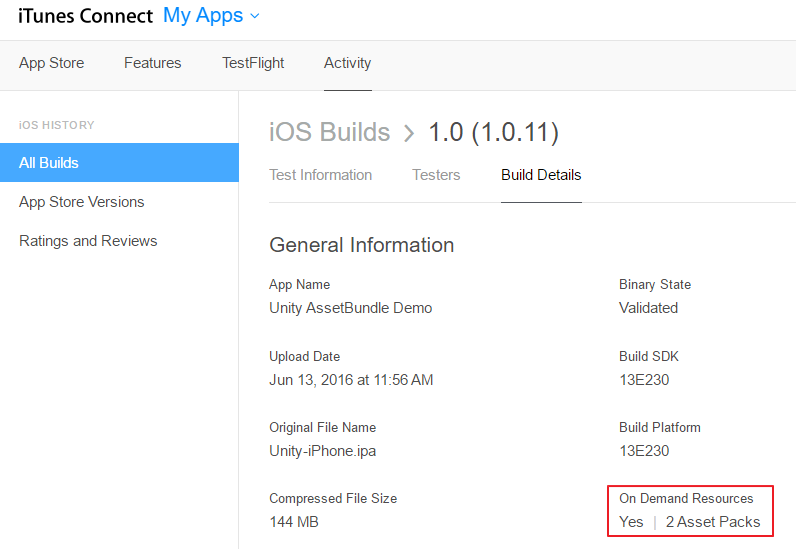
The next step is to generate an Xcode project, build an .IPA, and upload it to iTunes Connect’s TestFlight. As part of the TestFlight processing procedure, the embedded ODR AssetBundles are removed from the app and hosted on Apple’s servers, ready for downloading.
Before you build the .IPA in Xcode, check in XCode’s Build Settings to make sure that in the Assets section, Embed Asset packs In Product Bundle is set to No, and Enable On Demand Resources is set to Yes.

Once iTunes Connect has finished processing your app upload, click on the build version in TestFlight Builds to see more information about it:
App slicing
App slicing follows a similar process to on-demand resourcing, allowing you to dynamically download Assets according the specification of the device the app is running on (for example, to download high-resolution Assets for retina iPads, and low-resolution Assets for smaller devices like iPhones and the iPad Mini). This is achieved by defining AssetBundles, with the added provision of variants. This way, you can decide at startup which variant to use, and automatically append this to the Asset file name upon download.
To create a Variant, click on your new folder and navigate to the Asset Labels section at the bottom of the Inspector window. Click on the right-hand drop-down menu, select New, and enter the name of your new variant. Note that AssetBundle variants must be lower-case.
The new variant must be referenced in an Editor script. To create an Editor script, create a new folder inside the Project window called Editor. Right-click on the Editor folder and select Create > C# Script. Name the new script BuildiOSAppSlices.cs.
Copy and paste the code below, replacing the example label (“textures”) and variants (“hd” and “sd”) with your own. In this code example, multiple folders are referred to: one containing HD textures, and one containing SD textures. These have been given the variants “hd” and “sd” respectively.
using UnityEngine;
using UnityEditor;


public class BuildiOSAppSlices : MonoBehaviour
{
    [InitializeOnLoadMethod]
    static void SetupResourcesBuild( )
    {
        UnityEditor.iOS.BuildPipeline.collectResources += CollectResources;
    }

    static UnityEditor.iOS.Resource[] CollectResources( )
    {
        return new UnityEditor.iOS.Resource[]
        {
            new UnityEditor.iOS.Resource("textures").BindVariant( "Assets/ODR/textures.hd", "hd" )
                                     .BindVariant( "Assets/ODR/textures.sd", "sd" )
                     .AddOnDemandResourceTags( "textures" ),
    };
    }

    [MenuItem( "Bundle/Build iOS App Slices" )]
    static void BuildAssetBundles( )
    {
        var options = BuildAssetBundleOptions.None;

        bool shouldCheckODR = EditorUserBuildSettings.activeBuildTarget == BuildTarget.iOS;

#if UNITY_TVOS
            shouldCheckODR |= EditorUserBuildSettings.activeBuildTarget == BuildTarget.tvOS;
#endif

        if( shouldCheckODR )
        {
#if ENABLE_IOS_ON_DEMAND_RESOURCES
            if( PlayerSettings.iOS.useOnDemandResources )
                options |= BuildAssetBundleOptions.UncompressedAssetBundle;
#endif

#if ENABLE_IOS_APP_SLICING
            options |= BuildAssetBundleOptions.UncompressedAssetBundle;
#endif
        }

        BuildPipeline.BuildAssetBundles( "Assets/ODR", options, EditorUserBuildSettings.activeBuildTarget );
    }

}
This creates a new menu in the Unity Editor menu bar called Bundle. Click this and select the only item in the list, Build iOS App Slices. This generates the AssetBundles in the ODR folder.
Then, to load an Asset, place this class somewhere in your project and pass in the name of the Variant you wish to load:
using UnityEngine;
using UnityEngine.iOS;
using System;
using System.Collections;

public class LoadBundle : MonoBehaviour
{
    public AssetBundle     TextureBundle;


    void Start( )
    {
        StartCoroutine( LoadAsset( "textures", "textures" ) );
    }

    public IEnumerator LoadAsset( string resourceName, string odrTag )
    {
        // Create the request
        OnDemandResourcesRequest request = OnDemandResources.PreloadAsync( new string[] { odrTag } );

        // Wait until request is completed
        yield return request;

        // Check for errors
        if( request.error != null )
            throw new Exception( "ODR request failed: " + request.error );

        TextureBundle = AssetBundle.LoadFromFile( "res://" + resourceName );

        request.Dispose( );
    }
}
You can now see and modify variants in Player Settings > Other Settings > Configuration in a Variant map for app slicing drop-down menu. The Variant map for app slicing menu is visible only if Use on demand resources is enabled in Player Settings.

Additional resources:
Copyright © 2023 Unity Technologies
优美缔软件(上海)有限公司 版权所有
"Unity"、Unity 徽标及其他 Unity 商标是 Unity Technologies 或其附属机构在美国及其他地区的商标或注册商标。其他名称或品牌是其各自所有者的商标。
公安部备案号:
31010902002961