Setting up your project for Unity services
To start using Unity services, you must first link your Unity project to a Project ID. You can create a new Project ID within the Unity Editor, or in the Unity developer dashboard.
To link your project from the Unity Editor:
- Open the Services window (Window > General > Services).
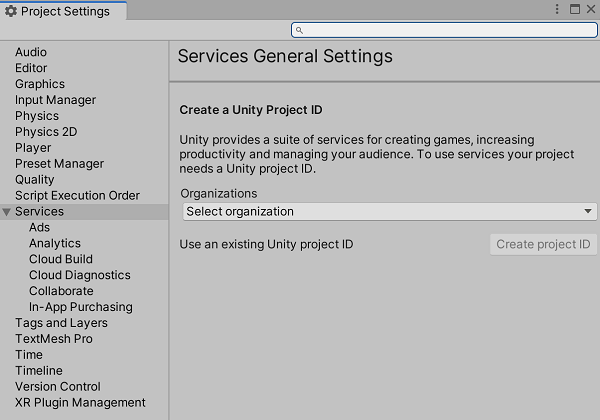
- Click General settings to open the Services section of the Project settingsA broad collection of settings which allow you to configure how Physics, Audio, Networking, Graphics, Input and many other areas of your project behave. More info
See in Glossary menu. - Select your Organization from the dropdown. You must be signed in to Unity Hub in order to view a list of associated Organizations. For more information, see documentation on Organizations.
- Click Use an existing Unity project ID to link a project to an ID you previously created on the developer dashboard, or Create project ID to link your project to a new ID.
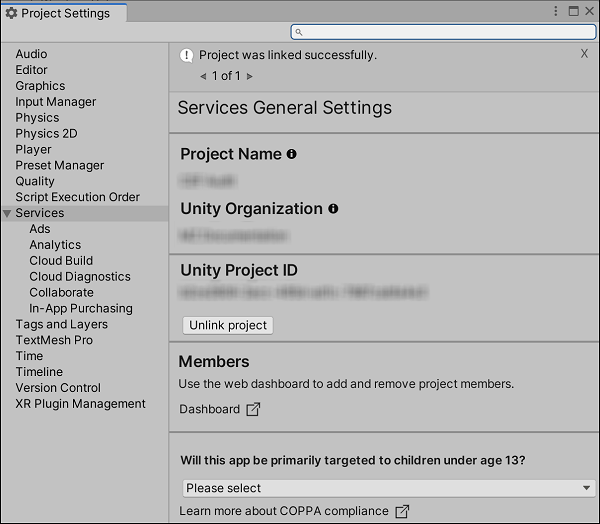
Note: Your project is now available to manage in the developer dashboard. For more information, see documentation on using the developer dashboard.
In the Editor, new settings will appear, allowing you to unlink the specified Project ID, and define a COPPA compliance setting.
Your project is now configured to integrate Unity services. See the following pages for more information on integrating specific services:
- Collaborate
- Cloud BuildA continuous integration service for Unity projects that automates the process of creating builds on Unity’s servers. More info
See in Glossary - Cloud Diagnostics
- Multiplayer
- AnalyticsAbbreviation of Unity Analytics
See in Glossary - GameTune
- Unity Ads
- In-app purchasing
Copyright © 2023 Unity Technologies
优美缔软件(上海)有限公司 版权所有
"Unity"、Unity 徽标及其他 Unity 商标是 Unity Technologies 或其附属机构在美国及其他地区的商标或注册商标。其他名称或品牌是其各自所有者的商标。
公安部备案号:
31010902002961