- Unity User Manual (2017.2)
- 动画
- 动画剪辑
- 外部来源的动画
- Masking Imported Clips
Masking Imported Clips
Masking allows you to discard some of the animation data within a clip, allowing the clip to animate only parts of the object or character rather than the entire thing. A good example of this would be a character with a throwing animation. If you wanted to be able to use the throwing animation in conjunction with various other body movements such as running, crouching and jumping, you could create a mask for the throwing animation limiting it to just the right arm, upper body and head. This portion of the animation can then be played in a layer over the top of the base running or jumping animations.
Masking can be applied to animation clips either during import time, or at runtime. Masking during import time is preferable, because it allows the discarded animation data to be omitted from your build, making filesize and memory footprint smaller. It also makes for faster processing speed because there is less animation data to be blended at runtime. In some cases, import masking may not be suitable for your purposes, in which case you can apply a mask at runtime by using the layer settings of the Animator Controller. This page relates to masking in the import settings.
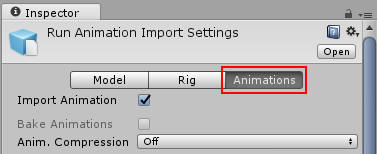
To apply a mask to an imported animation clip, first select the imported animation file in your project view, then in the import settings in the inspector, select the Animations button.

Then scroll all the way to the bottom of the inspector to find the Mask heading, among the four fold-out headings as shown:

Expand the Mask heading to reveal the Mask options. When you open the menu, you’ll see three options: Definition, Humanoid and Transform.

定义
在此处可以指定是否要在 Inspector 中专门为此剪辑创建一次性遮罩,或者是否要使用项目中的现有遮罩资源。
如果希望仅为此剪辑创建一次性遮罩,请选择“Create From This Model”。
如果希望多个剪辑使用相同的遮罩,则应选择“Copy From Other Mask”并使用遮罩资源。这样即可对多个剪辑重复使用同一个遮罩定义。
选择 Copy From Other Mask 时,Humanoid 和 Transform 选项不可用,因为这些选项仅与在此剪辑的 Inspector 中创建一次性遮罩有关。

Humanoid
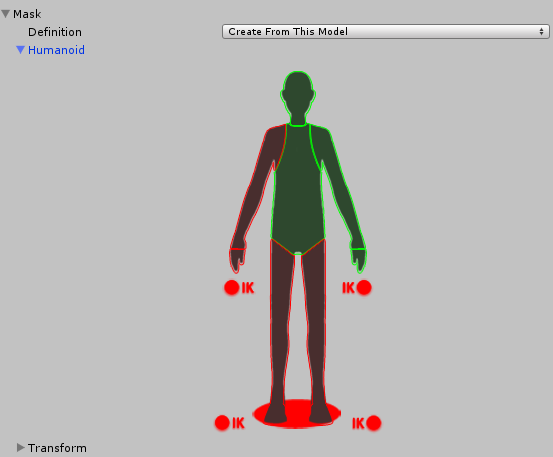
Humanoid 选项可让您选择或取消选择人体图的身体部位,从而快速定义遮罩。如果已将动画标记为人形并具有有效的 Avatar,则可以使用此类选项。

Transform
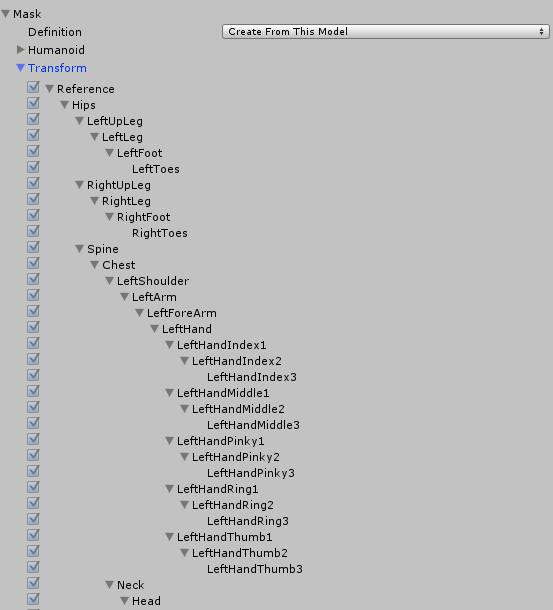
使用此选项可根据各个骨骼或动画的移动部件来指定遮罩。这样可以更精确地控制确切的遮罩定义,还可以将遮罩应用于非人形动画剪辑。
