- Unity User Manual (2019.1)
- 时间轴
- Using the Timeline window
- Using Animation Override tracks and Avatar Masking
Using Animation Override tracks and Avatar Masking
This task demonstrates how to use an Animation Override track and an Avatar Mask to replace the upper-body animation of an Animation track. Use this technique to animate a humanoid to, for example, run and carry an object. For information on creating an Avatar mask, see Avatar Mask window.
This task assumes that you have already created a Timeline instance with a simple Animation clip on an Animation track bound to a humanoid:

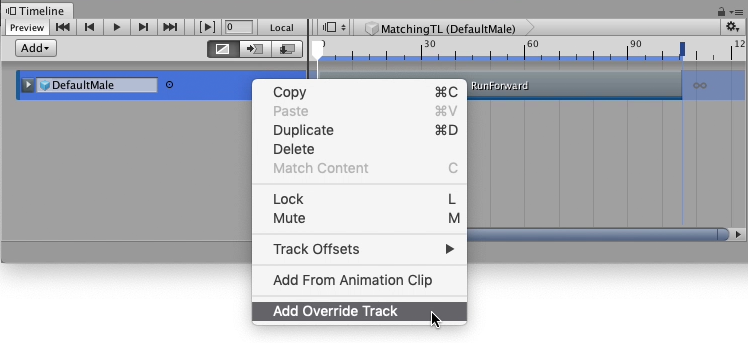
Right-click the Animation track and select Add Override Track from the context menu. An Animation Override track, named Override 0, is linked to the selected Animation track. Notice that the Animation Override track is not bound to a GameObject. Because the Override track is linked to the Animation track above, the Override track is bound to the same GameObject, in this case, the DefaultMale humanoid.

From your Project, drag an Animation Clip with upper-body animation into the Override track. For example, drag an animation of a humanoid standing still and waving their arms. Position and resize the clip to match the Animation clip that you want to override.

Play the Timeline instance. In this example, the WavingArms clip completely overrides the RunForward clip. To combine the lower-body animation from one Animation clip with upper-body animation from another Animation clip, specify an Avatar Mask for the Animation Override track.

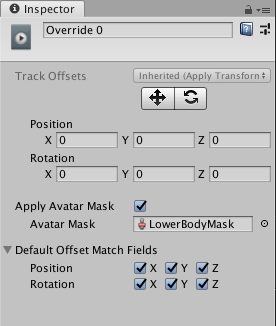
From the Project, drag an Avatar Mask, that masks the lower body animation, into the Avatar Mask property in the Inspector window. Enable the Apply Avatar Mask checkbox. An Avatar Mask icon appears beside the track name.


Play the Timeline instance. In this example, the DefaultMale humanoid uses upper-body animation from the WavingArms clip and lower-body animation from the RunForward clip. To temporarily disable the Avatar Mask, click the Avatar Mask icon.

- 2019–08–20 页面已发布并只进行了有限的编辑审查