Setting up Unity Collaborate
启用服务
To use Collaborate, Unity Services must be enabled on your project. For more information, see Setting up your project for Unity Services.
Collaborate is distributed as a pre-installed Unity package. You can update or uninstall Collaborate using the Unity Package Manager.
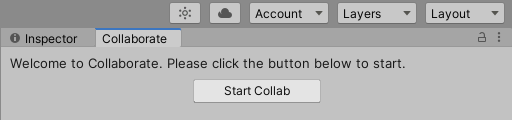
To enable Collaborate in your project:
- In the Unity Editor toolbar, click the collaborate button.

- Click Start Collab.
Note: If the collaborate button is not available, it is likely that the Collaborate package is not installed. Use the Package Manager to reinstall it.
Publishing changes to your project
If you enable Collaborate on a newly created project, your project is automatically published to the cloud.
If you are adding Collaborate to an existing project, you might need to manually publish your project.
To publish your changes and share them with your teammates:
- Click the collaborate button.
- Select the files you wish to publish.
- Click Publish.
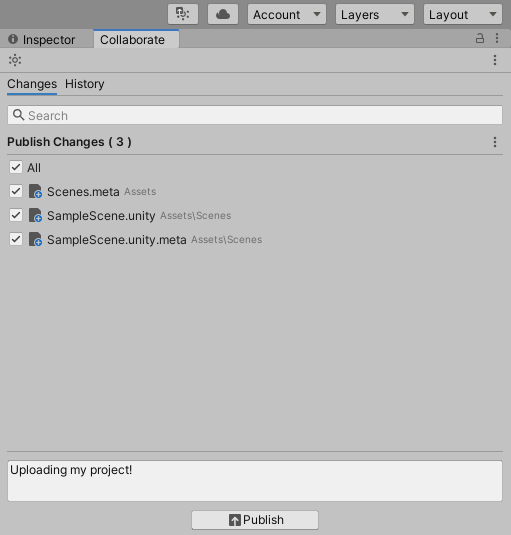
When you make changes to your project, the collaborate button displays an up arrow to indicate there are unpublished changes.

Getting changes from the server
When another team member makes changes to the project and publishes to the cloud, the collaborate button displays an icon to indicate that there are new remote changes that your local version of the project doesn’t have.
To get the latest changes from the server, click Sync in the Collaborate window.
- 2019–04–24 页面已发布
Copyright © 2023 Unity Technologies
优美缔软件(上海)有限公司 版权所有
"Unity"、Unity 徽标及其他 Unity 商标是 Unity Technologies 或其附属机构在美国及其他地区的商标或注册商标。其他名称或品牌是其各自所有者的商标。
公安部备案号:
31010902002961