- Unity User Manual 2023.2 (beta)
- User interface (UI)
- UI 工具包
- Structure UI
- Structure UI examples
- Create a custom style for a custom control
Create a custom style for a custom control
Version: 2023.2+
This example demonstrates how to use custom USS variables in a custom control.
Example overview
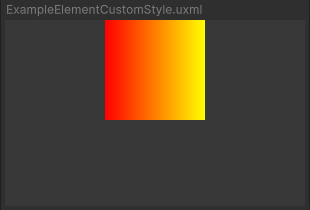
This example creates a custom control that reads two colors from USS and uses them to generate a texture.

You can find the completed files that this example creates in this GitHub repository.
先决条件
This guide is for developers familiar with the Unity Editor, UI Toolkit, and C# scripting. Before you start, get familiar with the following:
Create the custom control
Create a C# script to define the custom control and a USS file to define the custom style.
- Create a Unity project with any template.
- Create a folder named
create-custom-style-custom-controlto store your files. - In the
ExampleElementCustomStylefolder, create a C# script namedExampleElementCustomStyle.csand replace its contents with the following:
Create the custom control and custom style
Create a USS file named ExampleElementCustomStyle.uss and replace its contents with the following:
Use the custom control in UI Document
Create a UI Document to use the custom control and apply the custom style to the custom control.
- In the
ExampleElementCustomStylefolder, create a UI Document namedExampleElementCustomStyle.uxml. - Double-click
ExampleElementCustomStyle.uxmlto open it in the UI Builder. - Select Library > Project > UIToolkitExamples, and drag ExampleElementCustomStyle to the Hierarchy window. A grey square appears in the Viewport window.
- Add the
ExampleElementCustomStyle.ussfile as an existing USS. This applies the custom USS variables to the square.
其他资源
Copyright © 2023 Unity Technologies
优美缔软件(上海)有限公司 版权所有
"Unity"、Unity 徽标及其他 Unity 商标是 Unity Technologies 或其附属机构在美国及其他地区的商标或注册商标。其他名称或品牌是其各自所有者的商标。
公安部备案号:
31010902002961