- Unity User Manual 2023.2 (beta)
- 世界観の構築
- Terrain
- 草とその他のディテール
草とその他のディテール
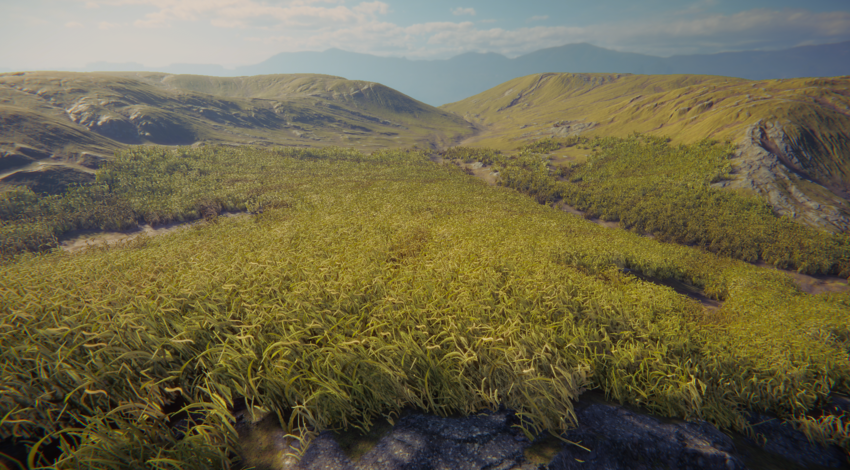
Terrain (地形) の表面が草の塊や他の小さな物オブジェクト (岩など) で覆われている場合があります。Unity は、必要なディテールやパフォーマンスのレベルに応じて、テクスチャ化したクアッドや完全なメッシュを使用してこれらのオブジェクトをレンダリングします。
Instancing details work with all render pipelines, including the High Definition Render Pipeline (HDRP).

Terrain (地形) のディテールにはいくつかのモードがあり、それぞれのモードはゲーム開発中に異なる用途で使用されます。
| モード | 説明 |
|---|---|
| インスタンスメッシュ | Unity ではこのモードの使用を推奨しています。理由は、このモードは、Terrain (地形) 上に任意の数のメッシュを配置する必要があるほとんどのシナリオで最適だからです。 インスタンシングしたメッシュを追加するには、Add Detail Mesh を選択し Use GPU Instancing オプションを有効にします。 |
| Vertex Lit メッシュ | レンダリングに GPU インスタンシングを使用しません。代わりに、すべてのディテールインスタンスを 1 つのメッシュに結合します。結果的にシンプルなシェーディングとなり、実現できるインスタンスの数に制限があります。 Vertex Lit メッシュを加えるには、Add Detail Mesh を選択し、Render Mode を Vertex Lit に設定します。 |
| 草メッシュ | Vertex Lit メッシュと同様に動作しますが、Unity はこれらのメッシュを草として扱うので、常に上向きの法線を持ち、風で動きます。 草のメッシュを追加するには、Add Detail Mesh を選択し、Render Mode を Grass に設定します。 |
| 草テクスチャ | 風で動く草のクアッドメッシュをテクスチャから直接作成できます。カスタムメッシュを指定する必要はありません。また、ビルボード効果のために草のクアッドを常にカメラに向けるようにするオプションも用意されています。 このオプションを使うには、Add Grass Texture を選択します。 |
Paint Details
草とディテールのペイントを利用するには、Terrain Inspector のツールバーで、Paint Details (ディテールをペイント) ボタンを選択します。

To access Paint Details from an overlay:
- In the Terrain Tools overlay, select Foliage Mode
 . Foliage Mode tools display at the end of the Terrain Tools overlay.
 - From the available Foliage Mode tools on the Terrain Tools overlay, select Paint Details
 .
.
最初は、Terrain に利用できる草やディテールはありませんが、Inspector ウィンドウで Edit Details ボタンをクリックすると、Add Detail Mesh と Add Grass Texture オプションが表示されます。いずれかのオプションを選択すると、ウィンドウが表示され、Terrain をペイントするアセット の選択ができます。
ディテールメッシュを加える

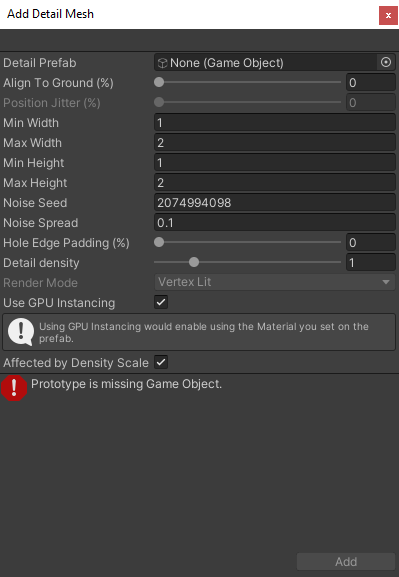
Use the Detail Prefab field to select a Prefab from your Project. To create an authentic look, a random factor affects each mesh to determine the size and color. Unity uses the Perlin noise algorithm to generate such random factors.
Min Width、Max Width、Min Height、Max Height の値は、メッシュをランダムに生成する X 軸と Y 軸に沿った上下のスケーリングを指定します。
The Align to Ground (%) value specifies how much the detail axis aligns to the terrain normal. 0 is unaligned, and 100 is aligned to the normal.
The Position Jitter (%) controls the randomness of the detail distribution from ordered to random. This is only available when legacy distribution is turned off in Quality settings.
Noise Seed 設定は、乱数生成のシードを設定します。固有のシード値が一意の値を生成するのに必要です。もし、2 つのタイプのディテールに同じシードを設定すると、まったく同じインスタンスが生成されます。Noise Spread 値は、X-Z 平面上のノイズパターンのスケーリングを参照し、値が高いほど与えられた領域内でより多くのバリエーションがあることを示します。
Hole Edge Padding (%) 設定は、ディテールオブジェクトが穴領域の端からどのくらい離れているかを制御します。詳細は、DetailPrototype.holeEdgePadding を参照してください。
The Detail Density value controls the detail’s density relative to its size. You can enable this in “Coverage” detail scatter mode, set in Terrain Settings.
Healthy Color and Dry Color settings control the color variation. Unity performs linear interpolation between the healthy and dry colors, and selects a color based on the size of the mesh. For example, the system considers bigger-sized meshes to be healthier. The linear interpolation results for such meshes lean more towards the Healthy Color tint. These color settings disappear when you select Use GPU Instancing because they have no effect on instanced meshes.
The Affected by Density Scale checkbox determines whether the Detail Density Scale setting set in the Terrain Settings affects this detail.
Render Mode を Vertex Lit または Grass に設定できます。
| Render Mode | 説明 |
|---|---|
| Vertex Lit | シーンで、ディテールメッシュを風に吹かれても動かない固定の、Vertex Lit ゲームオブジェクトとしてレンダリングします。 |
| Grass | シーンで、ディテールメッシュをグラステクスチャに似た簡易化したライティングでレンダリングします。ディテールは、風に吹かれて動きます。 |
Note: To apply a texture on a detail using Vertex Lit or Grass render mode, assign a texture to the MainTex material property (default property name for Base Color Map in built-in/URP). No other material properties are considered for non-instanced details.
Use GPU Instancing
You can specify if you want to use GPU instancing to render your detail meshes. With GPU instancing, Unity uses the material and the shader specified on the prefab for rendering. This lets you perform more customization in the shader and use Shader Graph.
Unity still applies the Width and Height noise to each instance, but disables the Healthy Color/Dry Color noise. You can use your own color variation technique, along with other randomizations, in the shader.
Under the hood, some Unity GPU instancing limitations do affect rendering. For example:
- ターゲットプラットフォームが GPU インスタンシングをサポートする必要があります。
- シェーダーが GPU インスタンシングをサポートする必要があります。(ほとんどのシェーダーはサポートします)。
- オブジェクトは 1,023 個以下のバッチで描画されます。
- Instanced light probe lighting or lightmap lighting aren’t supported.
Unity がフレームごとに動的にインスタンス定数バッファを構築する通常のインスタンシングとは異なり、ディテールのインスタンシングは、それがターゲットハードウェアで可能な場合、CPU と GPU のパフォーマンスを向上させる永続的な定数バッファを持っています。ただし、それと引き換えに GPUメモリ使用量が少し増加します。
Use GPU Instancing を選択すると、Render Mode の設定がグレーアウトして利用できなくなります。
草のテクスチャを加える

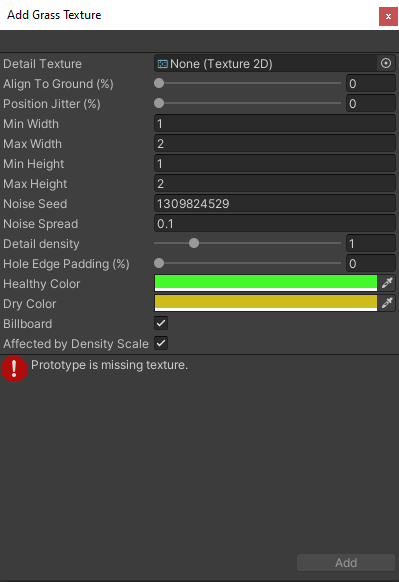
Add Grass Texture ウィンドウ
Detail Texture is the Texture that represents the grass. You can download Textures from the Asset Store, or create your own Textures. A Texture is a small image with alpha set to zero for the empty areas. Note that “Grass” is a generic term; it’s possible for a Texture to represent flowers or man-made objects such as barbed wire coils.
The Min Width, Max Width, Min Height, Max Height, Noise Seed, Noise Spread, Hole Edge Padding (%), Align to Ground (%), Position Jitter (%), Detail Density, Affected by Density Scale, Healthy Color, and Dry Color settings work the same as they do for meshes. The Add Detail Mesh section above provides more details.
When you enable the Billboard option, the grass images rotate so that they always face the Camera. This is useful when you want to display a dense field of grass because clumps are two-dimensional, and not visible from the side. However, with sparse grass, the rotations of individual clumps might become visible, which could a strange effect.
ディテールの削除
ディテールを削除するには、削除するディテールを選択し、Edit Details ボタンをクリックし、 Remove を選択します。ディテールを削除すると、そのディテールを配置した Terrain (地形) 領域を表すデータが除去されます。
- 2022–07–20 修正されたページ
- Added information about detail density and distribution.