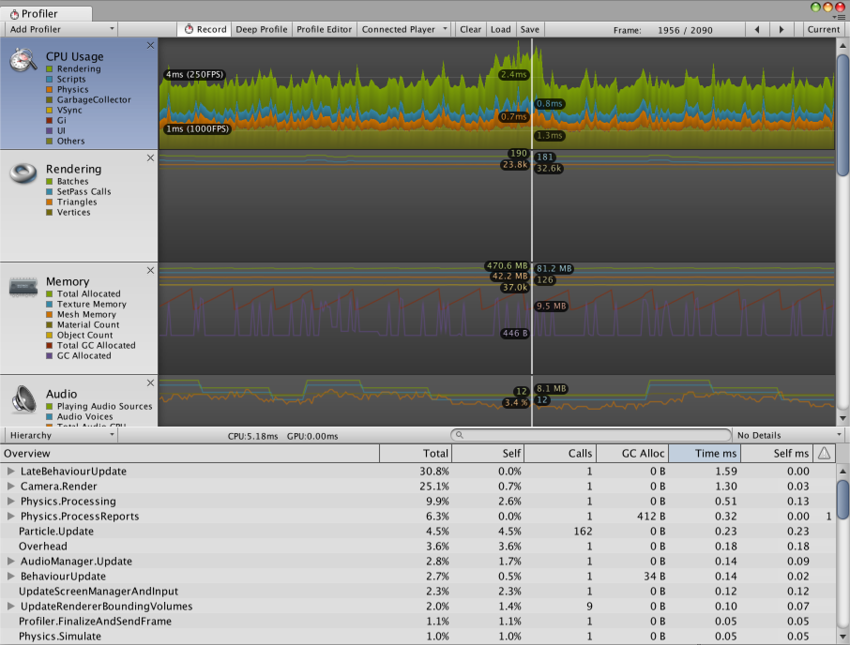
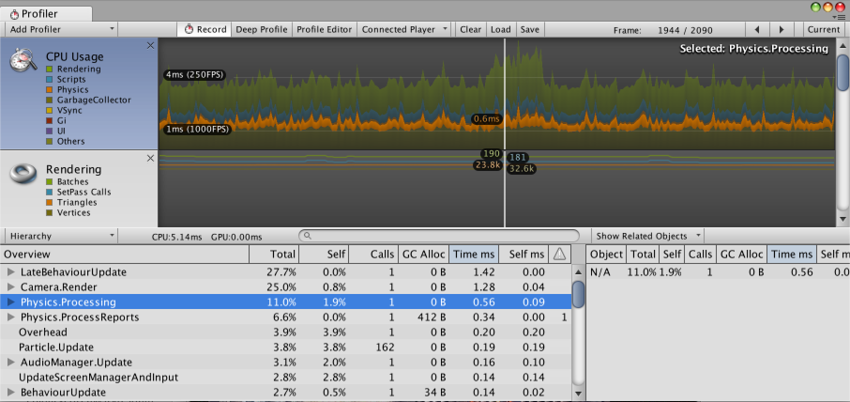
Profiler window
Access the Profiler window in the Unity Editor via the toolbar: Window > Profiler.
See Profiler overview for a summary of how the Profiler works.

Profiler Controls

The Profiler controls are in the toolbar at the top of the window. Use these to turn profiling on and off, and navigate through profiled frames. The transport controls are at the far right end of the toolbar. Note that when the game is running and the profiler is collecting data, clicking on any of these transport controls pauses the game. The controls go to the first recorded frame, step one frame back, step one frame forward and go to the last frame respectively.
The Profiler does not keep all recorded frames, so the notion of the first frame should really be though of as the oldest frame that is still kept in memory. The “current” transport button causes the profile statistics window to display data collected in real-time. The Active Profiler popup menu allows you to select whether profiling should be done in the editor or a separate player (for example, a game running on an attached iOS device). Save button lets you write the recorded frames to a file. Correspondingly, Load button reads data saved earlier. You can also load a binary profile data written out by the player (when generating log, set Profiler.enableBinaryLog to enable binary format). If “Load” is clicked while the shift button is pressed, file contents is appended to the current profile frames in memory.
Глубокий профайлинг
При включенной кнопке Deep Profile, все ваши скрипты профилируются, то есть записываются вызовы всех функций. Это полезно, когда вы хотите выяснить куда именно тратится время в коде вашей игры.
Учтите, что глубокий профайлинг привносит очень большие избыточные нагрузки и требует много памяти, в результате чего ваша игра будет работать значительно медленнее при профилировании. Если вы используете очень сложный код, глубокий профайлинг может быть вообще невозможен. Глубокий профайлинг должен довольно быстро работать на небольших играх с простым кодом. Если вы заметили, что включение глубокого профайлинга приводит к такому падению частоты кадров, что игра едва работает, то следует отказаться от использования глубокого профайлинга и использовать способ, описанный ниже. Глубокий профайлинг будет полезен на этапе разработки дизайна игры, чтобы определить как лучше реализовать те или иные ключевые возможности. Учтите, что при использовании глубоко профайлинга на больших проектах может привести к переполнению памяти Unity, делая глубокий профайлинг невозможным.
Manually profiling blocks of your script code will have a smaller overhead than using Deep Profiling. Use Profiler.BeginSample and Profiler.EndSample scripting functions to enable and disable profiling around sections of code.
View SyncTime (Отображение времени синхронизации)
При проигрывании с фиксированной частотой кадров или при включенной вертикальной синхронизации, Unity записывает время ожидания как “Wait For Target FPS”. По умолчанию, это время не отображается в профайлере. Чтобы посмотреть, сколько времени тратится на ожидание, вы можете включить “View SyncTime”. Также это помогает измерить как много времени у вас есть в запасе до снижения частоты кадров.
Profiler Timeline

В верхней части окна профайлера отображаются данные о производительности с течением времени. Когда вы запускаете игру, данные записываются каждый кадр и в профайлере выводится история последних нескольких сотен кадров. Клик на определенном кадре выделит его и в нижней части окна отобразит дополнительные данные, записанные в этом кадре. Дополнительные данные будут представлены в виде, соответствующем выделенной области.
Вертикальный масштаб временной шкалы устанавливается автоматически так, чтобы заполнялось вертикальное пространство окна. Заметьте, что вы можете удалить ненужные области для более детального просмотра нужной вам области, например можно удалить области Memory и Rendering, чтобы лучше рассмотреть область CPU. Также для увеличения площади под диаграмму временной шкалы, можно перетащить вниз горизонтальный разделитель между временной шкалой и панелью статистики.
Временная шкала состоит из нескольких областей: CPU Usage, Rendering и Memory. Эти области можно как удалить с помощью нажатия на кнопку закрытия на панели, так и добавить обратно с помощью выпадающего меню Add Area на панели инструментов профайлера.
Обратите внимание, что с помощью цветных меток вы можете контролировать связанные с ними части временной шкалы. Нажмите на метку для отключения отображения соответствующих данных. Метка затемнится и данные будут убраны из графика. Это может быть полезно при определении причин зашкаливающих скачков в графике CPU, например.
WebGL
You can use the Unity profiler on WebGL, just like on any other platform. One important distinction is that you cannot attach to running players in WebGL, though, as WebGL uses WebSockets for communication, which will not allow incoming connections on the browser side. Instead, you need to use the “Autoconnect profiler” checkbox in the build settings. Note also that draw calls cannot currently be profiled for WebGL.
Remote Profiling
To profile your game running on another device or a Unity player running on another computer, you can connect the Unity Editor to that other device or computer. The dropdown Active Profiler shows all Unity players running on the local network. These players are identified by player type and the host name running the player “iPhonePlayer (Toms iPhone)”.
To be able to connect to a Unity player, you must launch that Unity player as a Development build (menu: File > Build Settings…).
Check the Development Build option in the dialog box. From here you can also check Autoconnect Profiler to make the Editor and Player Autoconnect at startup.
iOS
Enable remote profiling on iOS devices by following these steps:
- Connect your iOS device to your WiFi network. (The Profiler uses a local WiFi network to send profiling data from your device to the Unity Editor.)
- In the Unity Editor’s Build Settings dialog box (menu: File > Build Settings…), check the Autoconnect Profiler checkbox.
- Attach your device to your Mac via cable. In the Unity Editor’s Build Settings dialog box (menu: File__>__Build Settings…), check the Autoconnect Profiler checkboxcheck and select Build & Run.
- When the app launches on the device, open the Profiler window in the Unity Editor (Window > Profiler).
Если вы используете брандмауэр, убедитесь, что порты с 54998 по 55511 открыты в исходящих правилах - это порты, используемые Unity для удалённого профайлинга.
Note: Sometimes the Unity Editor might not autoconnect to the device. In such cases you can initiate the Profiler connection from Profiler window Active Profiler drop down menu by select appropriate device.
Андроид
There are two methods to enable remote profiling on Android devices: WiFi or ADB.
Следуйте этим шагам для профайлинга через WiFi:
- Удостоверьтесь, что на вашем Andoid устройстве отключены мобильные данные.
- Connect your Android device to your WiFi network.(The Profiler uses a local WiFi network to send profiling data from your device to the Unity Editor.)
- Attach your device to your Mac or PC via cable. Check the Development Build and Autoconnect Profiler checkboxes in Unity’s Build Settings dialog box, and click on Build & Run in the Unity Editor.
- When the app launches on the device, open the Profiler window in the Unity Editor (Menu: Window > Profiler).
- If the Unity Editor fails to autoconnect to the device, select the appropriate device from the Profiler window Active Profiler drop down menu.
Важно: И устройство с Andoid и компьютер (с запущенным редактором Unity), к которому вы его подключили, оба должны находиться в одной подсети, чтобы редактор мог определить устройство.
Следуйте этим шагам для ADB профайлинга:
- Attach your device to your Mac or PC via cable and make sure ADB recognizes the device (i.e. it shows in adb devices list).
- In the Unity Editor’s Build Settings dialog box (menu: File__>__Build Settings…), check the Development Build__checkboxcheck and select Build & Run__.
- When the app launches on the device, open the Profiler window in the Unity Editor (Menu: Window > Profiler).
- Select the AndroidProfiler(ADB@127.0.0.1:34999) from the Profiler Window Active Profiler drop down menu. Note: The Unity Editor automatically creates an adb tunnel for your application when you click on Build & Run. If you want to profile another application or you restart the adb server you have to setup this tunnel manually. To do this, open a Terminal window / CMD prompt and enter:
adb forward tcp:34999 localabstract:Unity-{insert bundle identifier here}
Важно: Указанный выше пункт выпадающего меню виден только если в качестве целевой платформы выбран Andoid.
Если вы используете брандмауэр, убедитесь, что порты с 54998 по 55511 открыты в исходящих правилах - это порты, используемые Unity для удалённого профайлинга.
• 2017–05–16 Page amended with no editorial review