Деревья
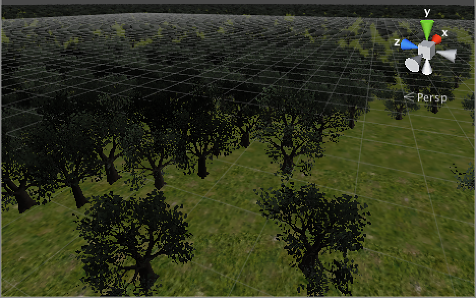
Terrain’ы в Unity могут быть дополнены деревьями. Островки с деревьями можно рисовать прямо на terrain’е, аналогично рисованию карт высот и текстур, но деревья - полноценные 3D объекты, которые растут из поверхности. Unity использует оптимизации (например, превращает удалённые деревья в спрайты) для сохранения хорошей производительности рендеринга, так что вы можете иметь плотно засаженные леса с тысячами деревьев, и сохранять при этом приемлемую частоту кадров.
Enabling trees
Кнопка с деревом на панели инструментов автивирует рисование деревьями.

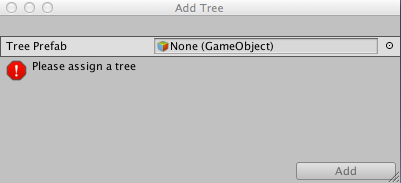
Изначально, у terrain’а не будет доступных деревьев, но если вы нажмёте на кнопку Edit Trees и в выпавшем меню выберите Add Tree, вы увидите окно, в котором можно выбрать ассет дерева из вашего проекта.
Unity comes with several sample SpeedTree tree objects in the Standard Assets packages for prototyping purposes Assets > Import Package > Terrain Assets) but you can also create suitable objects with SpeedTree Modeler app, Unity Tree Creator tools or other 3D modelling apps.
If the selected tree object is created by the Tree Creator, the window will show Bend factor for adjusting the wind responsiveness. See the section on Making trees bend in the wind below.
Painting trees
With a tree selected, you can paint onto the landscape in the same way you paint textures or heightmaps. You can remove trees from an area by holding the shift key while you paint and remove just the currently selected tree type by holding down the control key. The familiar Brush Size option is available for tree painting but the Opacity property is replaced by Tree Density, which controls the average number of trees painted into a given unit of area.
There is a ranged slider for you to control the tree’s minimal height and maximal height. If you disable Random, you can specify a value for all tree’s height. By default a tree’s width is locked to height so that trees are always scaled uniformly. However you can disable Lock Width to Height option and specify the width separately.
There is also a control for Color Variation and Random Tree Rotation. The variation options help to create the impression of a random, natural-looking forest rather than an artificial plantation of identical trees.
Кнопка Mass Place Trees (массово разместить деревья) очень полезна для полного покрывания terrain’а деревьями без рисования по ландшафту. После массового размещения вы всё ещё можете использовать инструменты рисования для добавления или удаления деревьев, чтобы создать более плотные или редкие области.
SpeedTree/LOD trees
From Unity 5, you can use SpeedTree Modeler from IDV, Inc. to create trees with advanced visual effects such as smooth LOD transition, fast billboarding and natural wind animation. Please refer to their site for detailed information. You can also freely import SpeedTree assets into your project folder from asset store packages or other third party sources.
See here for more information.
Создание деревьев
В Unity есть свой инструмент для создания деревьев (Tree creator), который вы можете использовать для создания новых ассетов деревьев, но вы также можете использовать и стандартные приложения для 3D моделирования для этой задачи. Меш дерева должен иметь менее 2000 треугольников (для повышения производительности) и центр вращения должен быть расположен прямо в основании дерева, там, где оно стыкуется с землёй. Меш всегда должен иметь ровно два материала, один для ствола и веток, другой для листвы.
Деревья должны использовать шейдеры Nature/Soft Occlusion Leaves и Nature/Soft Occlusion Bark. Чтобы использовать эти шейдеры, нужно поместить дерево в специальную папку, содержащую в имени “Ambient-Occlusion”. Когда вы поместите модель в эту папку и повторно импортируете её, Unity просчитает мягкое рассеянное затенение специально созданным для деревьев способом. Шейдеры “Nature/Soft Occlusion” опираются на соглашение об именовании папок, и дерево не отрисуется корректно, если вы не будете ему следовать.
После сохранения ассета дерева из пакета для 3D моделирования, вам потребуется нажать на кнопку Refresh (отображается в инспекторе, когда выбран инструмент рисования деревьев) для того, чтобы увидеть обновлённые деревья на вашем terrain’е.
Using colliders with trees
You can add a Capsule Collider to a new tree asset by instantiating it in the scene, adding the collider (menu: Component > Physics > Capsule Collider) and creating a new prefab for the modified tree object. When you add the tree to the terrain for painting, make sure you select the prefab with the collider rather than the original object. You should also enable Create Tree Colliders in the terrain’s Terrain Collider component inspector.
Making trees bend in the wind
The first thing you will need to do is create a wind zone. You can do this by selecting from the menu: Game Object > 3D Object > Wind Zone.
At this point, you will need to make sure that your trees are set to bend. Select your Terrain, click the Place trees button in the Inspector and then select Edit Trees > Edit Tree. Setting the Bend Factor to 1 will cause the trees to adjust if you have not already done this.
You may notice that your trees are moving about quite violently. To fix this, you can change your bend value, but it is probably easier to set the values on the Wind Zone directly, keeping your tree bend factor set to 1. To keep the trees from fluttering around too much, adjust the wind turbulence down to around 0.1 to 0.3 and everything will become much smoother. If you don’t want the trees blowing all the way to one side, set the Wind Main value down to the same value as your turbulence.
2017–09–19 Page amended with limited editorial review
GameObject menu changed in Unity 4.6
Copyright © 2023 Unity Technologies
优美缔软件(上海)有限公司 版权所有
"Unity"、Unity 徽标及其他 Unity 商标是 Unity Technologies 或其附属机构在美国及其他地区的商标或注册商标。其他名称或品牌是其各自所有者的商标。
公安部备案号:
31010902002961