Настройка Аватара
With rare exceptions, humanoid models have the same basic structure, representing the major articulated parts of the body; the head and limbs. The first step to using Unity’s humanoid animation features is to set up the Avatar. This represents the mapping between the simplified humanoid bone structure understood by Unity and the actual bones present in the skeleton.
Since the Avatar is such an important aspect of the animation system, it is important that it is configured properly for your model. So, whether or not the automatic Avatar creation succeeds, you should always go into the Configure Avatar mode to check that your Avatar is valid and properly set up. It is important that your character’s bone structure matches Unity’s avatar predefined bone structure and that the model is in T-pose.
If the automatic Avatar creation fails, you will see a cross next to the Configure button.
Если было успешным, вы увидите галочку:
Здесь успешность означает что все требуемые кости подошли, но для лучших результатов вы можете сопоставить второстепенные кости, а также поставить модель в надлежащую Т-позу.
Когда вы переходите в меню Configure …, редактор попросит вас сохранить текущую сцену. Причиной этого является то, что в режиме Configure Scene View используется для отображения костей, мускулов и анимационной информации выбранной модели, без отображения остальной части сцены.
Как только вы сохраните сцену, вы увидите новое окно Inspector Avatar Configuration, содержащее сопоставление костей.
The inspector shows which of the bones are required and which are optional - the optional ones can have their movements interpolated automatically. For Unity to produce a valid match, your skeleton needs to have at least the required bones in place. In order to improve your chances for finding a match to the Avatar, name your bones in a way that reflects the body parts they represent (names like “LeftArm”, “RightForearm” are suitable here).
If the model does NOT yield a valid match, you can manually follow a similar process to the one used internally by Unity:-
- Sample Bind-pose (Старается поставить модель в позу, в которой она была создана, разумной начальной позе)
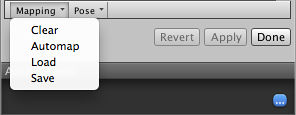
- Automap (Создает сопоставление костей из начальной позы)
- Enforce T-pose (force the model closer to T-pose, which is the default pose required by Unity animations)

If the auto-mapping (Mapping->Automap) fails completely or partially, you can assign bones by either draging them from the Scene or from the Hierarchy. If Unity thinks a bone fits, it will show up as green in the Avatar Inspector, otherwise it shows up in red.
Finally, if the bone assignment is correct, but the character is not in the correct pose, you will see the message “Character not in T-Pose”. You can try to fix that with Enforce T-Pose or rotate the remaining bones into T-pose.
Маски Тела Аватара
Sometimes it is useful to restrict an animation to specific body parts. For example, an walking animation might involve the character swaying their arms, but if they pick up a torch, they should hold it up to cast light. You can use an Avatar Body Mask to specify which parts of a character an animation should be restricted to. See documentation on Avatar Masks for further details.
Copyright © 2023 Unity Technologies
优美缔软件(上海)有限公司 版权所有
"Unity"、Unity 徽标及其他 Unity 商标是 Unity Technologies 或其附属机构在美国及其他地区的商标或注册商标。其他名称或品牌是其各自所有者的商标。
公安部备案号:
31010902002961