- Unity User Manual (2017.4)
- Timeline
- Timeline workflows
- Using Animation Override Tracks and Avatar Masking
Using Animation Override Tracks and Avatar Masking
This workflow demonstrates how to use an Animation Override track and an Avatar Mask to replace the upper-body animation of an Animation track. Use this technique to animate a humanoid character to, for example, run and carry an object.
This workflow does not show how to create an Avatar mask. This workflow only demonstrates how to use an Avatar Mask when creating a Timeline instance. This workflow also assumes that you have already created a Timeline instance with a simple Animation clip, such as a walk or run cycle, on an Animation track bound to a humanoid.

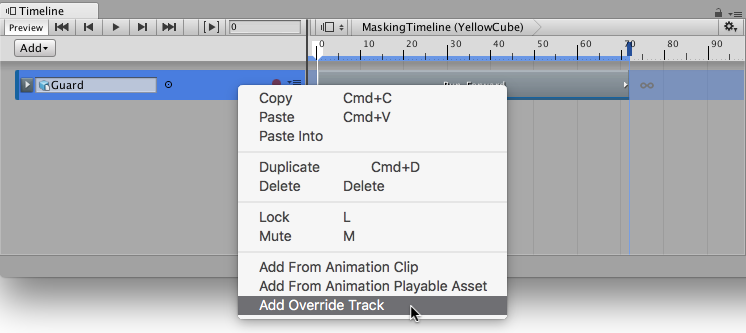
Right-click the Animation track and select Add Override Track from the context menu. An Animation Override track, named Override 0, is linked to the selected Animation track. Notice that the Animation Override track is not bound to a GameObject. Since the Override track is linked to the Animation track above, the Override track is bound to the same GameObject: the Guard humanoid.

From your project, drag an animation clip with upper-body animation into the Override track. For example, drag an animation of a humanoid standing still and waving their arms. Position and resize the Waving_Arms clip as appropriate.

Play the Timeline instance. The Waving_Arms clip completely overrides the Run_Forward clip. To combine the lower-body animation from the Run_Forward clip with the upper-body animation from the Waving_Arms clip, specify an Avatar Mask for the Animation Override track.

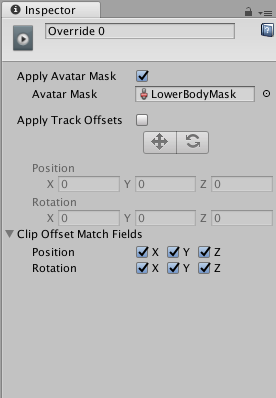
From the project, drag an Avatar Mask into the Avatar Mask property in the Inspector window. Activate the Apply Avatar Mask checkbox. An Avatar Mask icon appears beside the track name.


Play the Timeline instance. On the Guard humanoid, the upper-body animation is taken from the Waving_Arms clip and the lower-body animation is from the Run_Forward clip. To temporarily disable the Avatar Mask, click the Avatar Mask icon.

- 2017–12–07 Page published with limited editorial review