Debugging DirectX 12 shaders with PIX
PIX is a performance tuning and debugging tool by Microsoft, for Windows developers. It offers a range of modes for analyzing an application’s performance, and includes the ability to capture frames of DirectX projects from an application for debugging.
Use PIX to investigate issues in Windows 64-bit (x86_64) Standalone or Universal Windows Platform applications.
To install PIX, download and run the Microsoft PIX installer and follow the instructions.
For more information about PIX, see Microsoft’s PIX Introduction and PIX Documentation.
Debugging DirectX shaders with PIX
You should use a built version of your Unity application to capture frames, rather than a version running in the Unity Editor. This is because you need to launch the target application from within PIX to capture GPU frames.
Using a development build adds additional information to PIX, which makes navigating the scene capture easier.
Create a project with a debug-enabled Shader
To debug the shader with source code in PIX, you need to insert the following pragma into the shader code: #pragma enable_d3d11_debug_symbols
Example
The following walkthrough uses a basic example to demonstrate the entire process.
Create a basic project:
Create a new Unity project (see documentation on Getting Started).
In the top menu, go to Assets > Create > Shader > Standard Surface Shader. This creates a new shader file in your Project folder.
Select the shader file, and in the Inspector window, click Open. This opens the shader file in your scripting editor. Insert
#pragma enable_d3d11_debug_symbolsinto the shader code, underneath the other#pragmalines.Create a new Material (menu: Assets > Create > Material).
In the Material’s Inspector window, select the Shader dropdown, go to Custom, and select the shader you just created.
Create a 3D cube GameObject (menu: GameObject > 3D Object > Cube).
Assign your new Material to your new GameObject. To do this, drag the Material from the Project window to the 3D cube.
Capture a frame from a Windows Standalone application:
-
Go to File > Build Settings, and under Platform, select PC, Mac & Linux Standalone. Set the Target Platform to Windows, set the Architecture to x86_64, and click the Development Build checkbox.
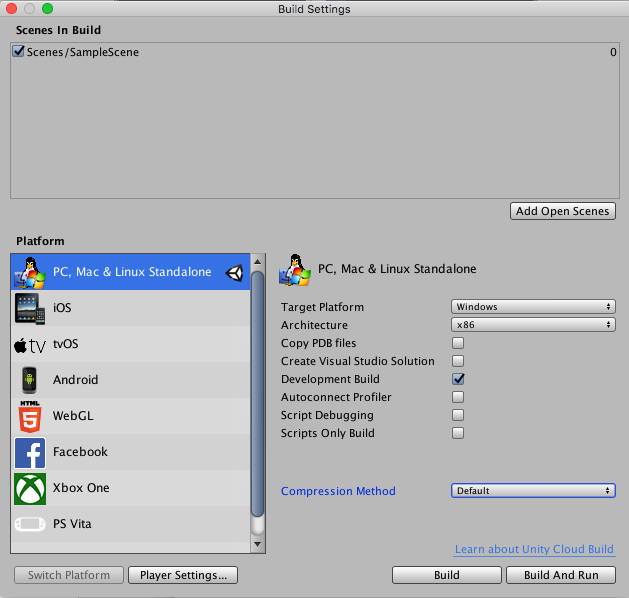
Click Build.
Launch PIX.
Click on Home, then Connect
Select Computer localhost to use your PC for capturing, and click connect.
In the Select Target Process box, select the Launch Win32 tab and use the Browse button to select your application’s executable file. Note that here, “Win32” means a non-UWP application; your application file must be a 64-bit binary file.
-
Enable Launch for GPU Capture, then use the Launch button to start the application.

-
Use your application as normal until you are ready to capture a frame. To capture a frame, press Print Screen on your keyboard, or click the camera icon on the GPU Capture Panel. A thumbnail of the capture appears in the panel. To open the capture, click the thumbnail.

-
To start analysis on the capture, click the highlighted text or the small Play icon on the menu bar.

-
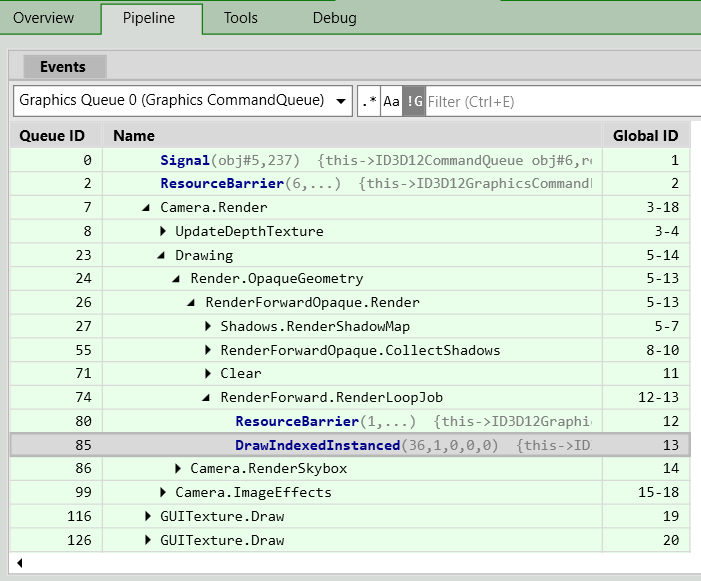
Select the Pipeline tab and use the__ Events__ window to navigate to a draw call you are interested in.
In the lower half of the Pipeline tab, select a render target from the OM (Output Merger) list to view the output of draw call. Select a pixel on the object you want to debug. Note that you can right-click a pixel to view the draw call history, as a way of finding draw calls you are interested in.
-
Select Debug Pixel on the Pixel Details panel.

-
On the debug panel, use the Shader Options to select which shader stage to debug.

-
Use the toolbar or keyboard shortcuts to step through the code.

For more information on debugging shaders with PIX, see Microsoft’s video series PIX on Windows, particularly Part 5 - Debug Tab.
For more information on GPU capture in PIX, see Microsoft’s documentation on GPU Captures.
- 2018–09–17 Page published with editorial review
Copyright © 2023 Unity Technologies
优美缔软件(上海)有限公司 版权所有
"Unity"、Unity 徽标及其他 Unity 商标是 Unity Technologies 或其附属机构在美国及其他地区的商标或注册商标。其他名称或品牌是其各自所有者的商标。
公安部备案号:
31010902002961