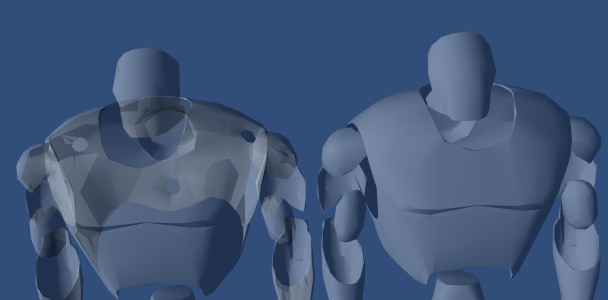
ShaderLab: Culling & Depth Testing

Отсечение - оптимизация, которая не рендерит отвернувшиеся от зрителя полигоны. У всех полигонов есть передняя и обратная стороны. Отсечение использует тот факт, что большинство объектов замкнуты; если у вас есть куб, вы никогда не увидите стороны, повёрнутые не к вам (всегда есть сторона повёрнутая к вам, которая их загораживает), поэтому нам нет надобности рисовать стороны, которые не видны. Отсюда и термин: обратное отсечение.
Другая функция, благодаря которой рендеринг выглядит корректно - проверка глубины. Проверка глубины позволяет убедиться, что в сцене рисуются только ближайшие поверхности объектов.
Синтаксис
Отсечение
Cull Back | Front | Off
Задаёт те стороны полигонов, которые должны быть отсечены (не рисуются)
Back Don’t render polygons facing away from the viewer (default).
Front Don’t render polygons facing towards the viewer. Used for turning objects inside-out.
Off Disables culling - all faces are drawn. Used for special effects.
ZWrite
ZWrite On | Off
Controls whether pixels from this object are written to the depth buffer (default is On). If you’re drawng solid objects, leave this on. If you’re drawing semitransparent effects, switch to ZWrite Off. For more details read below.
ZTest
ZTest Less | Greater | LEqual | GEqual | Equal | NotEqual | Always
Как проверка глубины должна быть исполнена. По умолчанию LEqual (рисует объекты на расстоянии в виде существующих объектов; прячет объекты, находящиеся позади).
Offset
Offset Factor, Units
Allows you specify a depth offset with two parameters. factor and units. Factor scales the maximum Z slope, with respect to X or Y of the polygon, and units scale the minimum resolvable depth buffer value. This allows you to force one polygon to be drawn on top of another although they are actually in the same position. For example Offset 0, -1 pulls the polygon closer to the camera ignoring the polygon’s slope, whereas Offset -1, -1 will pull the polygon even closer when looking at a grazing angle.
Примеры
Этот объект будет рендерить только внутренние стороны объекта:
Shader "Show Insides" {
    SubShader {
        Pass {
            Material {
                Diffuse (1,1,1,1)
            }
            Lighting On
            Cull Front
        }
    }
}
Попробуйте применить это к кубу и заметьте, насколько неправильной кажется его геометрия, когда вы его вращаете. Это потому, что вы видите только внутренние части куба.
Шейдер прозрачности с записью глубины
Обычно полупрозрачные шейдеры не пишут прямо в буфер глубины. Тем не менее, это может создать проблемы рисования, особенно с комплексными не выпуклыми мешами. Если вы хотите использовать затухание, вроде такого, и наоборот с мешем, то может быть полезным использование шейдера, который заполняет буфер глубины прежде чем начать рендер прозрачности.

Shader "Transparent/Diffuse ZWrite" {
Properties {
    _Color ("Main Color", Color) = (1,1,1,1)
    _MainTex ("Base (RGB) Trans (A)", 2D) = "white" {}
}
SubShader {
    Tags {"Queue"="Transparent" "IgnoreProjector"="True" "RenderType"="Transparent"}
    LOD 200

    // extra pass that renders to depth buffer only
    Pass {
        ZWrite On
        ColorMask 0
    }

    // paste in forward rendering passes from Transparent/Diffuse
    UsePass "Transparent/Diffuse/FORWARD"
}
Fallback "Transparent/VertexLit"
}
Отладка нормалей
А вот это уже будет поинтереснее; сначала мы рендерим объект с обычным вершинным освещением, затем рендерим обратные стороны в ярко-розовом цвете. Это может иметь эффекты подсвечивания любого места, где нормали нужно перевернуть в противоположную сторону. Если вы видите, как объекты, управляемые по законам физики, ‘засасываются’ какими-либо мешами, то попробуйте применить этот шейдер к этим мешам. Если какие-нибудь розовые части видны, то эти части будут притягивать всё, что к ним прикоснётся.
Собственно:
Shader "Reveal Backfaces" {
    Properties {
        _MainTex ("Base (RGB)", 2D) = "white" { }
    }
    SubShader {
        // Render the front-facing parts of the object.
        // We use a simple white material, and apply the main texture.
        Pass {
            Material {
                Diffuse (1,1,1,1)
            }
            Lighting On
            SetTexture [_MainTex] {
                Combine Primary * Texture
            }
        }

        // Now we render the back-facing triangles in the most
        // irritating color in the world: BRIGHT PINK!
        Pass {
            Color (1,0,1,1)
            Cull Front
        }
    }
}
Отсечение для эффекта стекла
Controlling Culling is useful for more than debugging backfaces. If you have transparent objects, you quite often want to show the backfacing side of an object. If you render without any culling (Cull Off), you’ll most likely have some rear faces overlapping some of the front faces.
Вот простой шейдер, который будет работать с выпуклыми объектами (сферы, кубы, лобовые стёкла автомобилей).
Shader "Simple Glass" {
    Properties {
        _Color ("Main Color", Color) = (1,1,1,0)
        _SpecColor ("Spec Color", Color) = (1,1,1,1)
        _Emission ("Emmisive Color", Color) = (0,0,0,0)
        _Shininess ("Shininess", Range (0.01, 1)) = 0.7
        _MainTex ("Base (RGB)", 2D) = "white" { }
    }

    SubShader {
        // We use the material in many passes by defining them in the subshader.
        // Anything defined here becomes default values for all contained passes.
        Material {
            Diffuse [_Color]
            Ambient [_Color]
            Shininess [_Shininess]
            Specular [_SpecColor]
            Emission [_Emission]
        }
        Lighting On
        SeparateSpecular On

        // Set up alpha blending
        Blend SrcAlpha OneMinusSrcAlpha

        // Render the back facing parts of the object.
        // If the object is convex, these will always be further away
        // than the front-faces.
        Pass {
            Cull Front
            SetTexture [_MainTex] {
                Combine Primary * Texture
            }
        }
        // Render the parts of the object facing us.
        // If the object is convex, these will be closer than the
        // back-faces.
        Pass {
            Cull Back
            SetTexture [_MainTex] {
                Combine Primary * Texture
            }
        }
    }
}