Starting Unity for the first time
There are two ways to create a new Project:
- Using the Unity Hub - The Unity Hub is a standalone application that streamlines the way you find, download, and manage your Unity projects and installations. For information on installing the Unity Hub, see Installing Unity using the Hub.
- Using the Unity Launcher - For more information on installing the Unity Editor with the Unity Launcher download assistant, see Installing Unity using the download assistant.
Creating a Project using the Hub
To create a new Project (and specify which Editor version to open it in), click New.
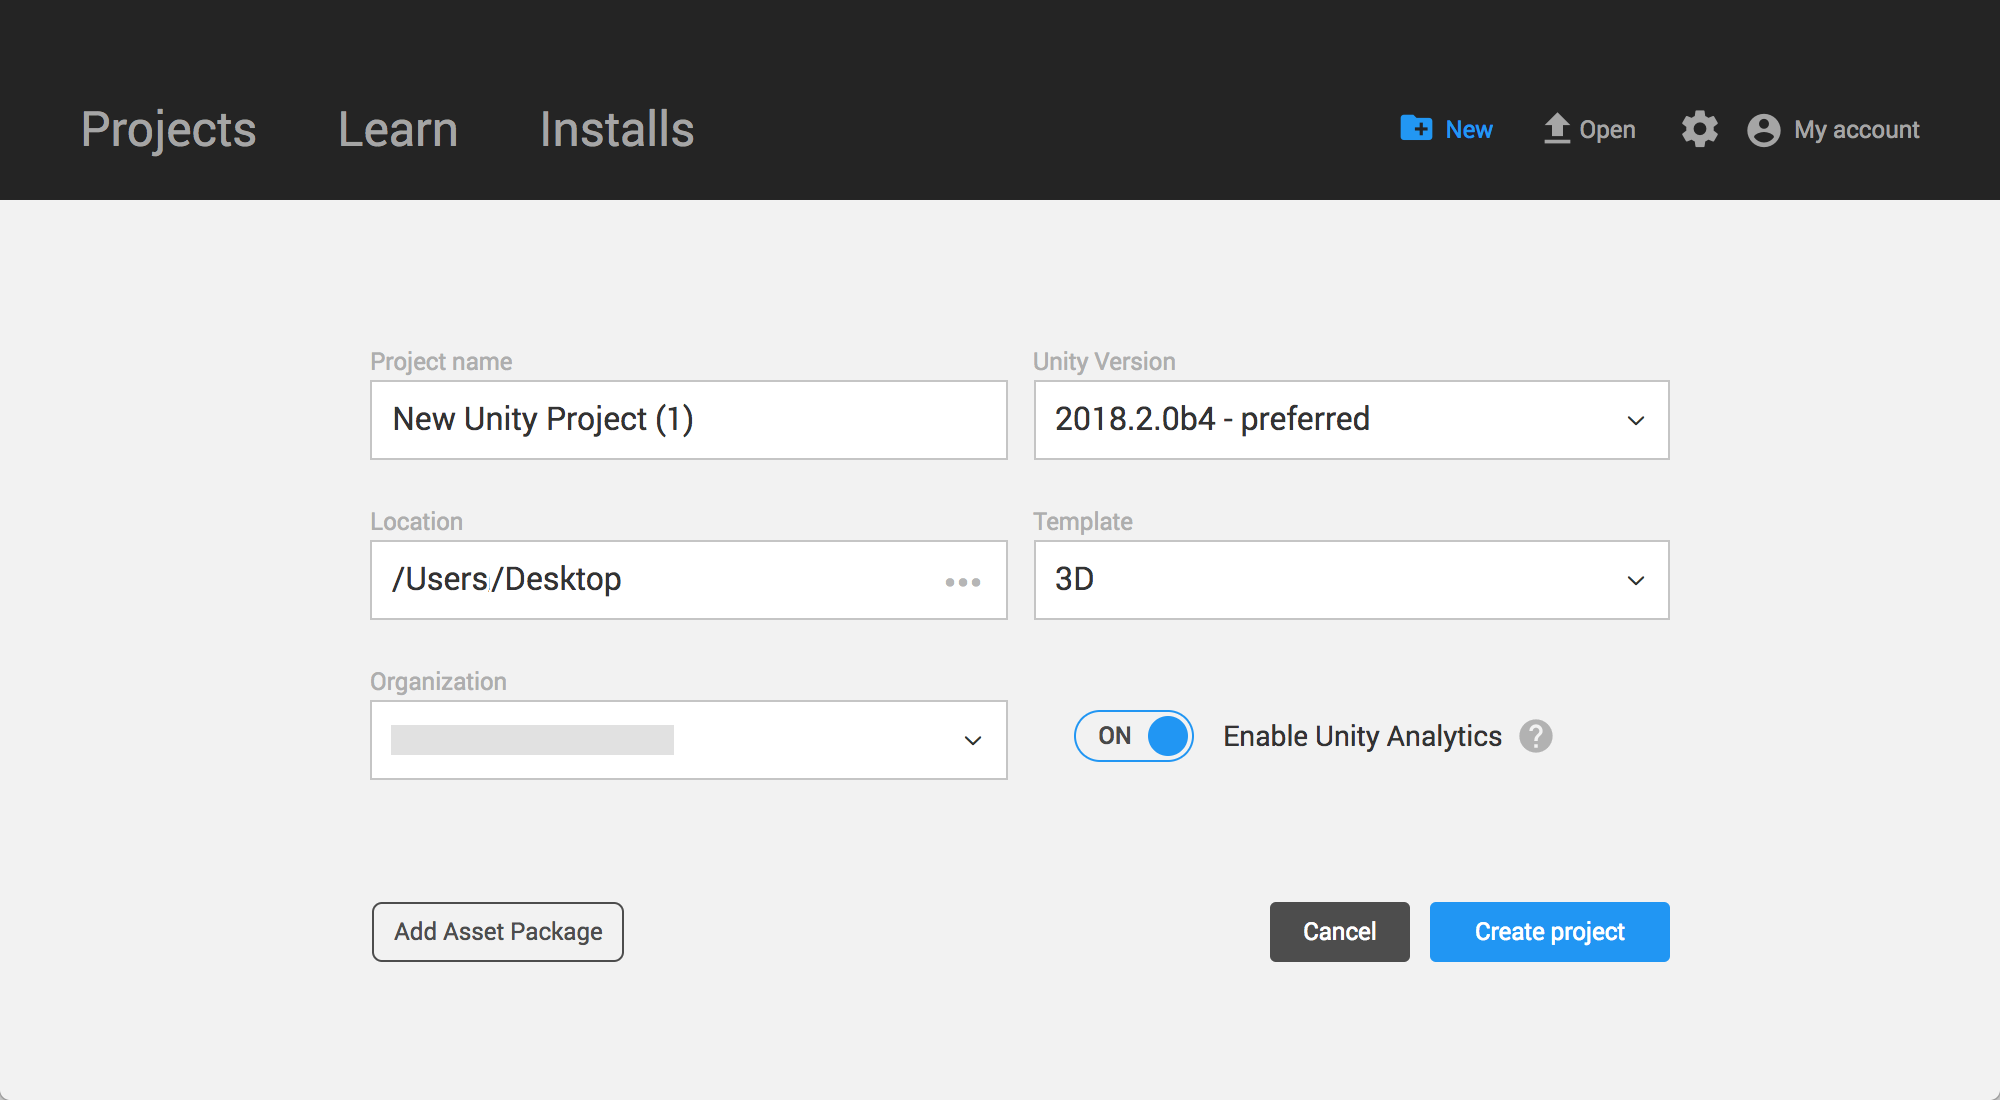
| Setting | Function |
|---|---|
| Project name | Sets the name of your Project. This names the main Project folder, which stores the Assets, ScenesA Scene contains the environments and menus of your game. Think of each unique Scene file as a unique level. In each Scene, you place your environments, obstacles, and decorations, essentially designing and building your game in pieces. More info See in Glossary, and other files related to your Project. |
| Unity Version | Select the Editor version you want to use to create the Project. Note: The drop-down menu is only available if you have installed multiple versions of the Editor in the Hub. |
| Location | Use this to define where in your computer’s file system to store your Project. The location of your Project defaults to the home folder on your computer. To change it, type the file path to your preferred storage location into the Location field. Alternatively, click the ellipsis icon in the Location field. This opens your computer’s file browser (Explorer, Finder or Files, depending on your computer’s operating system). In your file browser, navigate to the folder that you want to store your Project in, and click Select Folder or Open. |
| Template | Choose a Project Template. Project Templates provide pre-selected settings based on common best practices for Projects. These settings are optimized for 2D and 3D Projects across the full range of platforms that Unity supports. The default Template type is 3D. |
| Add Asset Package | Use this to add pre-made content to your Project. The Asset Packages provided with Unity include pre-made models, particle effects, and example scripts, along with other useful tools and content. To import Unity-provided Asset Packages into your Project, click the Add Asset Package button, then tick the checkbox to the left of each Asset Package you want to import, and click Done. Unity automatically imports the selected Assets when your Project is created. The Add Asset Package screen also contains any Assets you have downloaded from the Unity Asset Store. You can also add Asset Packages later, once you’ve created your project. To do this in the Unity Editor, go to Assets > Import Package, and select the package you want to import. |
| Enable Unity Analytics | Select whether to enable Unity Analytics. Unity Analytics is a data platform that provides analyticsA data platform that provides analytics for your Unity game. More info See in Glossary for your Unity game. Using Analytics, you can find out who the players are in your game and their in-game behavior. Unity Analytics are enabled by default. |
Creating a Project using the Unity Launcher
To use the Unity Editor you must have a Unity Developer Network (UDN) account. If you already have an account, sign in and proceed to the The Projects tab section.
If you do not have an account, follow the prompts to create one. For more information on accounts and subscriptions, see Unity Organizations.
When you launch the Unity Editor, the Unity launcher Home Screen appears.
There are two tabs: The ProjectsIn Unity, you use a Project to design and develop a game. A Project stores all of the files that are related to a game, such as the Asset and Scene files. More info
See in Glossary tab and the Learn tab.
The Projects tab is where you can create new Projects or open existing Projects.
From the Learn tab, you can access tutorials and learning resources to help you get started with Unity. If you are new to using Unity, you can work through the Unity Learn tutorials before starting a new project.
The Projects tab
On the Home Screen, click Projects to view the contents of the Projects tab.

Unity stores Projects in two locations:
- On Disk: To open an existing Unity Project stored on your computer, click the Project name in the Projects tab, or click Open to browse your computer for the Project folder.
- In the Cloud: To access Unity Collaborate Projects, click In the Cloud, then select the Project you want to load. The Hub prompts you to choose a storage location for the Project on your computer.
Creating a Project
In the top right corner of the Home Window, click New to open the Create Project ViewA view that shows the contents of your Assets folder (Project tab) More info
See in Glossary.
From the Create Project View, there are Project settingsA broad collection of settings which allow you to configure how Physics, Audio, Networking, Graphics, Input and many other areas of your Project behave. More info
See in Glossary to complete before Unity creates your project. These are described in detail below.
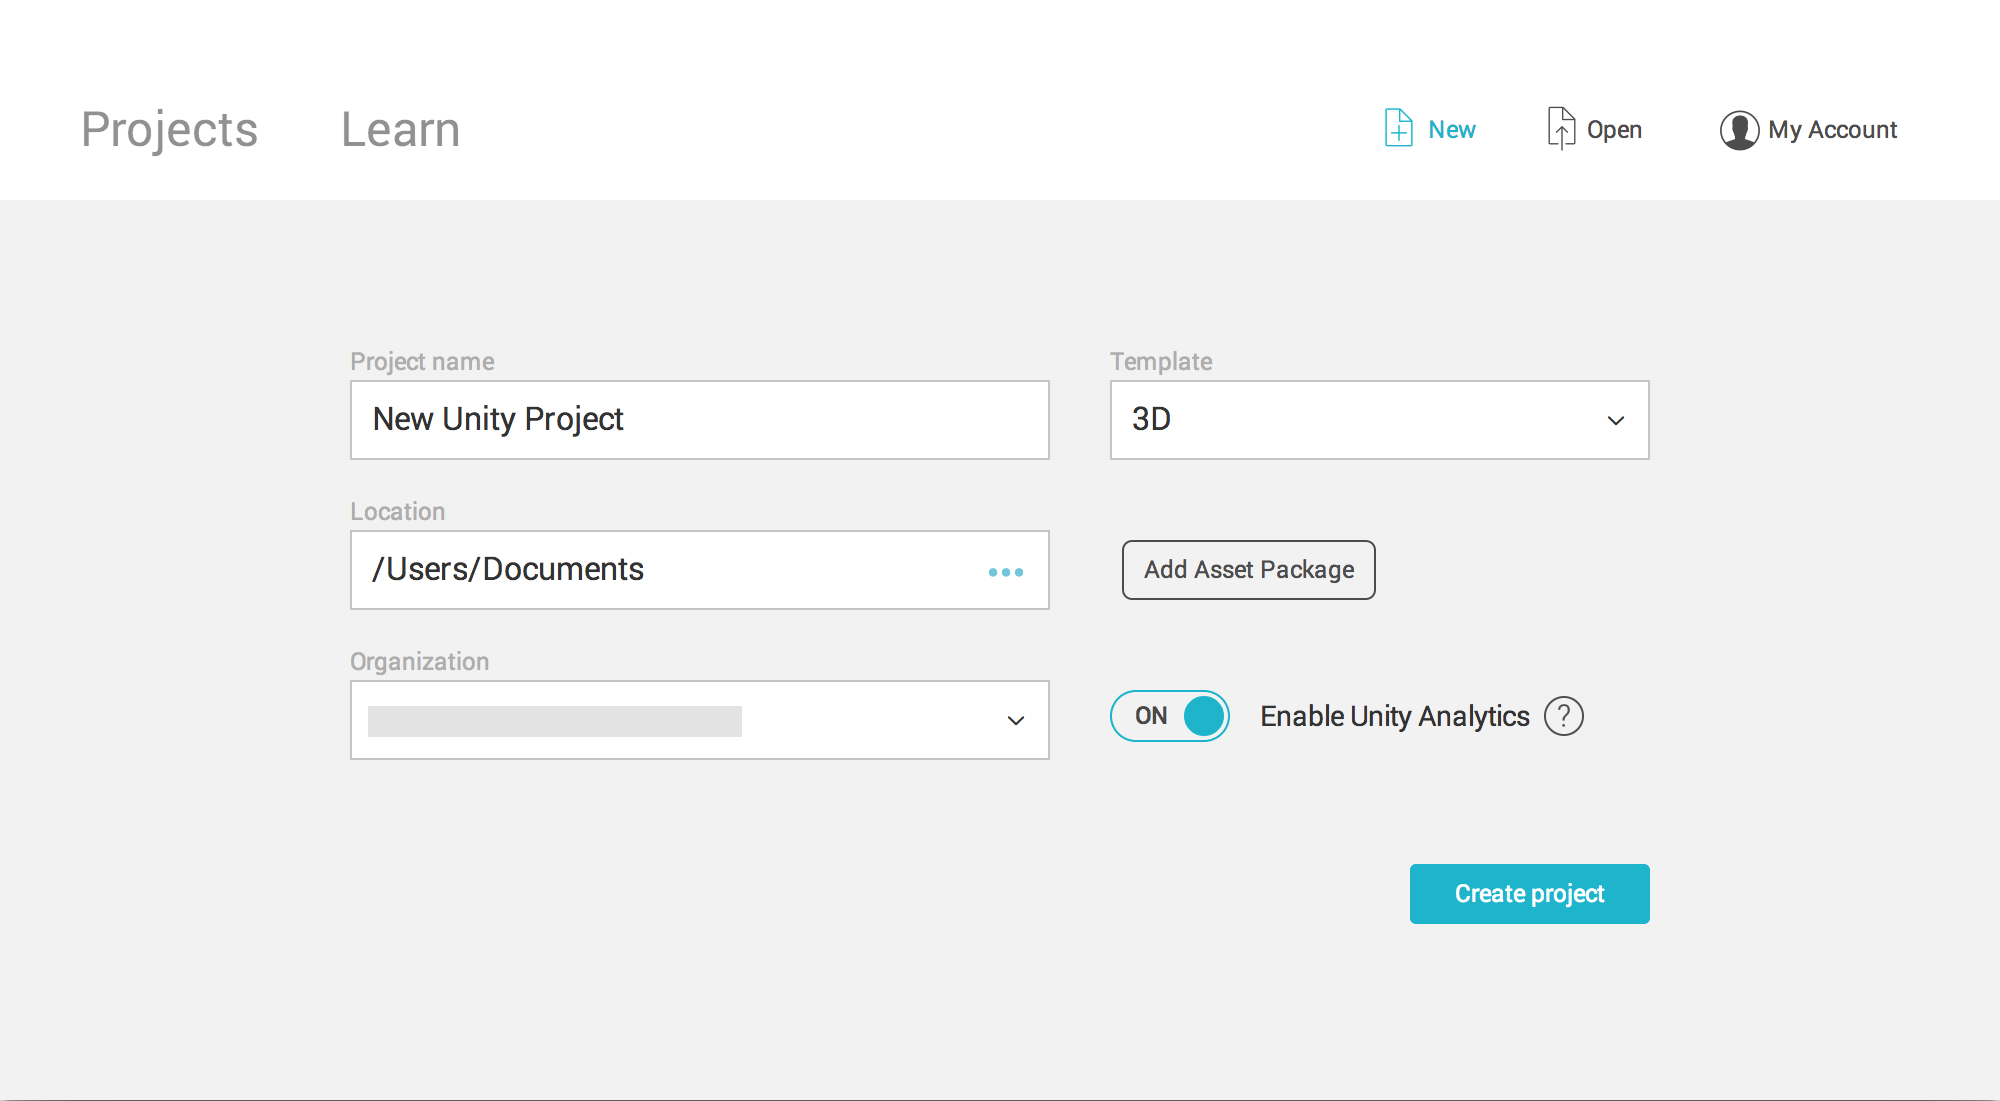
| Setting | Function |
|---|---|
| Project name | Sets the name of your Project. This names the main Project folder which stores the Assets, Scenes, and other files related to your Project. |
| Location | Use this to define where in your computer’s file system to store your Project. The location of your Project defaults to the home folder on your computer. To change it, type the file path to your prefered storage location into the Location field. Alternatively, click the ellipsis icon in the Location field. This opens your computer’s file browser (Explorer, Finder or Files, depending on your computer’s operating system). In your file browser, navigate to the folder that you want to store your Project in, and click Select Folder or Open. |
| Template | Choose a Project Template. Project Templates provide pre-selected settings based on common best practices for Projects. These settings are optimized for 2D and 3D Projects across the full range of platforms that Unity supports. The default Template type is 3D. |
| Add Asset Package | Use this to add pre-made content to your Project. The Asset Packages provided with Unity include pre-made models, particle effects, and example scripts, along with other useful tools and content.To import Unity-provided Asset Packages into your Project, click the Add Asset Package button, then tick the checkbox to the left of each Asset Package you want to import, and click Done. Unity automatically imports the selected Assets when your Project is created. The Add Asset Package screen also contains any Assets you have downloaded from the Unity Asset Store.You can also add Asset Packages later, once you’ve created your project. To do this in the Unity Editor, go to AssetsAny media or data that can be used in your game or Project. An asset may come from a file created outside of Unity, such as a 3D model, an audio file or an image. You can also create some asset types in Unity, such as an Animator Controller, an Audio Mixer or a Render Texture. More info See in Glossary > Import Package, and select the package you want to import. |
| Enable Unity Analytics | Select whether to enable Unity AnalyticsSee Analytics More info See in Glossary. Unity Analytics is a data platform that provides analytics for your Unity game. Using Analytics, you can find out who the players are in your game and their in-game behavior. Unity Analytics are enabled by default. |
When you are done, click the Create Project button. Unity automatically generates the required files, creates your Project and opens the Project.
2018–06–12 Page published with editorial review
对文档有任何疑问,请移步至开发者社区提问,我们将尽快为您解答