Upgrading to Unity 2021 LTS
Follow the advice in this section in release order. For example, if you need to upgrade your project from 2019 to 2021, read the 2020 upgrade guide to see if there are any changes that you need to make before you read the 2021 upgrade guides.
This page lists changes in the Unity 2021 LTS version which might affect existing projects when you upgrade from a 2020 version to 2021 LTS.
Note: 2021LTS is also known as 2021.3.
Page Outline
- Device Simulator
- Environment Lighting
- Environment lighting: Ambient probe and skybox reflection probe are now automatically baked
- Enable Code Coverage preference
- Particle System Force Fields
- Particle System Start Delay + Rate over Distance emission
- BuildReport - PackedAssets
- Terrain APIs out of experimental (WIP)
- Texture2D.Resize renamed to Reinitialize
- Android changes
- UI Toolkit - Default scaleMode for Image changed
- Mono upgrade behavior changes
- Adaptive Performance
- RenderTexture DepthStencilFormat
- Graphics formats DepthAuto, ShadowAuto and VideoAuto are deprecated
- WebGL: Updated Emscripten to 2.0.19
- Progressive GPU Lightmapper dropped support for CPU OpenCL devices
- OnPostprocessAllAssets behavior changes
- Mixed point and spot lights with no shadows bake direct light in subtractive lighting mode
- Shader keyword system improvements
- Unity supports .NET Standard 2.1 APIs
- Windows XR plugin removed
Device Simulator
The Device Simulator is now part of the Editor and is accessible from the Game window.
To set up the Device Simulator, add the UnityEngine.Device namespace to the Screen, Application, and SystemInfo classes:
UnityEngine.Device.Screen;
UnityEngine.Device.Application;
UnityEngine.Device.SystemInfo;
To switch to UnityEngine.Device, add the following logic to each script you want to use with the simulator:
using Screen = UnityEngine.Device.Screen;
using Application = UnityEngine.Device.Application;
using SystemInfo = UnityEngine.Device.SystemInfo;
The new namespace UnityEngine.Device transitions smoothly from Simulator (when in Editor) to actual device API with a runtime build.
Environment Lighting
The Editor now automatically bakes the default skyboxA special type of Material used to represent skies. Usually six-sided. More info
See in Glossary probe and ambient probe and retains that data until you manually bake the SceneA Scene contains the environments and menus of your game. Think of each unique Scene file as a unique level. In each Scene, you place your environments, obstacles, and decorations, essentially designing and building your game in pieces. More info
See in Glossary. When you upgrade, Scenes with no ambient lightLight that doesn’t come from any specific direction, and contributes equal light in all directions to the Scene. More info
See in Glossary contribution might visually change. To restore the original look of these Scenes, set the Environment lighting intensity multiplier to 0. Alternatively, set the skybox to black, bake the scene, then reset the skybox to your preferred sky color.
Environment lighting: Ambient probe and skybox reflection probe are now automatically baked
Unity’s Progressive LightmapperA tool in Unity that bakes lightmaps according to the arrangement of lights and geometry in your scene. More info
See in Glossary now automatically generates the ambient probe and the skybox reflection probeA rendering component that captures a spherical view of its surroundings in all directions, rather like a camera. The captured image is then stored as a Cubemap that can be used by objects with reflective materials. More info
See in Glossary for every scene by default. This means that a scene automatically receives environment lighting in accordance with the settings in the Environment tab in the Lighting settings panel. The Editor updates the ambient probe and skybox reflection probe every time the environment lighting changes, until you generate lighting. When you bake with the Generate Lighting control, the Editor stops updating the probes, and only updates them again at the next bake. When you enable the Auto Generate option, the Editor continues to update the probes every time the environment lighting changes. If you generate lighting and then delete this lighting data by removing the Lighting Data Asset from the project, the Editor automatically generates the ambient probe and skybox reflection probe again.
There is one situation which requires action when you upgrade a project. This is when you don’t wish to have any Environment lighting contribution in a project which also:
- Doesn’t have a Lighting Data Asset.
- Doesn’t have Auto Generate enabled.
- Has an Environment contribution set to a color other than black.
In this situation, navigate to Window > Rendering > Lighting Settings > Environment and disable the environment contribution of the automatically generated ambient probe and skybox reflection probe by making one of the following changes:
- Option 1: Set the Intensity Multiplier to 0.
- Option 2: Use a black Skybox Material.
- Option 3: Use a black color in either Color or Gradient mode for the Source.
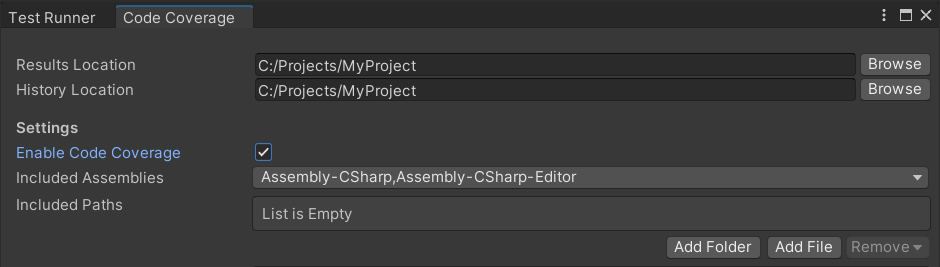
Enable Code Coverage preference
The user interface for managing Code Coverage has moved from General Preferences to within the Code Coverage package.
The Code Coverage package is available as a released package via the Package Manager for Unity 2019.3 and above. The latest version is 1.0.0.
You can use one of the following methods to enable code coverage:
- Install the Code Coverage package, open the Code Coverage window (Window > Analysis > Code Coverage) and select Enable Code Coverage.
- Use the Command line argument
-enableCodeCoveragein batchmode. - Use the
Coverage.enabledAPI. Example class:
// Create a new C# script called CodeCoverageMenuItem and place it
// under the Editor folder.
// This class creates a toggle menu item under Code Coverage > Enable
// Code Coverage. Use it to enable/disable Code Coverage.

using UnityEditor;
using UnityEngine.TestTools;

class CodeCoverageMenuItem
{
    const string EnableCodeCoverageItemName = "Code Coverage/Enable Code Coverage";

    [MenuItem(EnableCodeCoverageItemName, false)]
    static void EnableCodeCoverage()
    {
        Coverage.enabled = !Coverage.enabled;
    }

    [MenuItem(EnableCodeCoverageItemName, true)]
    static bool EnableCodeCoverageValidate()
    {
        Menu.SetChecked(EnableCodeCoverageItemName, Coverage.enabled);
        return true;
    }
}
Particle System Force Fields
Previously, some Force Field properties behaved differently at different frame rates (or if using the Time Scale in the Time Manager settings)
The Particle SystemA component that simulates fluid entities such as liquids, clouds and flames by generating and animating large numbers of small 2D images in the scene. More info
See in Glossary now uses a reference frame rate of 30fps to serve as the basis for the simulation. If your app runs at a different frame rate, the following settings might behave differently compared to earlier versions of Unity:
- Gravity
- Rotation
- Vector Fields
If these settings are affected, adjust the strengths of the affected areas to get the desired appearance.
Particle System Start Delay + Rate over Distance emission
Previously, Rate over Distance emission ignored the Start Delay setting. Now, if the Start Delay setting is defined, it delays the start for the distance-based emission.
If this field was previously set, you might need to adjust it.
BuildReport - PackedAssets
PackedAssets.file has been marked obsolete without a direct replacement. Previously this held an integer signifying a file id or index into BuildReport.files To look up BuildReport files now, use PackedAssets.shortPath.
Terrain APIs out of experimental (WIP)
The experimental TerrainThe landscape in your scene. A Terrain GameObject adds a large flat plane to your scene and you can use the Terrain’s Inspector window to create a detailed landscape. More info
See in Glossary APIs have been moved to non-experimental namespaces. There have also been some other minor changes to the Terrain API. If you used the experimental Terrain APIs, use the following APIs instead:
-
UnityEngine.TerrainTools; -
UnityEditor.TerrainTools; -
UnityEngine.TerrainUtils;
Here is the full list of API changes:
- In most cases,
UnityEngine.Experimental.TerrainAPIandUnityEditor.Experimental.TerrainAPIare nowUnityEngine.TerrainToolsandUnityEditor.TerrainTools, respectively. Some runtime APIs have moved to a newUnityEngine.TerrainUtilsnamespace. - The
GetDesc()of theTerrainPaintTool<T>class was renamed toGetDescription(). - The
TerrainUtilityclass has moved fromUnityEngine.Experimental.TerrainAPItoUnityEngine.TerrainUtils. - The
TerrainUtility.TerrainMapclass is no longer an inner-class and belongs to theUnityEngine.TerrainUtilsnamespace. - The
TerrainMap.TileCoordstructure is no longer in theTerrainMapclass, has been renamed toTerrainTileCoord, and is now also part of theUnityEngine.TerrainUtilsnamespace. - The
UnityEditor.Experimental.TerrainAPI.BrushPreviewModeenum has been renamed toTerrainBrushPreviewModeand moved to theUnityEditor.TerrainToolsnamespace. - The
TerrainPaintUtilityEditor.BuiltinPaintMaterialPassesenum has moved from theTerrainPaintUtilityEditorclass and into theUnityEditor.TerrainToolsnamespace. It has also been renamed toTerrainBuiltinPaintMaterialPasses. - The three
ShowBrushGUIfunctions inIOnInspectorGUIhave been merged into one function with default parameter values instead of the different overloaded functions. -
TerrainFilterhas been removed. UseSystem.Predicate<Terrain>instead.
Texture2D.Resize renamed to Reinitialize
Texture2D.Resize and its overloads have been renamed to Texture2D.Reinitialize.
The API Updater should rename this automatically. If not, change any usage of Texture2D.Resize to Texture2D.Reinitialize.
Android changes
A large part of the Android build pipeline is now incremental and Unity removed the following features that were in the previous build pipeline:
- Unity no longer copies GradleAn Android build system that automates several build processes. This automation means that many common build errors are less likely to occur. More info
See in Glossary project assets located in Assets/Plugins/Android/[res, assets] to the Gradle project.- Previously you could place Gradle resources in this folder and Unity copied them into the Gradle project. You should now use AAR or androidlib plug-ins to pass additional Gradle resources to the application.
- If you place project assets in this folder, Unity shows a build error message.
- Unity no longer ignores files inside the GENERATED BY UNITY. REMOVE THIS COMMENT TO PREVENT OVERWRITING WHEN EXPORTING AGAIN comment.
- Previously Unity wouldn’t overwrite files if you removed this comment. If you didn’t remove the comment, Unity always regenerated build.gradle, manifest, and UnityPlayerActivity files.
- If you want your changes to persist using the new build pipeline, use templates.
- When you export an Android project, Unity no longer creates a symbols zip package. The symbols are now available in the unityLibrary\symbols directory which you can zip. The reason for this change is that not all symbols files are available when you export a project; Gradle produces the
libil2cpp.sosymbols when it builds the application. - Changed how Unity checks to see if an obb is compatible with an apkThe Android Package format output by Unity. An APK is automatically deployed to your device when you select File > Build & Run. More info
See in Glossary. Both the apk and obb now have unity_obb_guid file inside them and if the contents match between them, Unity treats them as being compatible. - For custom build scriptsA piece of code that allows you to create your own Components, trigger game events, modify Component properties over time and respond to user input in any way you like. More info
See in Glossary that use PatchPackage, note that Patch/Patch & Run now works with all types of assets and doesn’t require a Script Only Build.
UI Toolkit - Default scaleMode for Image changed
Default Image.scaleMode was changed from ScaleAndCrop to ScaleToFit.
The expected behavior for an image is to scale to the size of the element, so we changed the default value of Image.scaleMode to ScaleToFit. If you didn’t override the Image scale mode, some cropped images might shrink to fit the size of the element. If ScaleAndCrop was the expected mode for your images, you can override their style by adding the following value in your UXML file inline style:
-unity-background-scale-mode: scale-and-crop;
You can also create a style class with the override and apply it to images that require ScaleAndCrop.
Mono upgrade behavior changes
The underlying C# runtime, Mono, has been upgraded in the latest version. This includes many fixes from the upstream version of Mono, and some notable changes in behavior.
-
Directory.GetFilesis no longer guaranteed to return a sorted list.- Previously, this always returned an alphabetically sorted list of items. If your project needs items to be returned in the same order every time, sort the returned list. For example:
var files =
Directory.GetFiles(dir).OrderBy(f => f);
- Previously, this always returned an alphabetically sorted list of items. If your project needs items to be returned in the same order every time, sort the returned list. For example:
var files =
-
Object.GetHashCodenow returns a different value and shouldn’t be relied on as a deterministic hashing algorithm between operating systems.- In general, you shouldn’t use the result of
GetHashCodeoutside of the current process, that is don’t serialize it or expect it to be the same the next time the code runs in a new process. Unity recommends using a deterministic hashing algorithm such as MD5.
- In general, you shouldn’t use the result of
- Some bug fixes have resulted in new exceptions being thrown. Additionally, the content of some exception messages have changed.
- This new behavior will be particularly noticeable in automated testing scenarios and may require changing the expected behavior if the tests are parsing the logs for specific exception messages.
Adaptive Performance
Version 3.0 of the Adaptive Performance package is now available. For information on how to upgrade to version 3.0, see the Adaptive Performance upgrade guides.
RenderTexture DepthStencilFormat
Previously, if you set the RenderTexture.depth property to 32-bit, you could get D24_S8 depending on the platform. Now if you set it to 32-bit, you get D32_S8 with 32-bit for the depth component if that format is supported on the current platform. However, this doubles the memory usage for that depth bufferA memory store that holds the z-value depth of each pixel in an image, where the z-value is the depth for each rendered pixel from the projection plane. More info
See in Glossary.
The new RenderTexture.depthStencilFormat property returns the format that the graphics API uses to create the resource in video memory. You can also use this property to request a specific format. However, not all platforms support all depth stencil formats. When you set the DepthStencilFormat property to an unsupported format, Unity automatically selects a compatible format that has the equal or greater amount of bits for the depth and stencil components.
Upgrading
The RenderTexture asset now serializes the depth stencil format that you selected. If you use an API that takes a number of bits instead of a format, these bits get mapped to a format and that format is serialized. RenderTexture assets from previous versions that had the depth set to more than 16-bits are automatically upgraded to use D24_S8.
On some platforms (for example Windows) that use the DirectX graphics API, this results in a format with fewer depth bits because the graphics backend selects the D32_S8 format internally if you set bits>16. To ensure consistent upgrades across all platforms, D24_S8 is used on all platforms for the automatic upgrader. However, this might introduce visual artifacts in the render output of your project if you have RenderTexture assets in your project. Review these assets and change the depth stencil format to D32_S8 when needed. The following issues might occur:
- The memory size might increase for the RenderTextures that you use. However, the memory reported is now correct.
- Now that setting the depth property to 32-bit gives you a 32-bit depth component, the memory usage increases. To avoid this, set the bits to 24 and use D24_S8 if that is supported on your platform.
- If a platform doesn’t support D24_S8, Unity falls back to the compatible format D32_S8 by default. To prevent this, in the InspectorA Unity window that displays information about the currently selected GameObject, asset or project settings, allowing you to inspect and edit the values. More info
See in Glossary window, disable the Enable Compatible Format property on an asset. If Unity doesn’t support the format D32_S8 and it can’t fall back, you see the error message: RenderTexture.Create failed: depth/stencil format unsupported. There is no compatible format on this platform or this fallback to a compatible format is disabled in the import inspector.. In most cases, to fix the issue you can turn on Enable Compatible Format.
Graphics formats DepthAuto, ShadowAuto and VideoAuto are deprecated
The following graphics formats have now been deprecated:
- DepthAuto
- ShadowAuto
- VideoAuto
These Auto formats are unclear about the exact format that’s used and might vary by platform.
The steps to remove the use of these deprecated formats depends on the format and use case.
For VideoAuto
To get the current platform’s automatic video format, use SystemInfo.GetGraphicsFormat(DefaultFormat.Video).
For DepthAuto/ShadowAuto used to indicate a depth-only render texture.
The GraphicsFormat API often uses DepthAuto or ShadowAuto to create render texturesA special type of Texture that is created and updated at runtime. To use them, first create a new Render Texture and designate one of your Cameras to render into it. Then you can use the Render Texture in a Material just like a regular Texture. More info
See in Glossary with depth-only rendering, and no color buffer. Examples of this use case are:
renderTextureDescriptor.graphicsFormat = GraphicsFormat.ShadowAutoRenderTexture.GetTemporary(width, height, bits, GraphicsFormat.ShadowAuto)
To indicate depth-only (non-color) rendering, use GraphicsFormat.None as the new color format.
renderTextureDescriptor.graphicsFormat = GraphicsFormat.None;
If you used ShadowAuto, set the shadowSamplingMode of your RenderTextureDescriptor to ShadowSamplingMode.CompareDepths to enable depth-compare sampling on the depth texture, and change the code to use an overload that takes a RenderTextureDescriptor.
renderTextureDescriptor.shadowSamplingMode = ShadowSamplingMode.CompareDepths;
For DepthAuto/ShadowAuto in other situations
In some situations the DepthAuto/ShadowAuto formats represented an automatically selected depth format appropriate for the current platform. To replace the deprecated values in this case, use SystemInfo.GetGraphicsFormat(DefaultFormat.Depth/Shadow)
WebGL: Updated Emscripten to 2.0.19
The asm.js Linker target that was available for advanced users is no longer available.
- In Unity 2021.2, the underlying Emscripten compiler used by the WebGLA JavaScript API that renders 2D and 3D graphics in a web browser. The Unity WebGL build option allows Unity to publish content as JavaScript programs which use HTML5 technologies and the WebGL rendering API to run Unity content in a web browser. More info
See in Glossary platform was updated to version 2.0.19. This upgraded the native code object file format, and therefore requires recompiling all native code plugins (C/C++ code plugins) in a project. If you are using closed source 3rd-party plugins from Unity Asset StoreA growing library of free and commercial assets created by Unity and members of the community. Offers a wide variety of assets, from textures, models and animations to whole project examples, tutorials and Editor extensions. More info
See in Glossary, for example, remember to ask the author for an updated version for Unity 2021.2. - The Emscripten runtime JavaScript function
Pointer_stringify()is now deprecated. Instead, call the functionUTF8ToString()to marshal a UTF8-encoded null-terminated C string from the WebAssembly heap to a JavaScript string.
Progressive GPU Lightmapper dropped support for CPU OpenCL devices
The Progressive GPU Lightmapper no longer supports CPU OpenCL devices. If no supported GPU is found but a CPU OpenCL device is detected, a warning message informs you that the device is skipped and falls back to the Progressive CPU Lightmapper. The Progressive CPU Lightmapper offers better performance for CPU-based computation of lightmapsA pre-rendered texture that contains the effects of light sources on static objects in the scene. Lightmaps are overlaid on top of scene geometry to create the effect of lighting. More info
See in Glossary.
This change of behavior will happen automatically and lightmaps should be computed as expected.
OnPostprocessAllAssets behavior changes
When Unity calls InitializeOnLoad methods during the asset import process, asset loading can fail. During asset import, the asset database is in an update state and Unity can’t determine which assets have already been imported. InitializeOnLoad methods can’t load assets that haven’t been imported.
To improve the asset import process, the OnPostprocessAllAssets callback has been enhanced. In particular, the OnPostprocessAllAssets callback:
- Can perform initialization after a domain reload, when the asset database is guaranteed to be in a ready state.
- Contains the
didDomainReloadparameter, which is set to true if the domain has reloaded. - Supports asset operations. This includes asset loading, which behaves in the same way as loading assets via a menu item.
- Has moved out of the asset database importing loop. Callback processing is postponed until asset import is complete.
Move any domain-related initialization logic that requires asset operations to the OnPostprocessAllAsset callback; do not perform asset operations inside InitializeOnLoad methods.
The following behavior change code examples show how asset operations were previously postponed.
Example 1:
public class AssetPostprocessorTester1 : AssetPostprocessor
{
    static void OnPostprocessAllAssets(string[] importedAssets, string[] deletedAssets, string[] movedAssets, string[] movedFromAssetPaths)
    {
        var assetPath = "Assets/hello.txt";

        if (File.Exists(assetPath))
        {
            var txtObj = AssetDatabase.LoadAssetAtPath<TextAsset>("Assets/hello.txt");
            AssetDatabase.DeleteAsset("Assets/hello.txt");

            if (txtObj == null)
                Debug.Log("New Behaviour: Asset object is unloaded");
            else
                Debug.Log("Old Behaviour: Asset is loaded for deleted asset!!");
        }
    }
}
Example 2:
 public class AssetPostprocessorTester2 : AssetPostprocessor
{
    static void OnPostprocessAllAssets(string[] importedAssets, string[] deletedAssets, string[] movedAssets, string[] movedFromAssetPaths)
    {
        var assetPath = "Assets/SomeText.txt";
        if (!File.Exists(assetPath))
        {
            File.WriteAllText(assetPath, "hello world");

            AssetDatabase.ImportAsset(assetPath);
            var txtObj = AssetDatabase.LoadAssetAtPath<TextAsset>(assetPath);

            if (txtObj == null)
                Debug.Log("Old Behaviour: Asset hasn't been imported yet");
            else
                Debug.Log("New Behaviour: Asset is imported and loaded");
        }
    }
}
The following example has the new OnPostprocessAllAssets variant with the didDomainReload parameter:
static void OnPostprocessAllAssets(string[] importedAssets, string[] deletedAssets, string[] movedAssets, string[] movedFromAssetPaths, bool didDomainReload)
{
    if (didDomainReload)
        Debug.Log("Domain has been reloaded");
    else
        Debug.Log("Domain did not reload during import");
}
All domain reloads are now processed inside the asset database.
OnPostprocessAllAssets now works better with asset operations, but any processing in this callback increases asset database refresh and domain reload time. InitializeOnLoad methods also add to domain reload time. It is best practice to minimize processing in these callbacks to improve Editor responsiveness between iterations.
Mixed point and spot lights with no shadows bake direct light in subtractive lighting mode
Mixed mode point and spot lights now consistently contribute baked direct light in Scenes using Subtractive lighting mode, regardless of their Shadow Type setting. As a result, specular lighting for Static GameObjectsThe fundamental object in Unity scenes, which can represent characters, props, scenery, cameras, waypoints, and more. A GameObject’s functionality is defined by the Components attached to it. More info
See in Glossary may appear to be missing in affected Scenes. To resolve this issue, replace affected Mixed mode lights with Realtime mode Lights. Alternatively, use Baked Indirect or ShadowmaskA Texture that shares the same UV layout and resolution with its corresponding lightmap. More info
See in Glossary lighting mode(s) with Mixed lights.
Shader keyword system improvements
The shaderA program that runs on the GPU. More info
See in Glossary keyword system now allows up to 65534 local keywords per shader or compute shader and 232–2 global keywords per project. All keywords you declare in a shader or compute shader are now local to this shader. Keywords you declare in a directive with the _local suffix aren’t affected by the state of global keywords.
Example:
A pass in a shader declares the following keywords:
#pragma shader_feature FOO BAR#pragma shader_feature_local BOO BAZ
When using this pass, keywords FOO and BAR are enabled if they’re enabled either globally or on the material. Keywords BOO and BAZ are only enabled if they’re enabled on the material.
Unity supports .NET Standard 2.1 APIs
Unity now supports many additional APIs in the .NET base class libraries, including all APIs in the .NET Standard 2.1 API. Your project might fail to compile if any of your code has conflicts with new APIs.
To avoid errors when you upgrade projects created in previous versions of Unity, check and update your code to ensure that there are no conflicts with types and methods that are now available in .NET Standard 2.1.
Sources of conflict include the following:
- ambiguous references
- extension methods
- precompiled assemblies
Resolve ambiguous references
If your code implements types or methods with a name that conflicts with types or methods that .NET Standard 2.1 adds, your code fails to compile. Name conflicts can lead to C# compiler errors due to ambiguous references.
For example, if you add a type named MyCompany.MyCode.Range to your project’s code, this might conflict with the existing System.Range type. Code that contains both using System; and using MyCompany; statements fails to compile.
To prevent errors, fully specify the namespace in the C# code for any types that have conflicting names.
Resolve conflicting extension methods
If your existing code has an extension method that .NET Standard 2.1 now implements on a type directly, you can choose to rename your extension methods or to use the methods implemented by the base class library.
For example, code in your project might implement an extension method named CopyTo on the ArraySegment type. In .NET Standard 2.1, ArraySegment has a built-in CopyTo method. You can choose to rename your CopyTo extension method, or eliminate it entirely and use the built-in one.
Resolve conflicting assemblies
If your project uses precompiled assemblies (that is, managed plugins) that implement types and methods that are now part of the base class library, then remove these assemblies from your project and use the built-in implementations.
For example, in previous versions of Unity, you needed to use the System.Memory.dll assembly from NuGet to access the System.Span value type. Now, .NET Standard 2.1 provides System.Span in the base class library. If you try to use the System.Memory.dll managed plugin in Unity 2021.2, the project fails to build.
Windows XR plugin removed
Microsoft has deprecated the Windows XR plugin and now supports Windows Mixed Reality (WMR) features and devices through the OpenXR plugin.
- The Windows XR plugin has been removed as of Unity 2021.2.
- When you open an existing project in Unity 2021.2, the update process removes the Windows XR plugin, if present.
- To continue to use the project for Windows Mixed Reality, you must enable the Unity OpenXR plugin.
- Depending on which features you are using, you must also install Microsoft’s Mixed Reality OpenXR support plugin and possibly additional tools from the Microsoft Mixed Reality Toolkit.
To upgrade to the Unity OpenXR plugin:
- Open the Project SettingsA broad collection of settings which allow you to configure how Physics, Audio, Networking, Graphics, Input and many other areas of your project behave. More info
See in Glossary window. - In the XR Plug-inA set of code created outside of Unity that creates functionality in Unity. There are two kinds of plug-ins you can use in Unity: Managed plug-ins (managed .NET assemblies created with tools like Visual Studio) and Native plug-ins (platform-specific native code libraries). More info
See in Glossary Management section, enable OpenXR in the Plug-in Providers list. If needed, Unity downloads and installs the OpenXR plugin.
Once the OpenXR plugin is enabled, you can use the Mixed Reality Feature Tool provided by Microsoft to install the required supporting packages.
To install or update WMR features, tools, and samples:
- Download and run the Mixed Reality Feature Tool.
- Choose the Unity Project to update and click Discover Features.
- Under Platform Support, select the Mixed Reality OpenXR Plugin.
- Select any additional features you wish to add.
- Click Get features.
- Click Import and then Approve to complete the process.
- Return to the XR Plug-in Management section of your Unity Project Settings and enable and configure the added features.
For more information about setting up new and updated Unity projects to use Windows Mixed Reality, see Setting up your XR configuration on Microsoft’s documentation site.
Copyright © 2023 Unity Technologies
优美缔软件(上海)有限公司 版权所有
"Unity"、Unity 徽标及其他 Unity 商标是 Unity Technologies 或其附属机构在美国及其他地区的商标或注册商标。其他名称或品牌是其各自所有者的商标。
公安部备案号:
31010902002961