使用 PIX 来调试 DirectX 12 着色器
PIX 是 Microsoft 为 Windows 开发人员提供的性能调优和调试工具。此工具提供了一系列用于分析应用程序性能的模式,并包括从应用程序中捕获 DirectX 项目的帧以进行调试的功能。
使用 PIX 可调查 Windows 64位 (x86_64) 独立平台或通用 Windows 平台应用程序中的问题。
要安装 PIX,请下载并运行 Microsoft PIX 安装程序,按照说明进行操作。
有关 PIX 的更多信息,请参阅 Microsoft 的 PIX 说明 (Introduction) 和 PIX 文档 (Documentation)。
使用 PIX 来调试 DirectX 着色器
应使用已构建的 Unity 应用程序版本来捕获帧,而不是使用 Unity Editor 中运行的版本。这是因为需要从 PIX 中启动目标应用程序来才能捕获 GPU 帧。
使用开发版可为 PIX 添加额外的信息,从而使得场景捕获操作更加容易。
使用支持调试的着色器来创建项目
要在 PIX 中使用源代码调试着色器,必须将以下 pragma 插入到着色器代码中:#pragma enable_d3d11_debug_symbols
示例
以下演练程序使用一个基本示例演示整个操作过程。
创建一个基本项目:
1.创建新的 Unity 项目(请参阅入门文档)。
2.在顶部菜单中,选择 Assets > Create > Shader > Standard Surface Shader。此时将在 Project 文件夹中创建一个新的着色器文件。
3.选择着色器文件,然后在 Inspector 窗口中单击 Open。此时将在脚本编辑器中打开着色器文件。将 #pragma enable_d3d11_debug_symbols 插入到着色器代码中的其他 #pragma 行下面。
4.创建新的材质(菜单:__Assets__ > Create > __Material__)。
5.在 Material Inspector 窗口中,选择 Shader 下拉选单,选择 __Custom__,然后选择刚创建的着色器。
6.创建 3D 立方体游戏对象(菜单:__GameObject__ > 3D Object > __Cube__)。
7.将新材质分配给新的游戏对象。要执行此操作,请将材质从 Project 窗口拖到 3D 立方体上。
从 Windows 独立平台应用程序中捕获帧:
- Go to File > Build Settings, and under Platform, select PC, Mac & Linux Standalone. Set the Target Platform to Windows, set the Architecture to x86_64, and click the Development Build checkbox.
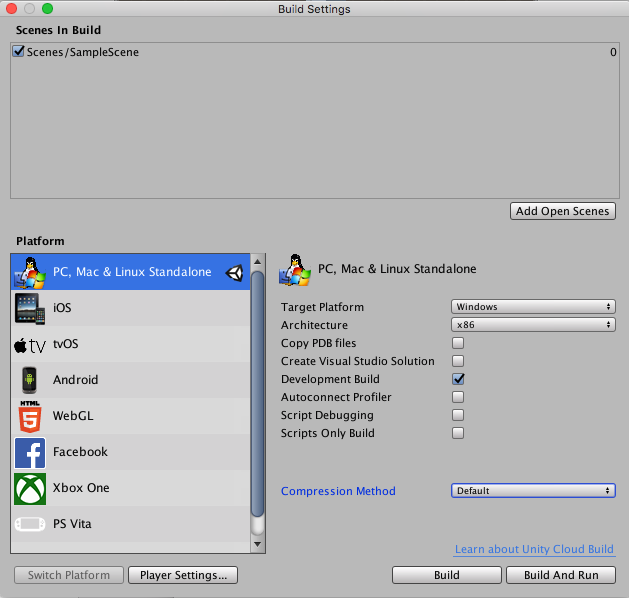
2.单击 Build。
3.启动 PIX。
4.单击 Home__,然后单击 Connect__。
5.选择计算机 localhost 以使用您的 PC 进行捕获,然后单击 Connect。
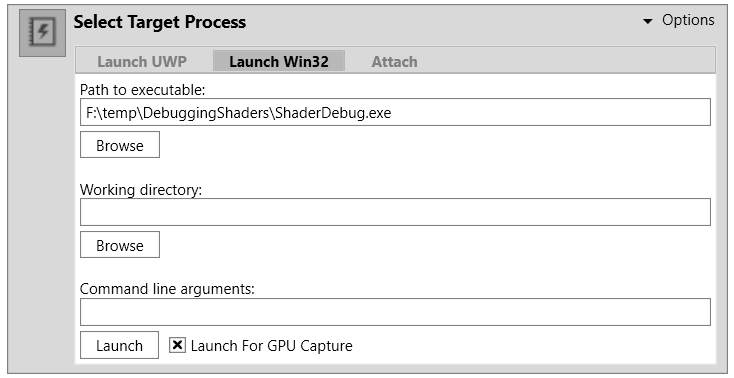
6.在 Select Target Process 对话框中,选择 Launch Win32 选项卡,然后使用 Browse 按钮选择应用程序的可执行文件。注意,这里的“Win32”表示非 UWP 应用程序;您的应用程序文件必须是 64 位二进制文件。
Enable Launch for GPU Capture, then use the Launch button to start the application.
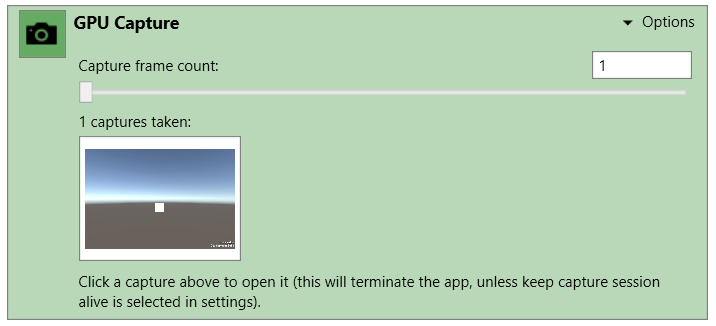
Use your application as normal until you are ready to capture a frame. To capture a frame, press Print Screen on your keyboard, or click the camera icon on the GPU Capture Panel. A thumbnail of the capture appears in the panel. To open the capture, click the thumbnail.
To start analysis on the capture, click the highlighted text or the small Play icon on the menu bar.

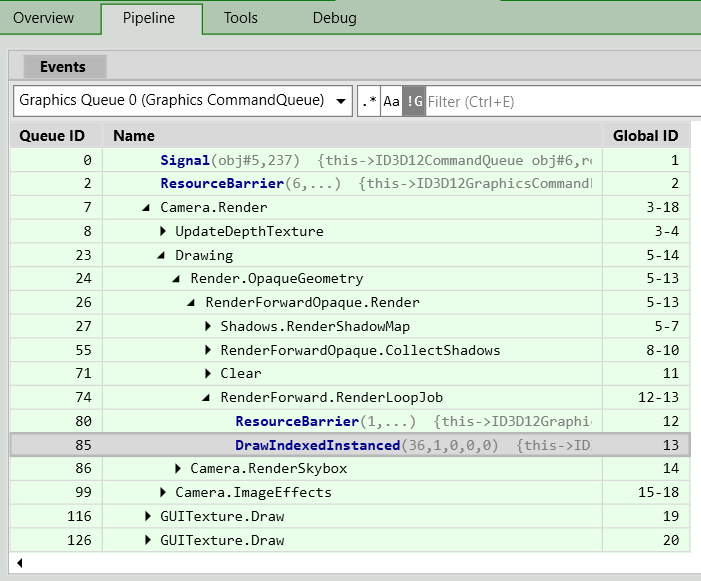
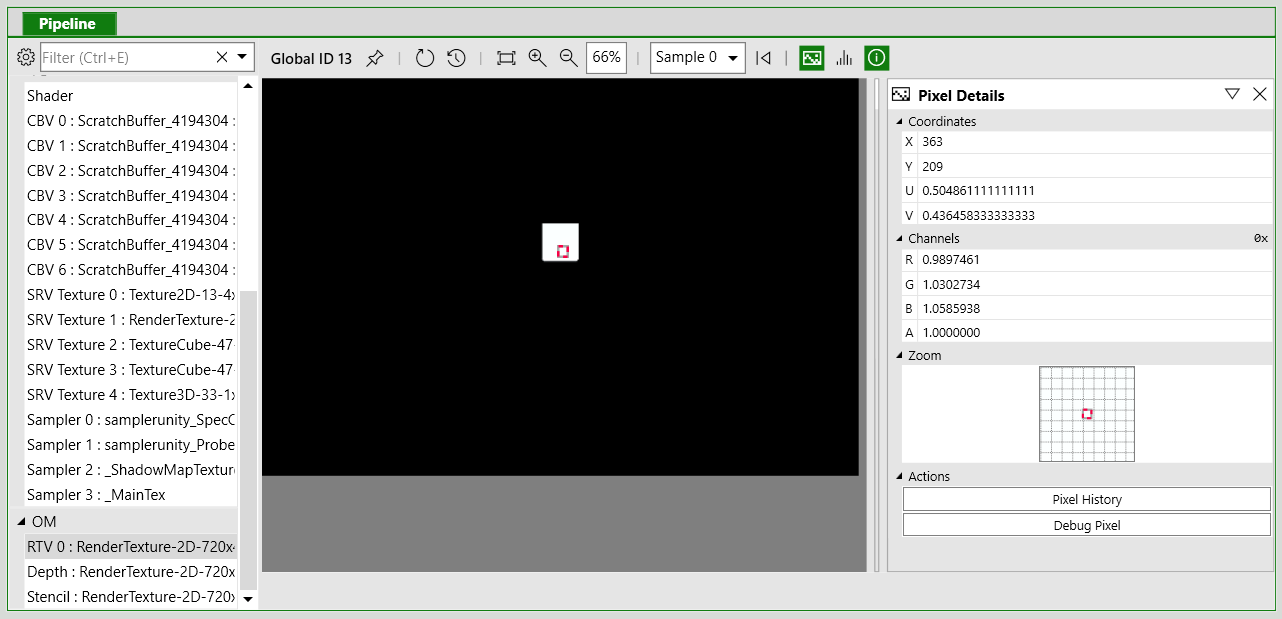
Select the Pipeline tab and use the__ Events__ window to navigate to a draw call you are interested in.
11.在 Pipeline 选项卡的下半部分,从 OM (Output Merger) 列表中选择一个渲染目标以查看绘制调用的输出。在要调试的对象上选择一个像素。请注意,为了查找感兴趣的绘制调用,一种方法是可以右键单击像素以查看绘制调用历史记录。
Select Debug Pixel on the Pixel Details panel.
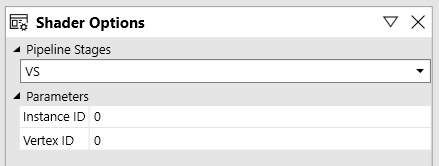
On the debug panel, use the Shader Options to select which shader stage to debug.
Use the toolbar or keyboard shortcuts to step through the code.

有关使用 PIX 调试着色器的更多信息,请参阅 Microsoft 的视频系列 Windows 上的 PIX (PIX on Windows),尤其是第 5 部分 - Debug 选项卡 (Part 5 - Debug Tab)。
有关 PIX 中的 GPU 捕获的更多信息,请参阅 Microsoft 的 GPU 捕获 (GPU Captures) 文档。
- 2018–09–17 页面已发布并进行了编辑审查
Copyright © 2023 Unity Technologies
优美缔软件(上海)有限公司 版权所有
"Unity"、Unity 徽标及其他 Unity 商标是 Unity Technologies 或其附属机构在美国及其他地区的商标或注册商标。其他名称或品牌是其各自所有者的商标。
公安部备案号:
31010902002961