Using the Animation view
Use the Animation view to preview and edit Animation Clips for animated GameObjects in Unity. To open the Animation view in Unity, go to Window > Animation.
Viewing Animations on a GameObject
The Animation window is linked to the Hierarchy window, the Project window, the Scene view, and the Inspector window. Like the Inspector, the Animation window shows the timeline and keyframes of the Animation for the currently selected GameObject or Animation Clip Asset. You can select a GameObject using the Hierarchy window or the Scene View, or select an Animation Clip Asset using the Project Window.
The Animated Properties list
在下图中,Animation 视图(左)显示当前所选游戏对象及其子游戏对象(如果它们也受此动画控制)所使用的动画。Scene 视图和 Hierarchy 视图在右侧,展示了 Animation 视图中显示已附加到当前所选游戏对象的动画。

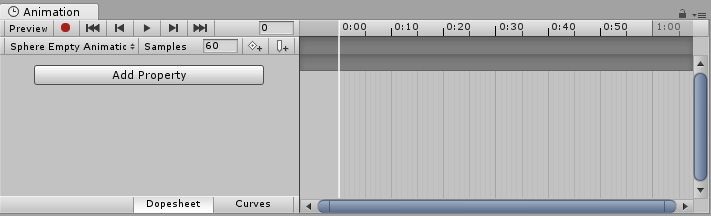
Animation 视图的左侧列出已动画化的属性。在尚未录制任何动画的新建剪辑中,此列表为空。
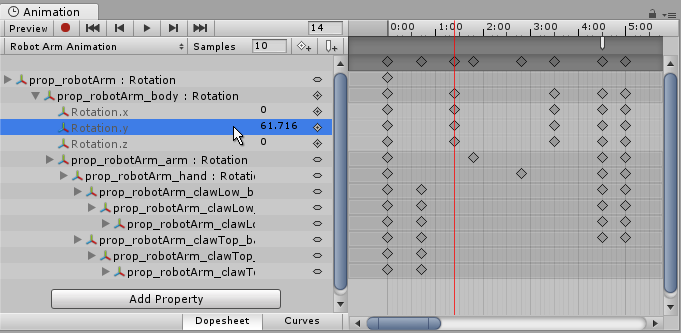
开始动画化此剪辑中的各种属性时,已动画化的属性将显示在此处。如果该动画控制多个子对象,列表中还将包括每个子对象的动画属性的分层子列表。在以上示例中,机械臂 (Robot Arm) 的游戏对象层级视图的各个部分都在同一动画剪辑中进行动画化。
当像这类在单个剪辑中需要对整个游戏对象层级视图进行动画化时,需确保在层级视图的根游戏对象上创建动画。
每个属性都可折叠和展开以显示每个关键帧记录的确切值。如果回放头(白线)位于关键帧之间,则值字段显示插值结果。您可以直接编辑这些字段。如果在回放头位于关键帧之上的情况下进行了更改,则会修改该关键帧的值。如果回放头位于关键帧之间的情况下进行了更改(因此显示的值是插值),则会在该点使用您输入的新值来创建新的关键帧。
The Animation Timeline
On the right side of the Animation View is the timeline for the current clip. The keyframes for each animated property appear in this timeline. The timeline view has two modes, Dopesheet and Curves. To toggle between these modes, click Dopesheet or Curves at the bottom of the animated property list area:

它们提供动画时间轴和关键帧数据的两个交替视图。
Dopesheet mode
Dopesheet mode offers a more compact view, allowing you to view each property’s keyframe sequence in an individual horizontal track. This allows you to view a simple overview of the keyframe timing for multiple properties or GameObjects.
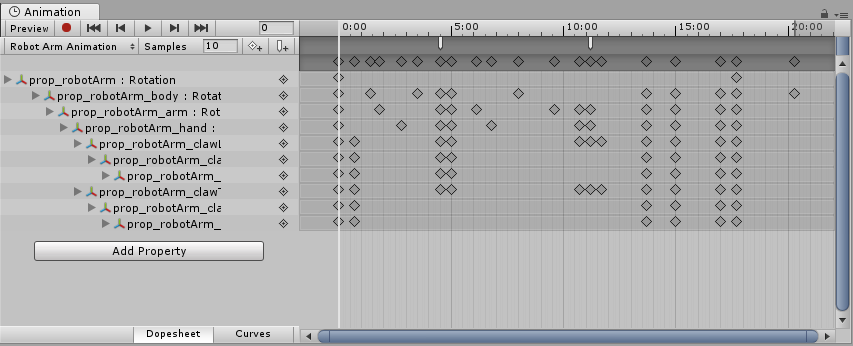
请参阅有关关键帧清单模式中的关键点操作的文档以了解更多信息。
Curves mode
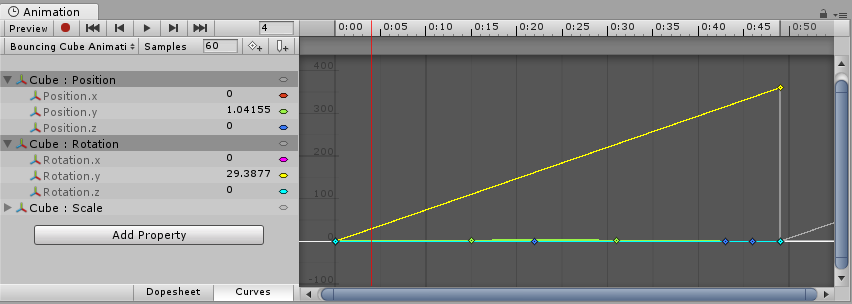
Curves mode displays a resizable graph containing a view of how the values for each animated property changes over time. All selected properties appear overlaid within the same graph view. This mode allows you to have great control over viewing and editing the values, and how they are interpolated between.

Fitting your selection to the window
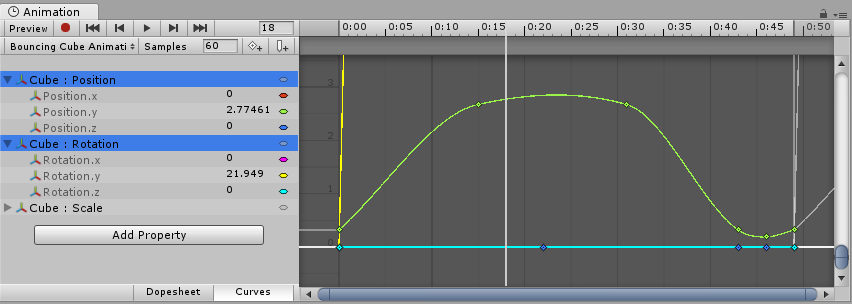
When using Curves mode to view your Animation, it’s important to understand that sometimes the various ranges for each property can differ greatly. For example, consider a simple Animation clip for a spinning bouncing cube. The bouncing Y position value may vary between the range 0 to 2 (meaning the cube bounces 2 units high during the animation); however, the rotation value goes from 0 to 360 (representing its degrees of rotation). When viewing these two curves at the same time, the animation curves for the position values will be very difficult to make out because the view will be zoomed out to fit the 0–360 range of the rotation values within the window:
Press F on the keyboard to zoom the view to the currently selected keyframes. This is useful as a quick way to focus and re-scale the window on a portion of your Animation timeline for easier editing.

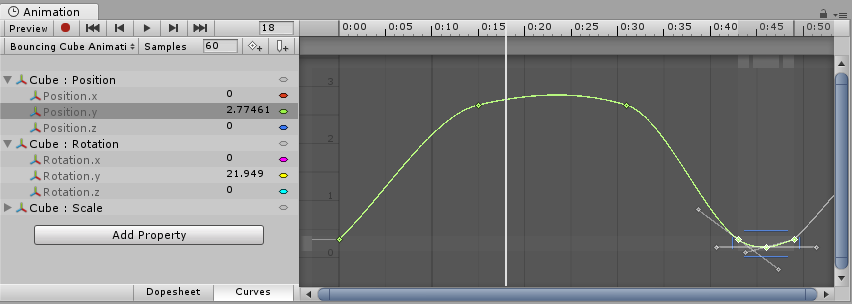
Click on individual properties in the list and press F on the keyboard to automatically re-scale the view to fit the range for that value. You can also manually adjust the zoom of the Curves window by using the drag handles at each end of the view’s scrollbar sliders. In the image below, the Animation Window is zoomed in to view the bouncing Y position Animation. The start of the yellow rotation curve is still visible, but now extends way off the top of the view:
Press A on the keyboard to fit and re-scale the window to show all the keyframes in the clip, regardless of which ones are selected. This is useful if you want to view the whole timeline while preserving your current selection:
Playback and frame navigation controls
To control playback of the Animation Clip, use the Playback Controls at the top left of Animation view.

从左到右,这些控制按钮是:
- Preview mode (toggle on/off).
- Record mode (toggle on/off). Note: Preview mode is on when record mode is on.
- Move playback head to the beginning of the clip.
- Move playback head to the previous keyframe.
- Play Animation.
- Move playback head to the next keyframe.
- Move playback head to the end of the clip.
还可使用以下键盘快捷键来控制回放头:
- Press Comma (,) to go to the previous frame.
- Press Period (.) to go to the next frame.
- Hold Alt (macOS: Option) and press Comma (,) to go to the previous keyframe.
- Hold Alt (macOS: Option) and press Period (.) to go to the next keyframe.
Locking the window
您可以锁定 Animation 编辑器窗口,使其不会自动切换来反映 Hierarchy 或 Scene 视图中当前选择的游戏对象。如果希望在专注于某个特定游戏对象的动画的同时,仍然能够选择和操作 Scene 视图中的其他游戏对象,则锁定窗口会非常有用。

要了解有关 Curve 视图导航的更多信息,请参阅使用动画曲线文档。
Copyright © 2023 Unity Technologies
优美缔软件(上海)有限公司 版权所有
"Unity"、Unity 徽标及其他 Unity 商标是 Unity Technologies 或其附属机构在美国及其他地区的商标或注册商标。其他名称或品牌是其各自所有者的商标。
公安部备案号:
31010902002961