9-Slice images with UI Toolkit
Generally, you can apply the 9-slice technique to a regular 2D Sprite. However, with UI Toolkit, you can apply the 9-slice technique to Texture, Render Texture, and SVG Vector images.
To apply the 9-slice technique to an image:
- For a Sprite image, use Sprite Editor or USS.
- For other types of images, use USS.
To apply the 9-slice technique to a selected image with USS:
- Open UI Builder.
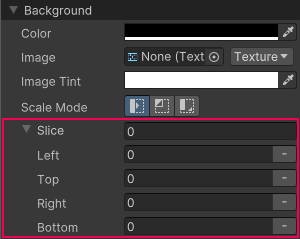
- In the Background section in the Inspector, specify the Left, Right, Top, and Bottom slice values.

You can also specify the slice values directly in USS, UXML, or C# files for the following properties:
-unity-slice-left-unity-slice-right-unity-slice-top-unity-slice-bottom-unity-slice-scale
Important:
- Slice values set with USS apply only to the image in the associated visual elementA node of a visual tree that instantiates or derives from the C#
VisualElementclass. You can style the look, define the behaviour, and display it on screen as part of the UI. More info
See in Glossary. The values don’t apply to the same image used in other visual elements, in other UI documents, or in a scene. - Unset slice value is zero. For example, if you set the Top, Bottom, and Right slice attributes but leave the Left slice empty, the Left slice is zero.
- Slice values set in USS override slice values set in the Sprite Editor. For the example above, no matter what value you added to the Left slice in the Sprite Editor, the Left slice value is zero.