- Unity User Manual (2019.3)
- 2D
- スプライト
- スプライトエディター
スプライトエディター
Sometimes a Sprite Texture contains just a single graphic element but it is often more convenient to combine several related graphics together into a single image. For example, the image could contain component parts of a single character, as with a car whose wheels move independently of the body. Unity makes it easy to extract elements from a composite image by providing a Sprite Editor for the purpose.
Note: Make sure the graphic you want to edit has its Texture Type set to Sprite (2D and UI). For information on importing and setting up Sprites, see Sprites.
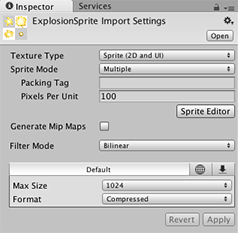
Sprite Textures with multiple elements need the Sprite Mode to be set to Multiple in the Inspector. (Texture Import Inspector image below.)
スプライトエディターを開く
スプライトエディター の開き方
-
プロジェクトビュー から編集したい 2D 画像を選択します (図1: プロジェクトビュー).
Note that you can’t edit a Sprite by selecting it in the Scene View.
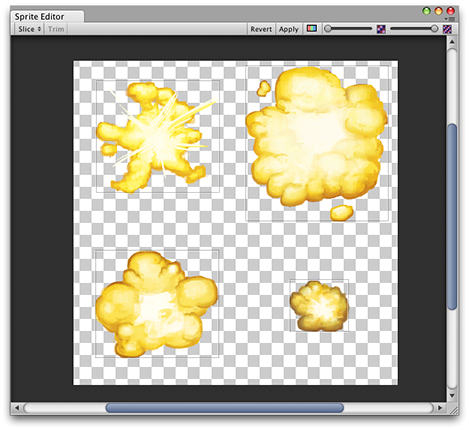
Texture Import Inspector の Sprite Editor ボタンをクリックしてください (図2: Texture Import Inspector)。すると Sprite Editor が表示されます (図3: Sprite Editor) 。
注意: Sprite Editor ボタンは画像の Texture Type を Sprite (2D and UI) に設定している場合にのみ表示されます。


注意: 画像に複数の要素があるのなら、 Texture Import Inspector で Sprite Mode を Multiple に設定してください。

Along with the composite image, you will see a number of controls in the bar at the top of the window. The slider at the top right controls the zoom, while the color bar button to its left chooses whether you view the image itself or its alpha levels. The right-most slider controls the pixelation (mipmap) of the Texture. Moving the slider to the left reduces the resolution of the Sprite Texture. The most important control is the Slice menu at the top left, which gives you options for separating the elements of the image automatically. Finally, the Apply and Revert buttons allow you to keep or discard any changes you have made.
エディターの使用
手動で要素を識別するものとしてもっとも直接的な方法はエディターを使用することです。画像をクリックすると隅にハンドルが表示された矩形領域が表示されます。サイズ調整はハンドルか矩形の端をドラッグすることで行うことができます。要素を分割したら、別のものを追加するには画像の別の部分の矩形をドラッグします。矩形を選択すると、ウィンドウの左下にパネルが表示されます。

The controls in the panel let you choose a name for the Sprite graphic and set the position and size of the rectangle by its coordinates. A border width, for left, top, right and bottom can be specified in pixels. The borders are useful when 9-Slicing Sprites. There are also settings for the Sprite’s pivot, which Unity uses as the coordinate origin and main “anchor point” of the graphic. You can choose from a number of default rectangle-relative positions (eg, Center, Top Right, etc) or use custom coordinates.
Slice メニューの隣にある Trim ボタンでは、透明部分をベースに、画像のフチ部分の周囲ぴったりに合うよう、四角形をリサイズできます。
注意: Border は 2D の SpriteRenderer ではなく、UI システムでのみサポートされています。
自動スライス
Isolating the Sprite rectangles manually works well but in many cases, Unity can save you work by detecting the graphic elements and extracting them for you automatically. If you click on the Slice menu in the control bar, you will see this panel:

With the slicing type set to Automatic, the editor will attempt to guess the boundaries of Sprite elements by transparency. You can set a default pivot for each identified Sprite. The Method menu lets you choose how to deal with existing selections in the window. The Delete existing option will simply replace whatever is already selected, Smart will attempt to create new rectangles while retaining or adjusting existing ones, and Safe will add new rectangles without changing anything already in place.
Grid by Cell Size or Grid by Cell Count options are also available for the slicing type. This is very useful when the Sprites have already been laid out in a regular pattern during creation:

The Pixel Size values determine the height and width of the tiles in pixels. If you chose grid by cell count, Column & Row determines the number of columns and rows used for slicing. You can also use the Offset values to shift the grid position from the top-left of the image and the Padding values to inset the Sprite rectangles slightly from the grid. The Pivot can be set with one of nine preset locations or a Custom Pivot location can be set.
Note that after any of the automatic slicing methods has been used, the generated rectangles can still be edited manually. You can let Unity handle the rough definition of the Sprite boundaries and pivots and then do any necessary fine tuning yourself.
ポリゴンのサイズ変更
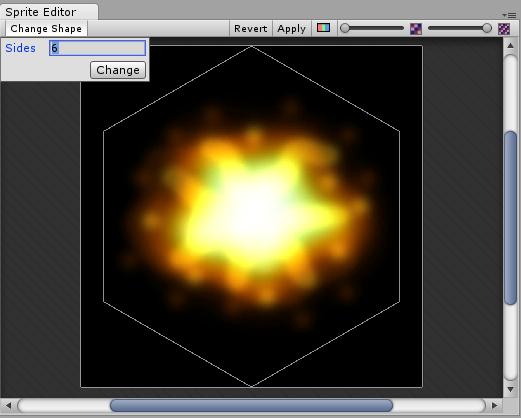
Sprite Editor では形状、サイズ、ピボットの位置を変更することができます。
Polygon shape

ポリゴンに対して希望するサイズの値を Sides 入力し、 Change をクリックしてください。
Polygon size and pivot

Polygon size
To change the polygon’s size, click on the Sprite to display green border lines and the Sprite information box. Click and drag on the green lines to create the border you want, and the values in the Border fields change.
Polygon pivot
To change the polygon’s pivot point (that is the axis point the polygon moves around), click on the image to display the Sprite information box. Click on the Pivot drop down menu and select an option. This displays a blue pivot circle on the polygon; its location depends on the pivot option to you have selected. If you want to change it further, select Custom Pivot and click and drag on the blue pivot circle to position it.