ビルド設定
Linux 用のビルドを作成するには、Unity のメインメニューから File > Build Settings と移動し、Platform リストで Linux を選択し Switch Platform をクリックします。
ビルド設定が完了したら、次の 2 つのオプションから 1 つを選択します。
- Build はアプリケーションをプレイヤーにビルドします。
- Build and Run はアプリケーションをプレイヤーにビルドし、ターゲットプラットフォームでそのプレイヤーを開きます。

Scenes In Build
The Scenes In Build pane displays a list of the Scenes from your Project that Unity includes in the build. If you can’t see any Scenes in this pane, select Add Open Scenes to add all the currently open Scenes to the build. You can also drag Scene Assets from your Project window into this window.
シーンをビルドから除外するには、そのシーンの横にあるチェックボックスを外します。これにより、シーンはビルドから削除されますが、リストからは削除されません。リストからシーンを削除するには、シーンを選択してキーボードの Delete キーを押します。
Build または Build and Run を選択すると、Unity は Scenes In Build リストのすべてのシーンを含むビルドを作成します。Unity はシーンのリストを使用して、シーンをロードする順序を決定します。シーンの順序を調整するには、リストを上または下にドラッグします。
プラットフォームのリスト
Platform リストには Unity エディターで使用可能なすべてのプラットフォームが表示されます。リストでは、ターゲットプラットフォームとして現在選択されているプラットフォームの名前の横に Unity アイコンが表示されます。
Unity は、インストールしたプラットフォームモジュールに応じて、使用可能なプラットフォームを決定します。
プロジェクトにさらにプラットフォームモジュールをインストールするには、以下を行います。
- Unity Hub を開き、モジュールを追加する Unity のバージョンを選択します。
- 縦の楕円をクリックして、モジュールを加える を選択します。
ターゲットプラットフォームを変更するには、切り替えたいプラットフォームを選択してから、 プラットフォームを切り替える を選択します。これには時間がかかる場合があります。なぜなら、ターゲットプラットフォームに合わせた形式でアセットを再インポートする場合があるためです。
When you select a platform, Unity displays a list of options that you can adjust for the build. Each platform has unique settings that are listed on each platform-specific manual page. Select the Windows, Mac, Linux build target to build standalone applications for most desktop platforms.
Build settings
Use these settings to configure how Unity builds your application.
| 設定 | 機能 | |
|---|---|---|
| ターゲットプラットフォーム | Select Linux to build your app for the Linux platform. | |
| Development Build | Enable this setting to include scripting debug symbols and the Profiler in your build. When you enable this, Unity sets the DEVELOPMENT_BUILD#define for testing purposes. When you select Development Build, Autoconnect Profiler, Deep Profiling Support, Script Debugging, and Wait for Managed Debugger settings also become available. |
|
| Autoconnect Profiler | Enable this setting to automatically connect the Unity Profiler to your build. | |
| Deep Profiling Support | Enable this setting to switch Deep Profiling in the Profiler. This makes the Profiler instrument every function call in your application and returns more detailed profiling data. When you enable Deep Profiling Support, it might slow down script execution. | |
| Script debugging | Enable this setting to allow your script code to be debugged. Not available on WebGL. | |
| Wait for Managed Debugger | Enable this setting to be prompted to attach a debugger before Unity executes any script code. | |
| Compression Method (Lumin と WebGL プラットフォームでは使用不可) | プレイヤーをビルドするときに、プロジェクトのデータを圧縮します。これには、アセット、シーン、プレイヤー 設定、GI データ が含まれます。以下の方法のいずれかを選択します。 | |
| Default | Windows、Mac、Linux、iOS は、デフォルトでは圧縮しません。Android では、デフォルトの圧縮は ZIP です。ZIP は LZ4HC よりも優れた圧縮結果になりますが、データの解凍が遅くなります。 | |
| LZ4 | A fast compression format that’s useful for development builds. For more information, see BuildOptions.CompressWithLz4. | |
| LZ4HC | A high compression variant of LZ4 that’s slower to build but produces better results for release builds. For more information, see BuildOptions.CompressWithLz4HC. | |
Asset Import Overrides
The Asset Import Overrides section allows you to locally override all texture import settings to speed up import and platform switch time. You must avoid shipping your final build with any import overrides, but during development they can be useful to speed up iteration time, especially, if assets such as textures resulting in lower resolution is not of any concern.
| 設定 | 機能 | |
|---|---|---|
| Max Texture Size | Override the maximum imported texture size. Unity imports textures in the lower of two values: this value, or the Max Size value specified in Texture import settings. The time it takes to import a texture is roughly proportional to the amount of pixels it contains; therefore, reducing maximum allowed texture size can speed up the import times. However, as this setting might result in lower resolution textures, use it only for development. |
|
| Texture Compression |
テクスチャインポート設定 で設定されたテクスチャ圧縮オプションをオーバーライドします。 これは、圧縮テクスチャ形式 のいずれかにインポートされたテクスチャにのみ影響します。 |
|
| Force Fast Compressor | 適用可能な形式 (BC7、BC6H、ASTC、ETC、ETC2) では、より高速で低品質のテクスチャ圧縮モードを使用します。通常、これにより圧縮アーティファクトが増加しますが、多くの形式では、圧縮自体が何倍も高速になります (2 - 20 倍高速)。 この設定はまた、すべてのテクスチャの クランチ テクスチャ圧縮形式を無効にします。 この効果は、すべてのテクスチャに対して、プラットフォームの テクスチャインポート設定 で Compressor Quality を Fast に設定したのと同様です。 |
|
| Force Uncompressed | Don’t compress the textures; use uncompressed formats instead. Note that while this is faster to import because it skips the whole texture compression process, the resulting textures take up more memory, game data size, and can impact rendering performance. Texture import settings. This option has the same effect as all textures that have their Compression set to None in their platforms’ Texture Import settings. |
また、-overrideMaxTextureSize と -overrideTextureCompression エディター コマンドライン引数 を使って、アセットインポートのオーバーライド設定を行い、初期のプロジェクトインポートを変更することもできます。
Building your Linux application
To build your Linux application, select one of the following:
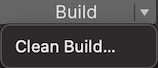
- Build: Compile a Player. The default build is incremental, except for the first build, which is always a full non-incremental (clean) build. To force a clean build instead of an incremental build, select Clean Build from the dropdown menu.
- Build and run: Compile a Player and open it in your native platform. This option always uses the incremental build.
Copyright © 2023 Unity Technologies
优美缔软件(上海)有限公司 版权所有
"Unity"、Unity 徽标及其他 Unity 商标是 Unity Technologies 或其附属机构在美国及其他地区的商标或注册商标。其他名称或品牌是其各自所有者的商标。
公安部备案号:
31010902002961