- Unity User Manual 2021.1
- 그래픽스
- 셰이더
- 셰이더 작성
- 표면 셰이더 작성
- 표면 셰이더 조명 예제
표면 셰이더 조명 예제
이 페이지에서는 표면 셰이더의 커스텀 표면 셰이더 조명 모델 예제를 제공합니다. 더 일반적인 표면 셰이더 지도는 표면 셰이더 예제를 참조하십시오.
Deferred Lighting 은 일부 커스텀 머티리얼당 조명 모델에서는 잘 동작하지 않기 때문에 아래 대부분의 예제에서 셰이더를 Forward Rendering 전용으로 컴파일합니다.
렌더 파이프라인 호환성
| 기능 이름 | 빌트인 렌더 파이프라인 | 유니버설 렌더 파이프라인(URP) | 고해상도 렌더 파이프라인(HDRP) | 커스텀 SRP |
|---|---|---|---|---|
| 표면 셰이더 | 지원 | 지원 안 함 URP에서 셰이더 오브젝트를 보다 간단하게 만드는 방법을 알아보려면 셰이더 그래프를 참조하십시오. |
지원 안 함 HDRP에서 셰이더 오브젝트를 보다 간단하게 만드는 방법을 알아보려면 셰이더 그래프를 참조하십시오. |
지원 안 함 |
디퓨즈
다음은 빌트인 램버트 조명 모델을 사용하는 셰이더 예제입니다.
  Shader "Example/Diffuse Texture" {
      Properties {
        _MainTex ("Texture", 2D) = "white" {}
      }
      SubShader {
        Tags { "RenderType" = "Opaque" }
        CGPROGRAM
        #pragma surface surf Lambert

        struct Input {
            float2 uv_MainTex;
        };

        sampler2D _MainTex;

        void surf (Input IN, inout SurfaceOutput o) {
            o.Albedo = tex2D (_MainTex, IN.uv_MainTex).rgb;
        }
        ENDCG
      }
      Fallback "Diffuse"
    }
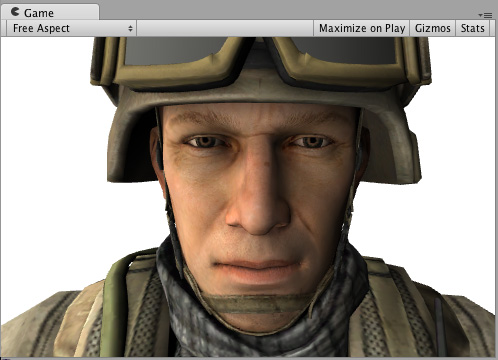
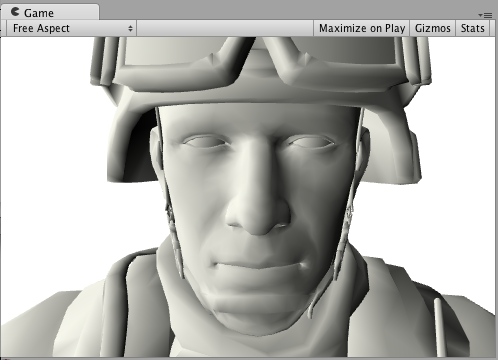
다음은 씬에 방향 광원이 하나일 때 텍스처가 있을 경우와 없을 경우를 보여줍니다.


다음 예제에서는 빌트인 램버트 모델을 사용하는 게 아닌 커스텀 조명 모델을 작성해 같은 결과를 얻는 방법을 보여줍니다.
이를 위해서는 여러 표면 셰이더 조명 모델 함수를 사용해야 합니다. 아래는 단순한 램버트 함수입니다. CGPROGRAM 섹션만 변한다는 점을 참조하십시오. 나머지 셰이더 코드는 동일합니다.
    Shader "Example/Diffuse Texture" {
            Properties {
                _MainTex ("Texture", 2D) = "white" {}
            }
            SubShader {
            Tags { "RenderType" = "Opaque" }
            CGPROGRAM
              #pragma surface surf SimpleLambert

              half4 LightingSimpleLambert (SurfaceOutput s, half3 lightDir, half atten) {
                  half NdotL = dot (s.Normal, lightDir);
                  half4 c;
                  c.rgb = s.Albedo * _LightColor0.rgb * (NdotL * atten);
                  c.a = s.Alpha;
                  return c;
              }

            struct Input {
                float2 uv_MainTex;
            };

            sampler2D _MainTex;

            void surf (Input IN, inout SurfaceOutput o) {
                o.Albedo = tex2D (_MainTex, IN.uv_MainTex).rgb;
            }
            ENDCG
            }
            Fallback "Diffuse"
        }
이 단순한 디퓨즈 조명 모델은 LightingSimpleLambert 함수를 사용합니다. 표면 노멀과 광원 방향 사이의 내적을 연산한 후 광원 감쇠와 컬러를 적용합니다.
디퓨즈 랩(Diffuse Wrap)
다음 예제는 조명이 오브젝트의 가장자리를 “감싸는” Diffuse 조명의 변형인 Wrapped Diffuse 입니다. 하위표면 산란 효과를 구현할 때 유용합니다. 이번에도 CGPROGRAM 섹션만 변하기 때문에 나머지 셰이더 코드는 생략했습니다.
    ...ShaderLab code...
        CGPROGRAM
        #pragma surface surf WrapLambert

        half4 LightingWrapLambert (SurfaceOutput s, half3 lightDir, half atten) {
            half NdotL = dot (s.Normal, lightDir);
            half diff = NdotL * 0.5 + 0.5;
            half4 c;
            c.rgb = s.Albedo * _LightColor0.rgb * (diff * atten);
            c.a = s.Alpha;
            return c;
        }

        struct Input {
            float2 uv_MainTex;
        };

        sampler2D _MainTex;
            void surf (Input IN, inout SurfaceOutput o) {
            o.Albedo = tex2D (_MainTex, IN.uv_MainTex).rgb;
        }
        ENDCG
        ...ShaderLab code...
다음은 씬에 방향 광원이 하나일 때 텍스처가 있을 경우와 없을 경우를 보여줍니다.


툰 램프(Toon Ramp)
다음 예제는 텍스처 램프를 사용해 표면이 광원과 노멀 사이 각도에 어떻게 반응하는지를 정의하는 “램프” 조명 모델입니다. 다양한 효과에 사용할 수 있으며 Toon 조명과 사용하면 더욱 효과적입니다.
    ...ShaderLab code...
        CGPROGRAM
        #pragma surface surf Ramp

        sampler2D _Ramp;

        half4 LightingRamp (SurfaceOutput s, half3 lightDir, half atten) {
            half NdotL = dot (s.Normal, lightDir);
            half diff = NdotL * 0.5 + 0.5;
            half3 ramp = tex2D (_Ramp, float2(diff)).rgb;
            half4 c;
            c.rgb = s.Albedo * _LightColor0.rgb * ramp * atten;
            c.a = s.Alpha;
            return c;
        }

        struct Input {
            float2 uv_MainTex;
        };

        sampler2D _MainTex;

        void surf (Input IN, inout SurfaceOutput o) {
            o.Albedo = tex2D (_MainTex, IN.uv_MainTex).rgb;
        }
        ENDCG
        ...ShaderLab code...
다음은 씬에 방향 광원이 하나일 때 텍스처가 있을 경우와 없을 경우를 보여줍니다.


단순 스페큘러(Specular)
다음 예제는 빌트인 블린퐁 조명 모델과 비슷한 단순한 스페큘러 조명 모델입니다.
    ...ShaderLab code...
        CGPROGRAM
        #pragma surface surf SimpleSpecular

        half4 LightingSimpleSpecular (SurfaceOutput s, half3 lightDir, half3 viewDir, half atten) {
            half3 h = normalize (lightDir + viewDir);

            half diff = max (0, dot (s.Normal, lightDir));

            float nh = max (0, dot (s.Normal, h));
            float spec = pow (nh, 48.0);

            half4 c;
            c.rgb = (s.Albedo * _LightColor0.rgb * diff + _LightColor0.rgb * spec) * atten;
            c.a = s.Alpha;
            return c;
        }

        struct Input {
            float2 uv_MainTex;
        };

        sampler2D _MainTex;

        void surf (Input IN, inout SurfaceOutput o) {
            o.Albedo = tex2D (_MainTex, IN.uv_MainTex).rgb;
        }
        ENDCG
        ...ShaderLab code...
다음은 씬에 방향 광원이 하나일 때 텍스처가 있을 경우와 없을 경우를 보여줍니다.


커스텀 GI
Unity 빌트인 GI를 모방한 셰이더부터 시작하겠습니다.
    Shader "Example/CustomGI_ToneMapped" {
            Properties {
                _MainTex ("Albedo (RGB)", 2D) = "white" {}
            }
            SubShader {
                Tags { "RenderType"="Opaque" }

                CGPROGRAM
                #pragma surface surf StandardDefaultGI

                #include "UnityPBSLighting.cginc"

                sampler2D _MainTex;

                inline half4 LightingStandardDefaultGI(SurfaceOutputStandard s, half3 viewDir, UnityGI gi)
                {
                    return LightingStandard(s, viewDir, gi);
                }

                inline void LightingStandardDefaultGI_GI(
                    SurfaceOutputStandard s,
                    UnityGIInput data,
                    inout UnityGI gi)
                {
                    LightingStandard_GI(s, data, gi);
                }

                struct Input {
                    float2 uv_MainTex;
                };

                void surf (Input IN, inout SurfaceOutputStandard o) {
                    o.Albedo = tex2D(_MainTex, IN.uv_MainTex);
                }
                ENDCG
            }
            FallBack "Diffuse"
        }
이제 GI에 톤 매핑을 추가해보겠습니다.
    Shader "Example/CustomGI_ToneMapped" {
            Properties {
                _MainTex ("Albedo (RGB)", 2D) = "white" {}
                _Gain("Lightmap tone-mapping Gain", Float) = 1
                _Knee("Lightmap tone-mapping Knee", Float) = 0.5
                _Compress("Lightmap tone-mapping Compress", Float) = 0.33
            }
            SubShader {
                Tags { "RenderType"="Opaque" }

                CGPROGRAM
                #pragma surface surf StandardToneMappedGI

                #include "UnityPBSLighting.cginc"

                half _Gain;
                half _Knee;
                half _Compress;
                sampler2D _MainTex;

                inline half3 TonemapLight(half3 i) {
                    i *= _Gain;
                    return (i > _Knee) ? (((i - _Knee)*_Compress) + _Knee) : i;
                }

                inline half4 LightingStandardToneMappedGI(SurfaceOutputStandard s, half3 viewDir, UnityGI gi)
                {
                    return LightingStandard(s, viewDir, gi);
                }

                inline void LightingStandardToneMappedGI_GI(
                    SurfaceOutputStandard s,
                    UnityGIInput data,
                    inout UnityGI gi)
                {
                    LightingStandard_GI(s, data, gi);

                    gi.light.color = TonemapLight(gi.light.color);
                    #ifdef DIRLIGHTMAP_SEPARATE
                        #ifdef LIGHTMAP_ON
                            gi.light2.color = TonemapLight(gi.light2.color);
                        #endif
                        #ifdef DYNAMICLIGHTMAP_ON
                            gi.light3.color = TonemapLight(gi.light3.color);
                        #endif
                    #endif
                    gi.indirect.diffuse = TonemapLight(gi.indirect.diffuse);
                    gi.indirect.specular = TonemapLight(gi.indirect.specular);
                }

                struct Input {
                    float2 uv_MainTex;
                };

                void surf (Input IN, inout SurfaceOutputStandard o) {
                    o.Albedo = tex2D(_MainTex, IN.uv_MainTex);
                }
                ENDCG
            }
            FallBack "Diffuse"
        }