- Unity User Manual 2022.1
- 그래픽스
- 셰이더
- 빌트인 셰이더
- 스탠다드 셰이더
- Standard Shader Material Inspector
- Specular mode: Specular Property
Specular mode: Specular Property

Specular Property
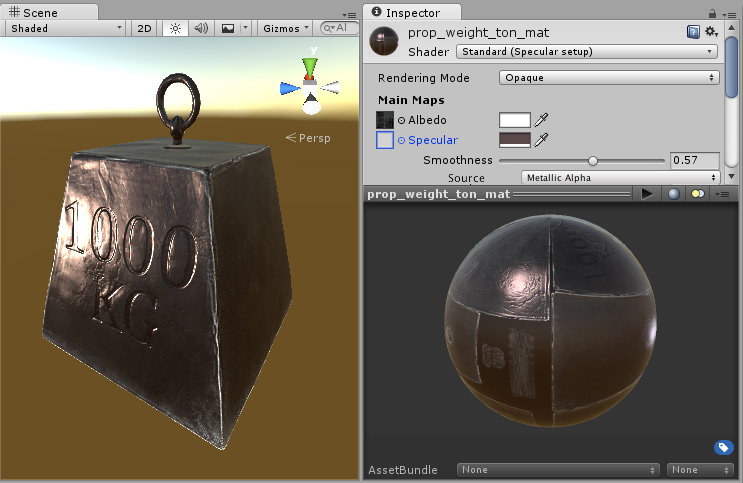
The Specular Property is only visible when using the Specular setup, as shown in the Shader field in the image above. Specular effects are essentially the direct reflections of light sources in your Scene, which typically show up as bright highlights and shine on the surface of objects (although specular highlights can be subtle or diffuse too).

Both the Specular setup and Metallic setup produce specular highlights, so the choice of which to use is more a matter of setup and your artistic preference. In the Specular setup you have direct control over the brightness and tint colour of specular highlights, while in the Metallic setup you control other Properties and the intensity and colour of the specular highlights emerge as a natural result of the other Property settings.
When working in Specular mode, the RGB colour in the Specular Property controls the strength and colour tint of the specular reflectivity. This includes shine from light sources and reflections from the environment. The Smoothness Property controls the clarity of the specular effect. With a low Smoothness value, even strong specular reflections appear blurred and diffuse. With a high Smoothness value, specular reflections are crisper and clearer.
You might want to vary the Specular values across the surface of your material - for example, if your Texture contains a character’s coat that has some shiny buttons. You would want the buttons to have a higher specular value than the fabric of the clothes. To achieve this, assign a Texture map instead of using a single slider value. This allows greater control over the the strength and colour of the specular light reflections across the surface of the material, according to the pixel colours of your specular map.
When a Texture is assigned to the Specular Property, both the Specular Property and Smoothness slider disappear. Instead, the specular levels for the material are controlled by the values in the Red, Green and Blue channels of the Texture itself, and the Smoothness levels for the material are controlled by the Alpha channel of the same Texture. This provides a single Texture which defines areas as being rough or smooth, and have varying levels and colors of specularity. This is very useful when working Texture maps that cover many areas of a model with varying requirements; for example, a single character Texture map often includes multiple surface requirements such as leather shoes, fabric of the clothes, skin for the hands and face, and metal buckles.

Here, the specular reflection and smoothness are defined by a colour and the Smoothness slider. No Texture has been assigned, so the specular and smoothness level is constant across the whole surface. This is not always desirable, particularly in the case where your Albedo Texture maps to a variety of different areas on your model (also known as a Texture atlas).

여기서는 텍스처 맵을 통해 스페큘러 정도와 평활도를 조절합니다. 이 방식을 사용하면 모델의 표면 전체에 걸쳐 스페큘러 정도를 다양하게 변화시킬 수 있습니다. 모서리는 중앙에 비해 더 높은 스페큘러 이펙트가 적용되었으며 광원에 대해 미세한 컬러 반응이 있고 글자 안쪽 영역은 더 이상 스페큘러 하이라이트가 적용되지 않습니다. 오른쪽 이미지는 스페큘러 컬러와 강도를 조절하는 RGB 채널 및 평활도를 조절하는 알파 채널입니다.
참조: 검은 스페큘러 컬러(0,0,0)를 사용하면 스페큘러 이펙트가 무효화됩니다.