Lightmapping: Getting started
Preparing the Scene and baking the lightmaps
Select Window > Rendering > Lighting Settings from the Unity Editor menu to open the Lighting window. Make sure any Mesh you want to apply a light map to has proper UVs for lightmapping. The easiest way to do this is to open the Mesh import settings and enable the Generate Lightmap UVs setting.
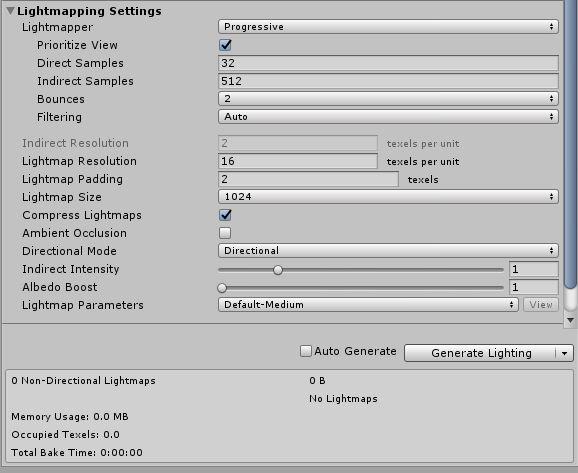
Next, to control the resolution of the lightmaps, go to the Lightmapping Settings section and adjust the Lightmap Resolution value.
In order to be included in your lightmap, Renderers must meet the following criteria:
- Have a Mesh Renderer or Terrain component
- Be marked as Contribute GI
- Use a built-in Unity Material, the Standard Shader, or a Shader with a Meta Pass
In the Mesh Renderer component, you can use the Scale In Lightmap parameter to adjust the resolution of your lightmap’s static Mesh or Terrain.
You can also adjust settings for Lights in the Light Explorer.

To generate lightmaps for your Scene:
At the bottom of the Scene tab on the Lighting window, click Generate Lighting (or ensure that Auto Generate is ticked).
A progress bar appears in Unity Editor’s status bar, in the bottom-right corner.
When lightmapping is complete, Unity’s Scene and Game views update automatically and you can view the resulting lightmaps in the Lighting window.
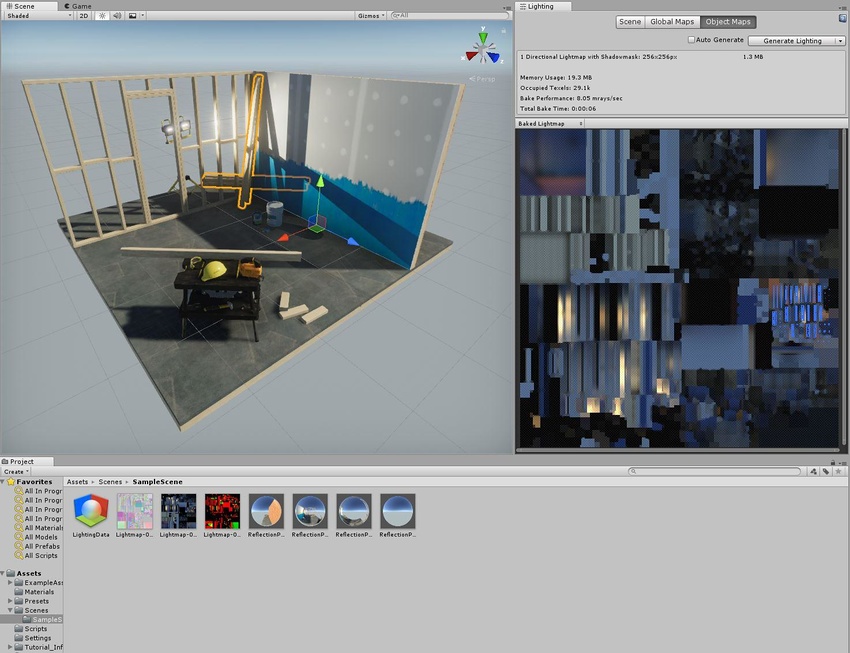
When you manually generate lighting, Unity adds Lighting Data Assets, baked lightmaps and Reflection Probes to the Assets folder.
Progressive Lightmapper added in 2018.1 NewIn20181
Copyright © 2023 Unity Technologies
优美缔软件(上海)有限公司 版权所有
"Unity"、Unity 徽标及其他 Unity 商标是 Unity Technologies 或其附属机构在美国及其他地区的商标或注册商标。其他名称或品牌是其各自所有者的商标。
公安部备案号:
31010902002961