Edición de Curves
There are several different features and windows in the Unity Editor which use Curves to display and edit data. The methods you can use to view and manipulate curves is largely the same across all these areas, although there are some exceptions.
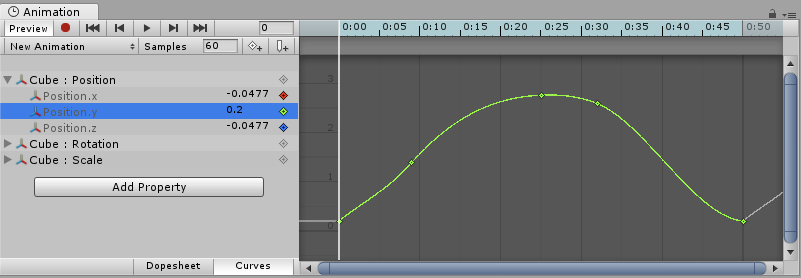
- The Animation Window uses curves to display and edit the values of animated properties over time in an Animation Clip.
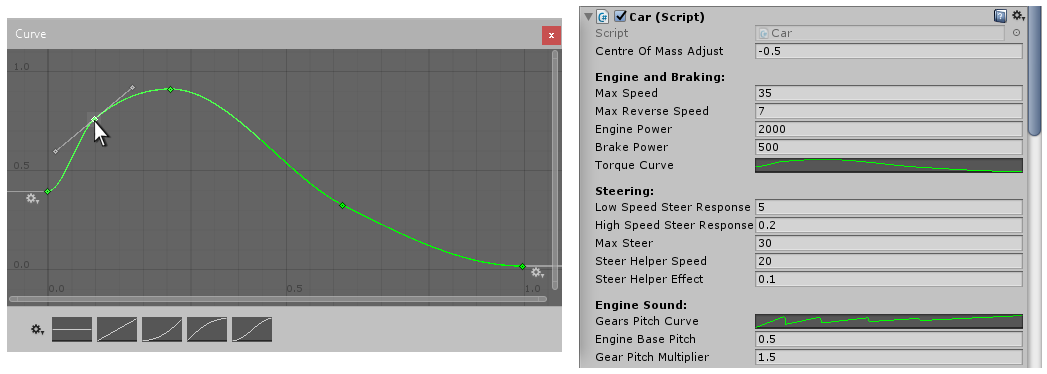
- Script components can have member variables of type Animation Curve that can be used for all kinds of things. Clicking on those in the Inspector will open up the Curve Editor.
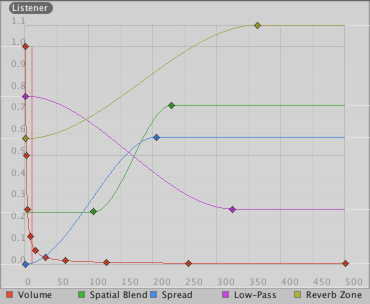
- The Audio Source component uses curves to control roll-off and other properties as a function of distance to the Audio Source.
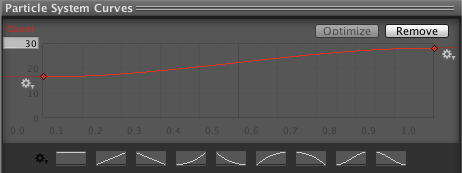
- The Particle System uses curves to vary particle properties over time.
Mientras estos controles tienen diferencias sutiles, las curves pueden ser editadas exactamente de la misma forma que todas ellas. Esta página explica cómo navegar y editar curves en estos controles.
Agregar y Mover Keys en un Curve
A key can be added to a curve by double-clicking on the curve at the point where the key should be placed. It is also possible to add a key by right-clicking on a curve and select Add Key from the context menu.
Una vez colocados, los keys pueden ser arrastrados con el mouse:
- Haz clic sobre un key para seleccionarlo. Arrastra el keys seleccionado con el mouse.
- Para ajustar el key a la cuadrícula mientras es arrastrado (snap), mantenga presionado el botón Command en Mac / Control en Windows mientras lo arrastra.
También es posible seleccionar múltiples keys de una vez:
- Para seleccionar múltiples keys de una vez, mantenga sostenida la tecla Shift mientras da clic sobre los keys.
- To deselect a selected key, click on it again while holding down Ctrl.
- Para seleccionar todos los keys dentro de un área rectangular, haz clic sobre un lugar vacío y arrastra para formar la selección rectangular.
- La selección rectangular también puede ser agregada a los keys ya seleccionados, manteniendo pulsada la tecla Shift.
Los Keys pueden ser borrados seleccionándolos y presionando Delete, o pulsando el botón derecho del mouse y seleccionando Delete Key en el menú contextual.
Edición de Curves
Direct editing of key values in curve editors is a new feature in Unity 5.1. Use Enter/Return or context menu to start editing selected keys, Tab to switch between fields, Enter/Return to commit, and Escape to cancel editing.
Navegar el Curve View
Al trabajar con el Animation View puedes fácilmente acercar para ver más detalladamente los curves con los que quieres trabajar, o alejar para poder ver la línea completa.
Usted siempre puede presionar F para seleccionar los cuadros de las curvas dadas o claves (keys) seleccionados completamente.
Zooming
Puedes dar zoom al Curve View usando la rueda de tu mouse, la funcionalidad de zoom de tu trackpad, o manteniendo presionada la tecla Alt mientras vas arrastrando con el botón derecho del mouse.
Sólo puedes dar zoom sobre el eje horizontal o vertical:
- Haz zoom mientras mantienes presionada la tecla Command en Mac / Control en Windows para manejarlo horizontalmente.
- Haz zoom mientras mantienes presionado Shift para manejarlo verticalmente.
Además puedes arrastrar cada punta de las barras de desplazamiento para encoger o expandir el área en el Curve View.
Panning
Usted puede pan la Vista de Curva (Curve View) arrastrando con la mitad de su mouse o mantener presionando Alt mientras arrastre con la izquierda con su mouse.
Editando Tangentes
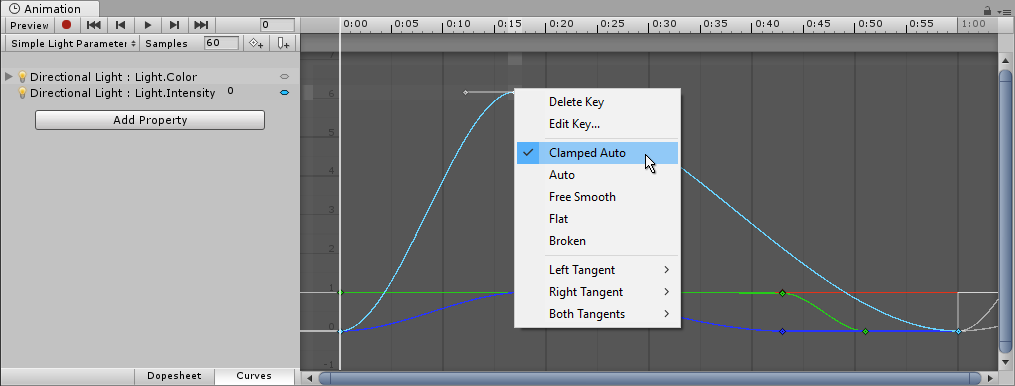
A key has two tangents - one on the left for the incoming slope and one on the right for the outgoing slope. The tangents control the shape of the curve between the keys. You can select from a number of different tangent types to control how your curve leaves one key and arrives at the next key. Right-click a key to select the tangent type for that key.
For animated values to change smoothly when passing a key, the left and right tangent must be co-linear. The following tangent types ensure smoothness:
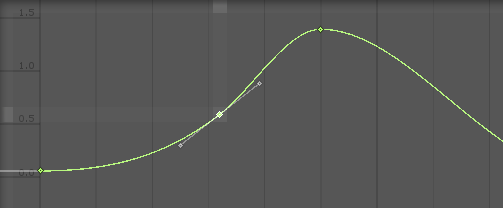
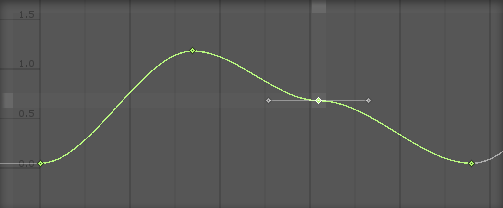
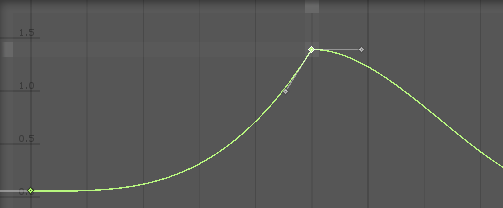
- Clamped Auto: This is the default tangent mode. The tangents are automatically set to make the curve pass smoothly through the key. When editing the key’s position or time, the tangent adjusts to prevent the curve from “overshooting” the target value. If you manually adjust the tangents of a key in Clamped Auto mode, it is switched to Free Smooth mode. In the example below, the tangent automatically goes into a slope and levels out while the key is being moved:
-
Auto: This is a Legacy tangent mode, and remains an option to be backward compatible with older projects. Unless you have a specific reason to use this mode, use the default Clamped Auto. When a key is set to this mode, the tangents are automatically set to make the curve pass smoothly through the key. However, there are two differences compared with Clamped Auto mode:
- The tangents do not adjust automatically when the key’s position or time is edited; they only adjust when initially setting the key to this mode.
- When Unity calculates the tangent, it does not take into account avoiding “overshoot” of the target value of the key.
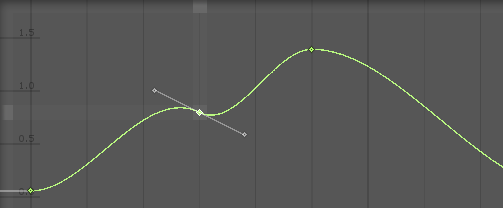
- Free Smooth: Drag the tangent handles to freely set the tangents. They are locked to be co-linear to ensure smoothness.
- Flat: The tangents are set to be horizontal (this is a special case of Free Smooth).
Sometimes you might not want the curve to be smooth when passing through a key. To create sharp changes in the curve, choose one of the Broken tangent modes.
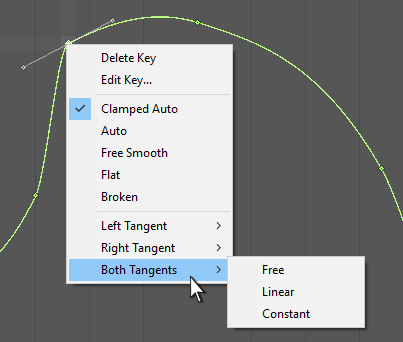
When using broken tangents, the left and right tangent can be set individually. Each of the left and right tangents can be set to one of the following types:
- Broken - Free: Drag the tangent handle to freely set the tangents.
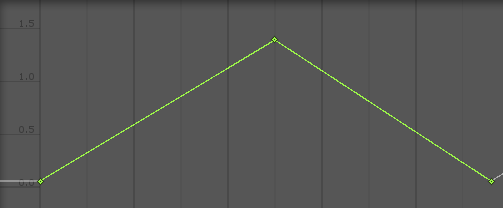
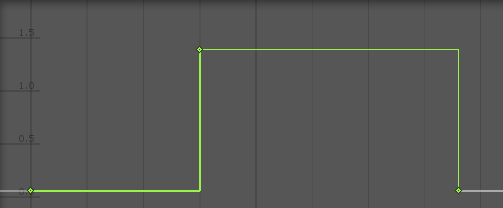
- Broken - Linear: The tangent points towards the neighboring key. To make a linear curve segment, set the tangents at both ends to be Linear. In the example below, all three keys have been set to Broken - Linear, to achieve straight lines from key to key.
- Broken - Constant: The curve retains a constant value between two keys. The value of the left key determines the value of the curve segment.
Copyright © 2023 Unity Technologies
优美缔软件(上海)有限公司 版权所有
"Unity"、Unity 徽标及其他 Unity 商标是 Unity Technologies 或其附属机构在美国及其他地区的商标或注册商标。其他名称或品牌是其各自所有者的商标。
公安部备案号:
31010902002961