- Unity ユーザーマニュアル 2022.3 (LTS)
- ユーザーインターフェース (UI)
- UI Toolkit
- UI の構築
- UI 構築の例
- カスタムコントロールのカスタムスタイルを作成する
カスタムコントロールのカスタムスタイルを作成する
バージョン: 2021.2 以降
この例では、カスタムコントロールのカスタム USS 変数の使用法を説明します。
例の概要
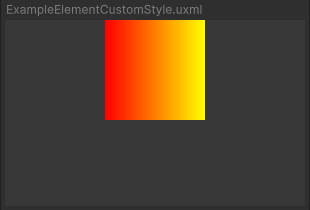
この例では、USS から 2 つの色を読み取り、それを使ってテクスチャを生成するカスタムコントロールを作成します。

この例で作成するすべてのファイルは、GitHub リポジトリ にあります。
要件
このガイドは、Unity エディター、UI Toolkit、および C# スクリプトに精通している開発者を対象としています。始める前に、以下をよく理解してください。
カスタムコントロールとカスタムスタイルの作成
カスタムコントロールを定義する C# スクリプトと、カスタムスタイルを定義する USS ファイルを作成します。
任意のテンプレートで Unity プロジェクトを作成します。
ファイルを保存するために
create-custom-style-custom-controlという名前のフォルダーを作成します。-
ExampleElementCustomStyleフォルダーに、ExampleElementCustomStyle.csという名の C# スクリプトを作成し、そのコンテンツを以下に置き換えます。using UnityEngine; using UnityEngine.UIElements; namespace UIToolkitExamples { public class ExampleElementCustomStyle : VisualElement { // Factory class, required to expose this custom control to UXML public new class UxmlFactory : UxmlFactory<ExampleElementCustomStyle, UxmlTraits> { } // Traits class public new class UxmlTraits : VisualElement.UxmlTraits { } // Use CustomStyleProperty<T> to fetch custom style properties from USS static readonly CustomStyleProperty<Color> S_GradientFrom = new CustomStyleProperty<Color>("--gradient-from"); static readonly CustomStyleProperty<Color> S_GradientTo = new CustomStyleProperty<Color>("--gradient-to"); // Image child element and its texture Texture2D m_Texture2D; Image m_Image; public ExampleElementCustomStyle() { // Create an Image and a texture for it. Attach Image to self. m_Texture2D = new Texture2D(100, 100); m_Image = new Image(); m_Image.image = m_Texture2D; Add(m_Image); RegisterCallback<CustomStyleResolvedEvent>(OnStylesResolved); } // When custom styles are known for this control, make a gradient from the colors. void OnStylesResolved(CustomStyleResolvedEvent evt) { Color from, to; if (evt.customStyle.TryGetValue(S_GradientFrom, out from) && evt.customStyle.TryGetValue(S_GradientTo, out to)) { GenerateGradient(from, to); } } public void GenerateGradient(Color from, Color to) { for (int i = 0; i < m_Texture2D.width; ++i) { Color color = Color.Lerp(from, to, i / (float)m_Texture2D.width); for (int j = 0; j < m_Texture2D.height; ++j) { m_Texture2D.SetPixel(i, j, color); } } m_Texture2D.Apply(); m_Image.MarkDirtyRepaint(); } } } -
ExampleElementCustomStyle.ussという名前の USS ファイルを作成し、そのコンテンツを以下のように置き換えます。ExampleElementCustomStyle { --gradient-from: red; --gradient-to: yellow; }
UI ドキュメントでカスタムコントロールを使用する
カスタムコントロールを使用するための UI ドキュメントを作成し、カスタムスタイルをカスタムコントロールに適用します。
-
ExampleElementCustomStyleフォルダーに、ExampleElementCustomStyle.uxmlという名前の UI ドキュメントを作成します。 -
ExampleElementCustomStyle.uxmlをダブルクリックして、UI Builder で開きます。 - Library > Project > UIToolkitExamples を選択し、ExampleElementCustomStyle を Hierarchy ウィンドウにドラッグしてください。ビューポートウィンドウにグレーの正方形が表示されます。
-
ExampleElementCustomStyle.ussファイルを既存の USS として加えます。これで、カスタム USS の変数が正方形に適用されます。
その他の参考資料
Copyright © 2023 Unity Technologies
优美缔软件(上海)有限公司 版权所有
"Unity"、Unity 徽标及其他 Unity 商标是 Unity Technologies 或其附属机构在美国及其他地区的商标或注册商标。其他名称或品牌是其各自所有者的商标。
公安部备案号:
31010902002961