Building your WebGL application
To create a build for WebGL, go to File > Build Settings from Unity’s main menu. In the Platform list, select WebGL and then click Switch Platform.
ビルド設定が完了したら、次の 2 つのオプションから 1 つを選択します。
- Build builds your application into a Player.
- Build and Run builds your application in a Player, and opens that Player on your target platform.

The Unity build system for WebGL supports the following settings:
| 設定 | 機能 | |
|---|---|---|
| Texture Compression | Select from the available formatting options below to set the default texture compression format for the textures in the project. You can also use this setting to change from a script or using the command-line switch -setDefaultPlatformTextureFormat. For more information, see the texture compression format overview.This setting is also available in the Player settings window. |
|
| Use default format (DXT) | This is the default compression format. | |
| ETC | This extension is part of the WebGL API and exposes the ETC compressed texture format. | |
| ETC2 | This extension is part of the WebGL API and exposes the ETC compressed texture format. Use this texture compression format if using OpenGL 4.3. | |
| ASTC | This texture compression format is a popular choice due its wide range of derived compression ratios. For instance, ASTC compression is available for most Intel GPUs and Nvidia Tegra chips. | |
| DXT | This extension supports the DXTn/BCn compression format. | |
| Development Build | Enable this setting to include scripting debug symbols and the Profiler in your build. When you enable this, Unity sets the DEVELOPMENT_BUILD scripting define. You should use this setting only when you want to test your application. Development builds don’t minify content because they’re large to distribute. |
|
| Code Optimization | Select the optimization mode to use for compiling the WebGL code. | |
| Speed | This is the default setting. Select this to generate WebGL code that’s optimized for runtime performance. | |
| Size | Select this to generate WebGL code that’s optimized for build size. This is useful for reducing WebGL games to the smallest downloadable size, and for large projects if a mobile browser (Android or iOS) refuses to load the default optimize-for-speed WebAssembly builds as too large for mobile devices to consume. | |
| Autoconnect Profiler | When enabled, this setting allows you to automatically connect the Unity Profiler to your build. However, for WebGL, as you can’t connect the Profiler to a running build, use this option to connect the content to the Editor instead. This is because the WebSockets in WebGL handle the Profiler connection, but a web browser only allows outgoing connections from the content. For this setting to be available, you should enable the Development Build option. | |
| Deep Profiling Support | Enable this setting to activate Deep Profiling in the Profiler. This makes the Profiler instrument every function call in your application and returns more detailed profiling data. When you enable Deep Profiling Support, it might slow down script execution. This option is only available if you enable the Development Build option. | |
| IL2CPP Code Generation | Define how Unity manages IL2CPP code generation. This option is only available if you are using IL2CPP for your scripting backend, not Mono. To change your scripting backend, go to Player Settings > Configuration > Scripting Backend and change from Mono to IL2CPP. | |
| Faster runtime | Generates code that’s optimized for runtime performance. This is the default behavior in previous versions of Unity. | |
| Faster (smaller) builds | Generates code that’s optimized for build size and iteration. It generates less code and produces a smaller build, but may have an impact on runtime performance, especially for generic code. You might want to use this option when faster build times are important, such as when iterating on changes | |
| Build | Use it build your application. | |
| Build And Run | Use it to view the WebGL Player locally. Unity uses a local web server to host your build, and opens it from a localhost URL. Alternatively, you can use a custom local web server with properly configured response headers. For more information, see Compressed builds and server configuration. | |
For changing the settings for Asset Import Overrides, see Build Settings.
Build Folder
The Build folder contains the following files ([ExampleBuild] represents the name of the target build folder).
| ファイル名 | 含まれるもの |
|---|---|
[ExampleBuild].loader.js |
The JavaScript code that the web page needs to load the Unity content. |
[ExampleBuild].framework.js |
JavaScript のランタイムとプラグイン。 |
[ExampleBuild].wasm |
WebAssembly バイナリ。 |
[ExampleBuild].mem |
プレイヤーのヒープメモリを初期化するためのバイナリイメージ。Unity はマルチスレッドの WebAssembly ビルドのみに対してこのファイルを生成します。 |
[ExampleBuild].data |
アセットデータとシーン。 |
[ExampleBuild].symbols.json |
エラーのスタックトレースを解除するのに必要なデバッグシンボル名。このファイルは、Debug Symbols オプション (File > Build Settings > Player Settings) を有効にする場合、リリースビルドに対してのみ生成されます。 |
[ExampleBuild].jpg |
A background image, which displays while the build is loading. This file is only generated when a Background Image is available in Player Settings (File > Build Settings > Player Settings > Splash Image). For more information, see Splash Screen. |
ビルドに対して Compression Method を有効にする場合、Unity は圧縮方法に対応する拡張子を識別し、Build サブフォルダー内のファイル名にこの拡張子を追加します。Decompression Fallback を有効にする場合、Unity はビルドのファイル名に .unityweb という拡張子を追加します。それ以外の場合、Unity は、Gzip 圧縮方式の場合は .gz、Brotli圧縮方式の場合は .br という拡張子を加えます。
詳細については、WebGL: 圧縮ビルドとサーバー設定 を参照してください。
If you enable Name Files As Hashes in the Player Settings, Unity uses the hash of the file content instead of the default filename. This applies to each file in the build folder. This option allows you to upload updated versions of the game builds into the same folder on the server, and only upload the files which have changed between build iterations.
Note: Opening a Player directly from the file system might not work in some browsers due to security restrictions applied to local file URLs.
Deep Profiling Support
Deep Profiling Support を有効にすると、Unity のプロファイラーがアプリケーション内のすべての関数呼び出しをプロファイルします。詳細については、詳細なプロファイリング のドキュメントを参照してください。
Player 設定
WebGL には、Player 設定 (Edit > Project Settings の順に移動し Player カテゴリを選択) にいくつかの追加オプションがあります。
Other Settings

Strip Engine Code
Strip Engine Code オプションにアクセスするには Other Settings を開きます。 このオプションはデフォルトでチェックされており、WebGL のコードストリップを有効にしています。このオプションをチェックすると、使用しないクラスのコードは含まれません。例えば、物理関連のコンポーネントや機能を使用しない場合は、物理エンジン全体がビルドから削除されます。 詳細は、後述の「ストリップ」のセクションを参照してください。
Publishing Settings
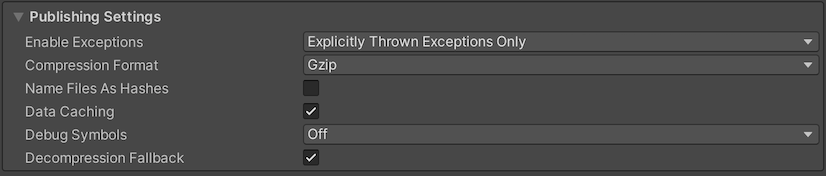
Enable Exceptions
-
Open Publishing Settings to access Enable Exceptions. Enable Exceptions allows you to specify how to handle unexpected code behavior (generally considered errors) at run time. It has these options:
- None: 例外に関するサポートを必要としない場合はこれを選択します。これにより、最高のパフォーマンスと最小のビルドが得られます。このオプションでは、例外がスローされるとコンテンツはその設定のままエラーで停止します。
-
Explicitly Thrown Exceptions Only (default): これを選択すると、スクリプトの
throwステートメントから明示的に指定された例外をキャッチし、finallyブロックを確実に呼び出します。このオプションを選択すると、スクリプトから生成された JavaScript コードが長く遅くなります。これは、スクリプトがプロジェクトの主なボトルネックになっている場合にのみ問題になります。 - Full Without Stacktrace: 以下をキャッチするには、このオプションを選択します。
- スクリプト内の
throwステートメントから明示的に指定された例外 (Explicitly Thrown Exceptions Only オプションと同じ) - Null 参照
- 範囲外の配列アクセス
- Full With Stacktrace: このオプションは上記のオプションと似ていますが、スタックトレースもキャプチャします。 Unity はそれらの確認をコードに埋め込むことでこれらの例外を生成します。そのため、このオプションはパフォーマンスを低下させ、ブラウザーのメモリ使用量を増やします。このオプションはデバッグにのみ使用し、常に64ビットブラウザーでテストしてください。
Select Publishing Settings to access Data Caching.
データキャッシング
To access Data Caching, go to Publishing Setings via File > Build Settings > Player Settings > WebGL. This enables the browser to cache the main data files into the IndexedDB database.
Using the default browser HTTP cache doesn’t guarantee that the browser caches a particular response. This is because the browser HTTP cache has limited space, and the browser might not be able to cache large files.
To improve your loading speed, IndexedDB allows you to cache files above the browser limit. When you cache more files, you increase the chance that downloaded content is available on the user’s machine during the next run of the build.
Data Caching caches the .data files in the IndexedDB cache for HTTP responses. To cache AssetBundles, you need to enable Data Caching and override unityInstance.Module.cacheControl().
To do this, make sure Module.cacheControl(url) returns must-revalidate for the requested AssetBundle URL. For example, you can override the unityInstance.Module.cacheControl() function in the fulfillment callback of the Promise that createUnityInstance() returns.
For information on createUnityInstance(), see Compressed builds and server configuration.
- asm.js のリンカーターゲットを Unity 2019.1で 削除
- ビルドファイルの更新とデータキャッシングは Unity 2020.1 で追加
Copyright © 2023 Unity Technologies
优美缔软件(上海)有限公司 版权所有
"Unity"、Unity 徽标及其他 Unity 商标是 Unity Technologies 或其附属机构在美国及其他地区的商标或注册商标。其他名称或品牌是其各自所有者的商标。
公安部备案号:
31010902002961