WebGL - 圧縮ビルドの展開
When you build a WebGL project in release mode (see Publishing builds), Unity compresses your build output files to reduce the download size of your build. You can choose the type of compression it uses from the Compression Format options in Publishing Settings (menu: Edit > Project Settings > Player > WebGL > Publishing Settings):
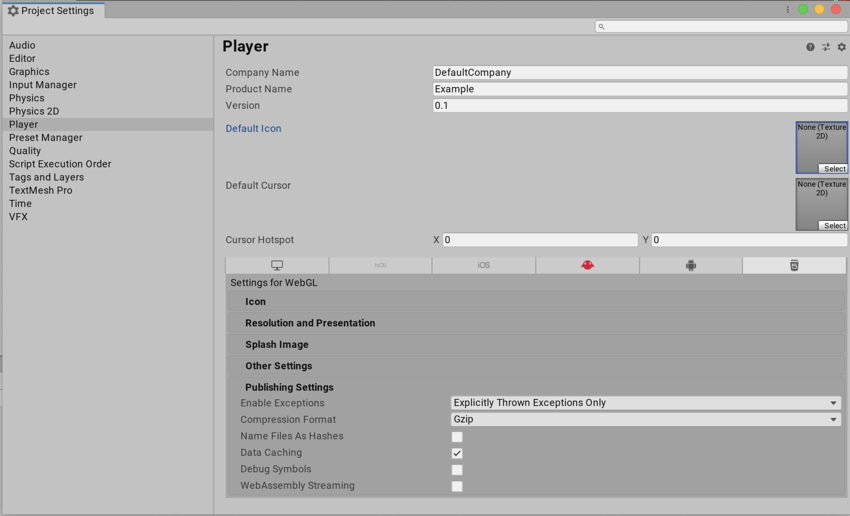
gzip: デフォルト設定。gzip ファイルは Brotli ファイルより大きいですが、ビルドにかかる時間が短く、http と https の両方に対しすべてのブラウザによってネイティブにサポートされています。
Brotli: Brotli compression offers the best compression ratios. Brotli compressed files are significantly smaller than gzip, but take a long time to compress, increasing your iteration times on release builds. Chrome and Firefox natively support Brotli compression over https. For more information, see documentation on WebGL browser compatibility.
Disabled: 圧縮を無効にします。ポストプロセススクリプトで独自の圧縮を実装したい場合はこのオプションを使います。
圧縮された Unity ビルドはどのブラウザでも作動します。Unity は JavaScript で書かれたソフトウェアデコンプレッサーを備えており、http 転送レベルの圧縮がサーバーによってできない場合は、そのデコンプレッサーを使用します。
Native browser decompression
The browser can handle decompression of Unity builds natively while it downloads the build data. This has the advantage of avoiding the additional delay caused by decompressing your files in JavaScript, therefore reducing your application’s startup time. To let the browser handle decompression natively, you need to configure your web server to serve the compressed files with the appropriate http headers. These tell the browser that the data is compressed with gzip or Brotli so it decompresses the data while it is being transferred. Firefox and Chrome support Brotli compression on https only, while all browsers support gzip compression. For more information, see documentation on WebGL browser compatibility
ウェブサーバーの設定
The setup process for native browser decompression depends on your web server. The instructions on this page apply to the two most common web servers: Apache and IIS. Note: These servers are designed to work on a default setup, but might need adjustments to match your specific configuration. In particular, there might be issues if you already have another server-side configuration to compress hosted files, which might interfere with this setup. To make the browser perform decompression natively and asynchronously during the download of your applications you need to append a Content-Encoding header to the server response, corresponding to the type of compression Unity uses at build time.
Apache
An apache server uses invisible .htaccess files for server configuration. The code below shows examples of .htaccess files which you can use to enforce native browser decompression. Apache server configuration setup is optional.
gzip で圧縮したビルドには、以下の .htaccess ファイルを Build サブフォルダーに置きます。
<IfModule mod_mime.c>
  AddEncoding gzip .unityweb
</IfModule>
Brotli で圧縮したビルドには、以下の .htaccess ファイルを Build サブフォルダーに置きます。
<IfModule mod_mime.c>
  AddEncoding br .unityweb
</IfModule>
IIS
IIS サーバー設定の必要なステップ
By default an IIS server does not serve static content of unknown MIME type (Multipurpose Internet Mail Extension). To make a Unity build work on IIS, you must associate the .unityweb extension with the application/octet-stream content type. There are two ways to achieve that:
Using IIS Manager interface: Select your website in the IIS Manager panel, then open the MIME Types setting. Select Add… and set the file name extension to .unityweb and the MIME type to application/octet-stream. Click OK to save the changes.
Using server configuration file: IIS uses web.config files for server configuration. Those configuration files reflect all the changes made in IIS Manager for a specific folder. To associate the application/octet-stream MIME type with the .unityweb extension, use the following web.config file:
<?xml version="1.0" encoding="UTF-8"?>
<configuration>
    <system.webServer>
            <staticContent>
            <remove fileExtension=".unityweb" />
<mimeMap fileExtension=".unityweb" mimeType="application/octet-stream" />
            </staticContent>
    </system.webServer>
</configuration>
Note: The configuration file affects all the server subfolders, so you only need to set the MIME type for the .unityweb extension just once in the server root folder.
オプショナルな IIS サーバー設定のステップ
To speed up the build startup times, you can optionally use the following configuration files. To use this setup, you need to have Microsoft’s IIS URL Rewrite IIS module installed, otherwise, the browser throws a 500 Internal Server Error.
gzip で圧縮したビルドには、以下の web.config ファイルを Build サブフォルダーに置きます。
<?xml version="1.0" encoding="UTF-8"?>
<configuration>
    <system.webServer>
            <staticContent>
                    <remove fileExtension=".unityweb" />
                    <mimeMap fileExtension=".unityweb" mimeType="application/octet-stream" />
            </staticContent>
            <rewrite>
                    <outboundRules>
                        <rule name="Append gzip Content-Encoding header">
                            <match serverVariable="RESPONSE_Content-Encoding" pattern=".*" />
                            <conditions>
                                    <add input="{REQUEST_FILENAME}" pattern="\.unityweb$" />
                            </conditions>
                            <action type="Rewrite" value="gzip" />
                        </rule>
                    </outboundRules>
            </rewrite>
    </system.webServer>
</configuration>
For Brotli-compressed builds put the following web.config file into the Build subfolder:
<?xml version="1.0" encoding="UTF-8"?>
<configuration>
    <system.webServer>
            <staticContent>
                    <remove fileExtension=".unityweb" />
                    <mimeMap fileExtension=".unityweb" mimeType="application/octet-stream" />
            </staticContent>
            <rewrite>
                    <outboundRules>
                        <rule name="Append br Content-Encoding header">
                            <match serverVariable="RESPONSE_Content-Encoding" pattern=".*" />
                            <conditions>
                                    <add input="{REQUEST_FILENAME}" pattern="\.unityweb$" />
                            </conditions>
                            <action type="Rewrite" value="br" />
                        </rule>
                    </outboundRules>
            </rewrite>
    </system.webServer>
</configuration>
Note: The <remove fileExtension=".unityweb" /> lines handle situations when the content type is already overridden at a higher level in the server directory’s hierarchy, which could otherwise cause a server exception.
WebAssembly streaming
WebAssembly streaming improves your build’s startup time by making the browser parse and compile the WebAssembly file while downloading it.
You can select WebAssembly streaming in the Publishing Settings panel (menu: Edit > Project Settings > Player > WebGL > Publishing Settings).
Setting up web servers with WebAssembly Streaming
For WebAssembly streaming compilation to work, the server needs to return .wasm with an application/wasm MIME type.
If you have compression enabled for your WebGL build, you need to add the correct Content-Encoding response header when serving the file. This is because the .wasm file that WebAssembly streaming generates is additionally compressed.
If you use WebAssembly streaming you must set up your web server accordingly. For more information about Content-Encoding specifics when using WebAssembly streaming see documentation on Server configuration for WebAssembly streaming.
2019–09–04 WebAssembly streaming added in 2019.2
2017–14–06 Page amended
5.6 で更新
Copyright © 2023 Unity Technologies
优美缔软件(上海)有限公司 版权所有
"Unity"、Unity 徽标及其他 Unity 商标是 Unity Technologies 或其附属机构在美国及其他地区的商标或注册商标。其他名称或品牌是其各自所有者的商标。
公安部备案号:
31010902002961