Apply masking effects in UI Toolkit
Masking is a technique that lets you control which parts of a UI(User Interface) Allows a user to interact with your application. Unity currently supports three UI systems. More info
See in Glossary element are visible. In UI Toolkit, you can use USS property overflow: hidden to hide parts of a UI element that are outside the bounds of another UI element.
Masking with an element
You can use an element to mask another element. To make a masking effect with an element, add the masking element as the parent element of the masked element. Set the overflow property to hidden on the masking element. This hides the parts of the masked element that are outside the bounds of the masking element.
The following example shows how to make a masking effect with a rectangle shape and a rounded corner shape.

In the example, the #MaskSquare and MaskRounded elements are the masking elements, and the Logo1 and Logo2 elements are the masked elements. The masking elements are the parent elements of the masked elements. The example uses a VisualElement with a background image to demonstrate the masking effect. You can apply the masking technique to any element, such as a Label or a Button.
The #MaskRounded element has a border-radius property set to 50px. This creates a rounded corner masking effect.
The UXML looks like this:
<UXML>
    <VisualElement name="MaskSquare" >
        <VisualElement name="Logo1" />
    </VisualElement>
    <VisualElement name="MaskRounded" >
        <VisualElement name="Logo2"  />
    </VisualElement>
</UXML>
The USS looks like this:
#MaskSquare {
    overflow: hidden;
}

#MaskRounded {
    overflow: hidden;
    border-radius: 50px;
}

#Logo1, #Logo2 {
    background-image: url("unity-logo.png");
}
Masking with arbitrary shapes
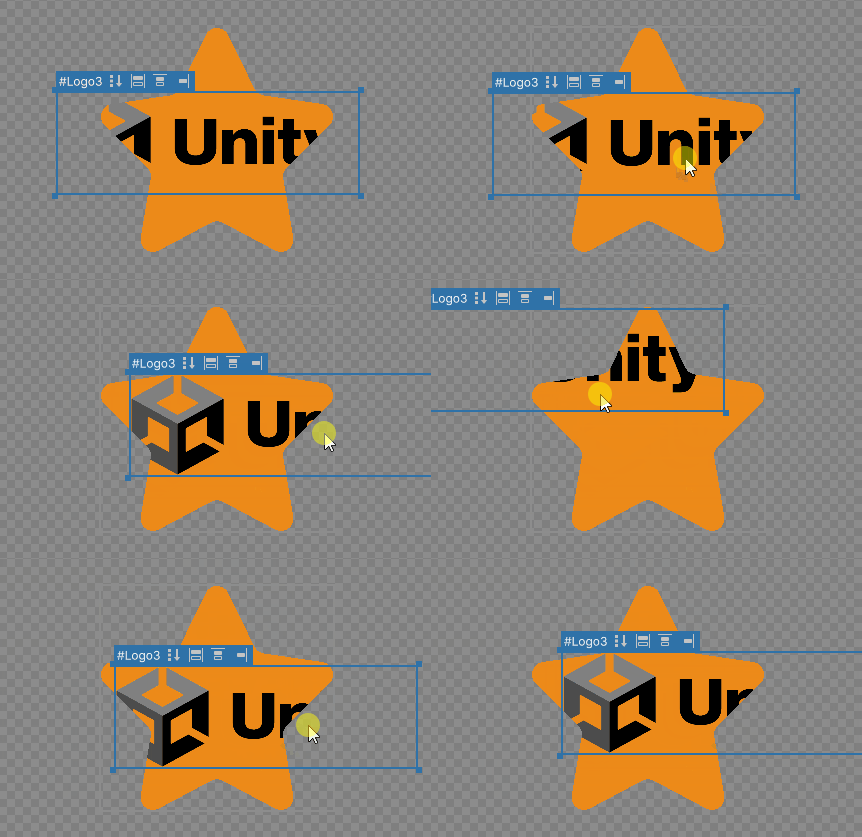
To make a masking effect with an arbitrary shape, set an SVG as the background image of the masking element as shown below:

The UXML looks like this:
<UXML>
    <VisualElement name="MaskSVG" >
        <VisualElement name="Logo3" />
    </VisualElement>
</UXML>
The USS looks like this:
#MaskSVG {
    overflow: hidden;
    background-image: url("mask.svg");
}

#Logo3 {
    background-image: url("unity-logo.png");
}
Reduce batch breaks for nested masking
Nested masking occurs when both an element and one or more ancestors define a mask. The intersection of these masks defines the final visibility. You can use this technique to create intricate visual effects or selectively reveal parts of an image based on various criteria. For example, you can define masks to display certain regions of an element and hide other masked areas.
When masking with rectangle shapes, Unity uses axis-aligned rectangles as the clipping region, this is called rectangle clipping. When masking with rounded corners or arbitrary shapes, Unity uses stencil masking instead of rectangle clipping. Stencil masking stores masks in a stencil, which is a special image type with 8 bits per channel. The shape stored in the stencil defines the clipping region. For more information, refer to ShaderLab command: Stencil.
Stencil masking uses a GPU feature called a stencil bufferA memory store that holds an 8-bit per-pixel value. In Unity, you can use a stencil buffer to flag pixels, and then only render to pixels that pass the stencil operation. More info
See in Glossary for masking operations. The stencil has a GPU-associated state that dictates image modification and its impact on rendering. When elements share the same stencil state, they can be batched into a single draw call. However, any change in the stencil state, such as nested masking, results in batching breaking. Batch breaking can significantly impact performance as it prevents multiple elements from being efficiently rendered together in a single draw call. It’s crucial to minimize batch breaking to optimize rendering performance.
To reduce the number of batch breaks for nested stencil masking, consider applying UsageHints.MaskContainer on the masking element that’s the ancestor of all the masks.
The following illustration shows the number of batches in a single-level masking, a nested masking, and a nested masking with MaskContainer applied. The yellow color indicates the masking elements. The orange color indicates the masking element with MaskContainer applied. The numbers indicate the number of batches.

A: Single-level masking (1 batch)
B: Nested masking (5 batches)
C: Nested masking with MaskContainer (2 batches)